speedline 680SD Pump .pdf - 第19页
. . . . . 680SD BRUSHL ESS SERVO PUM P Pump Remova l Ope rati on and Main tenance Gui de 17 Pump Re moval Procedur e Refer to the foll owing: 1. Disconnect the pump air supply hoses at the dispense panel. 2. Disconnect t…
680SD BRUSHLESS SERVO PUMP
Pump Maintenance
16 680SD Brushless Servo Driven Pump
Pump Maintenance
Introduction The following procedures are recommended for disassembly, cleaning and
reassembly of the pump. Pump cleaning may be performed with the pump on or off
the machine, however pump removal is preferred to facilitate handling and inspection.
Attention
CAUTION: When removing a syringe, always disconnect the air from the dispense
panel first. If the syringe or syringe adapter is removed before first disconnecting it
from the dispense panel material will be blown out of the syringe. Personal injury or
damage to machine could result.
In this Section Refer to the following:
Topic See Page
Pump Removal 17
Cartridge Removal and Disassembly 18
Cleaning the Pump Cartridge 20
Reassembly of the Pump Cartridge 21
Installing the Cartridge 23

.
.
.
.
.
680SD BRUSHLESS SERVO PUMP
Pump Removal
Operation and Maintenance Guide 17
Pump Removal
Procedure Refer to the following:
1. Disconnect the pump air supply hoses at the dispense panel.
2. Disconnect the electrical connector from the dispense panel.
3. Remove the syringe adapter connector from S1 or S3 and remove the syringe
adapter from the top of the syringe.
4. Remove the pump from Z-axis mount.
5. Remove the syringe from the feed tube assembly (11, Figure 6).
680SD BRUSHLESS SERVO PUMP
Cartridge Removal and Disassembly
18 680SD Brushless Servo Driven Pump
Cartridge Removal and Disassembly
Procedure
Attention
Refer to Figure 4 unless otherwise specified for parts identification and orientation.
To remove and disassemble the cartridge:
1. Loosen the syringe mount thumbscrew.
2. Loosen the cartridge retainer thumbscrew.
3. Remove the retainer clip using the retaining ring tweezers provided in the support
kit (Figure 5).
4. Remove the cartridge and feed tube as an assembly from the cartridge housing.
5. Remove the needle holder nut and needle and put aside.
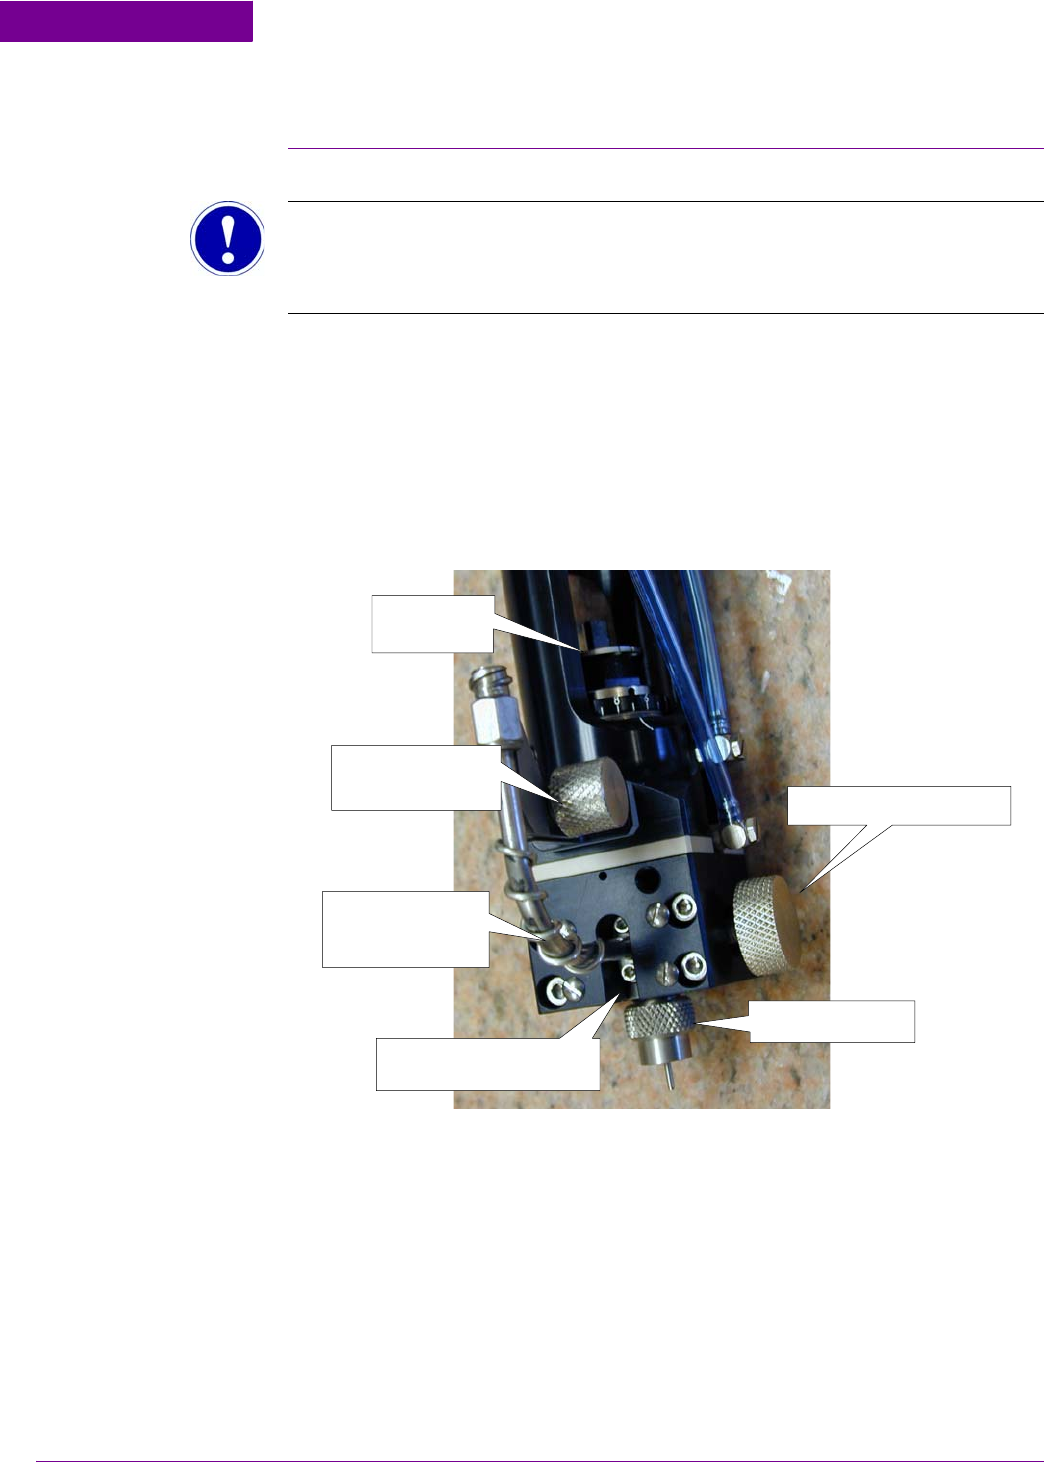
Figure 4
Retainer Clip
Syringe Mount
Screw
Feed Tube and
Leadscrew Assy
2-56 X 7/32 SHCS (2)
Cartridge Retainer Screw
Needle Holder Nut