speedline 680SD Pump .pdf - 第21页
. . . . . 680SD BRUSHL ESS SERVO PUM P Cartr idge Re m oval an d Disas sembly Ope rati on and Main tenance Gui de 19 Fi gu re 5 Attention CAUTION: T he leadsc rew is m ade of carbide s teel and sho uld be handled careful…
680SD BRUSHLESS SERVO PUMP
Cartridge Removal and Disassembly
18 680SD Brushless Servo Driven Pump
Cartridge Removal and Disassembly
Procedure
Attention
Refer to Figure 4 unless otherwise specified for parts identification and orientation.
To remove and disassemble the cartridge:
1. Loosen the syringe mount thumbscrew.
2. Loosen the cartridge retainer thumbscrew.
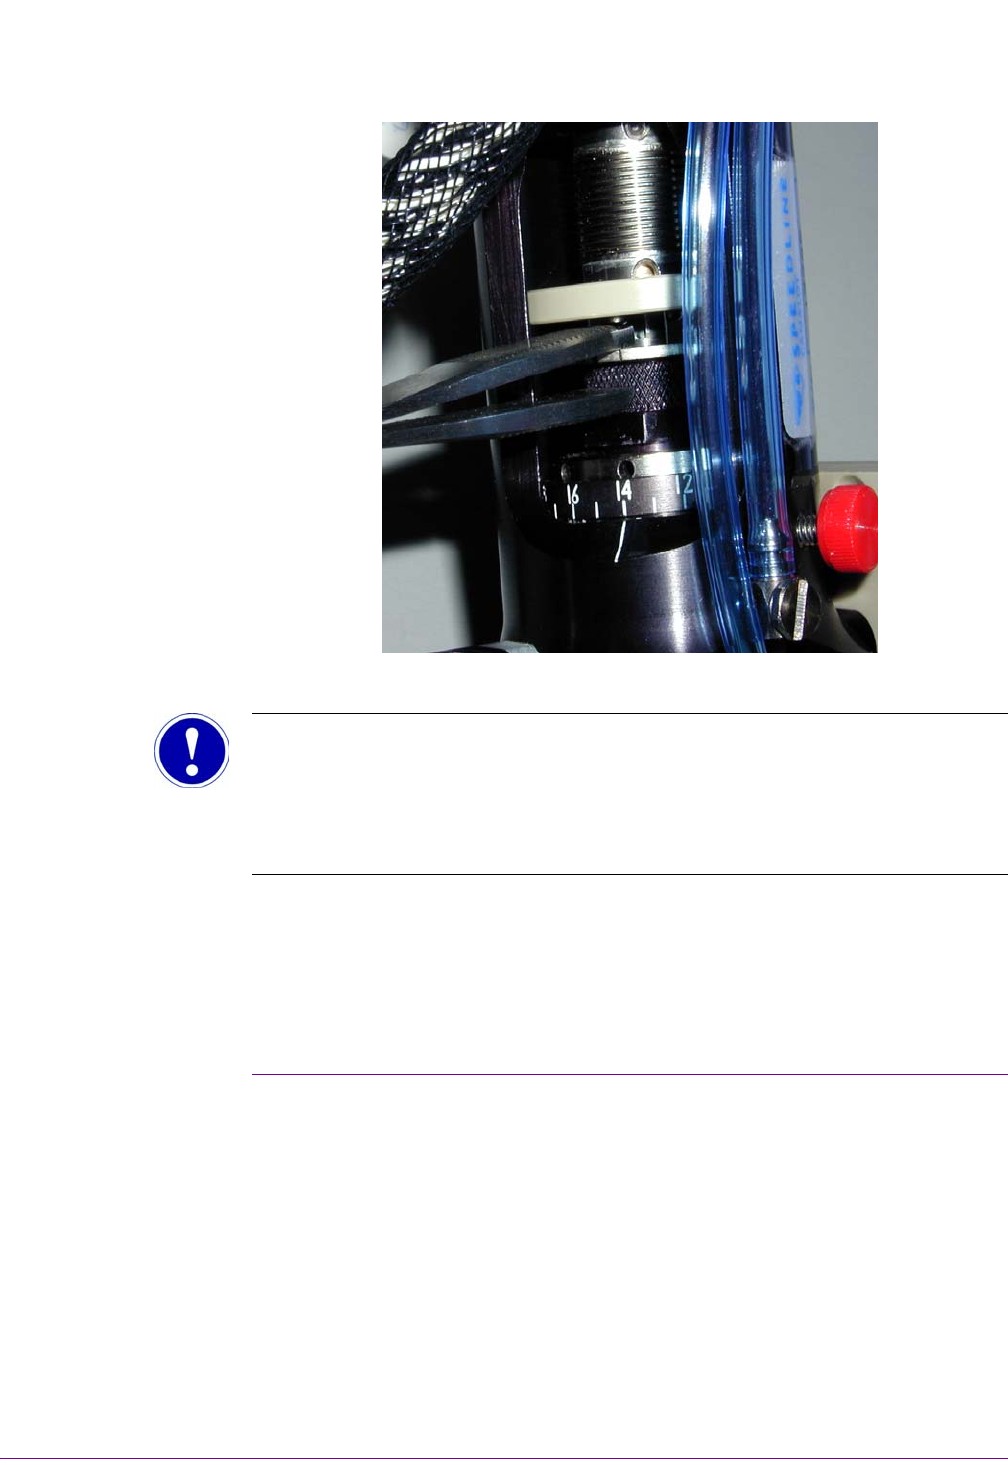
3. Remove the retainer clip using the retaining ring tweezers provided in the support
kit (Figure 5).
4. Remove the cartridge and feed tube as an assembly from the cartridge housing.
5. Remove the needle holder nut and needle and put aside.
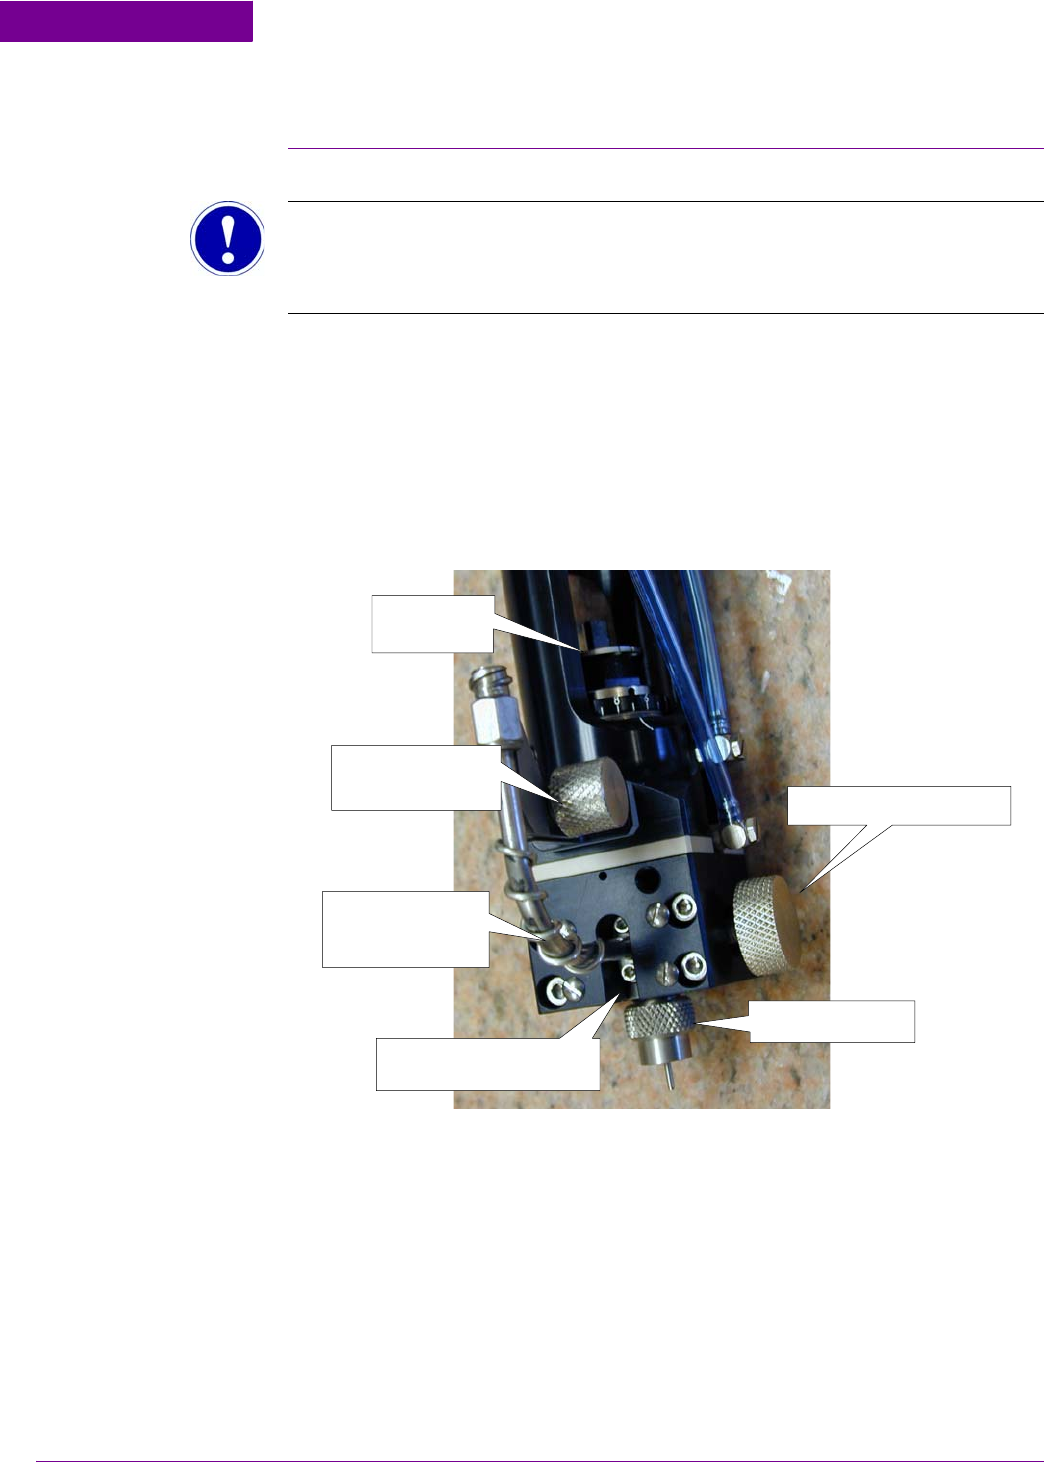
Figure 4
Retainer Clip
Syringe Mount
Screw
Feed Tube and
Leadscrew Assy
2-56 X 7/32 SHCS (2)
Cartridge Retainer Screw
Needle Holder Nut
.
.
.
.
.
680SD BRUSHLESS SERVO PUMP
Cartridge Removal and Disassembly
Operation and Maintenance Guide 19
Figure 5
Attention
CAUTION: The leadscrew is made of carbide steel and should be handled carefully to
avoid damage. Permanent damage will result if the pump is assembled with a
damaged leadscrew.
6. Pull the leadscrew from the cartridge housing and put aside (Figure 7 ,8).
7. Remove the O-ring and discard.
8. Remove the washer and put aside.
9. Remove the two 2-56 X 7/32 (Figure 4) socket head cap screws that secure the
feed tube assembly to the cartridge and separate.

680SD BRUSHLESS SERVO PUMP
Cleaning the Pump Cartridge
20 680SD Brushless Servo Driven Pump
Cleaning the Pump Cartridge
Introduction Cleaning of the pump cartridge and parts should be done thoroughly. It is critical that
all material is removed from all surfaces, particularly interior passages and threads.
Allowing partially cured material to remain on threads, in or on any other surface can
cause seizing of parts and other damage.
To avoid damage to machined and polished surfaces, do not use any sharp edged
implements.
The pump support kit contains pipe cleaners, cotton swabs and plastic bottle brushes
to facilitate cleaning.
Interior surfaces are considered clean when a fresh pipe cleaner or cotton swab
remains clean after being pushed through the passage.
Attention
HAZARDOUS MATERIALS. OBSERVE THE APPLICABLE MATERIAL SAFETY
DATA WARNINGS FOR CLEANING MATERIALS.
Attention
CAUTION. Be sure to use only the solvents recommended by the material
manufacturer for cleaning the pump.
Procedure Reference Figure 7 and Figure 8 when performing the following:
1. Gently clean the inside of the cartridge in a solvent suitable for removal of mate-
rial in pump. Cotton swabs and pipe cleaners immersed in the cleaning solvent,
are recommended for cleaning.
2. Use a pipe cleaner saturated with solvent to push the material from the feed tube
assembly. Repeat the procedure, using a clean pipe cleaner each time, until all
traces of material have been removed.
3. Clean the needle holder nut, washer, needle, and threads of the leadscrew.
4. Using denatured alcohol and a cotton swab, clean the bore of the cartridge hous-
ing and wipe down the outside of the housing.
5. Using a shop wipe and solvent, clean the leadscrew, making sure to remove all
traces of material from between the threads.