4OM-1064-001.pdf - 第245页
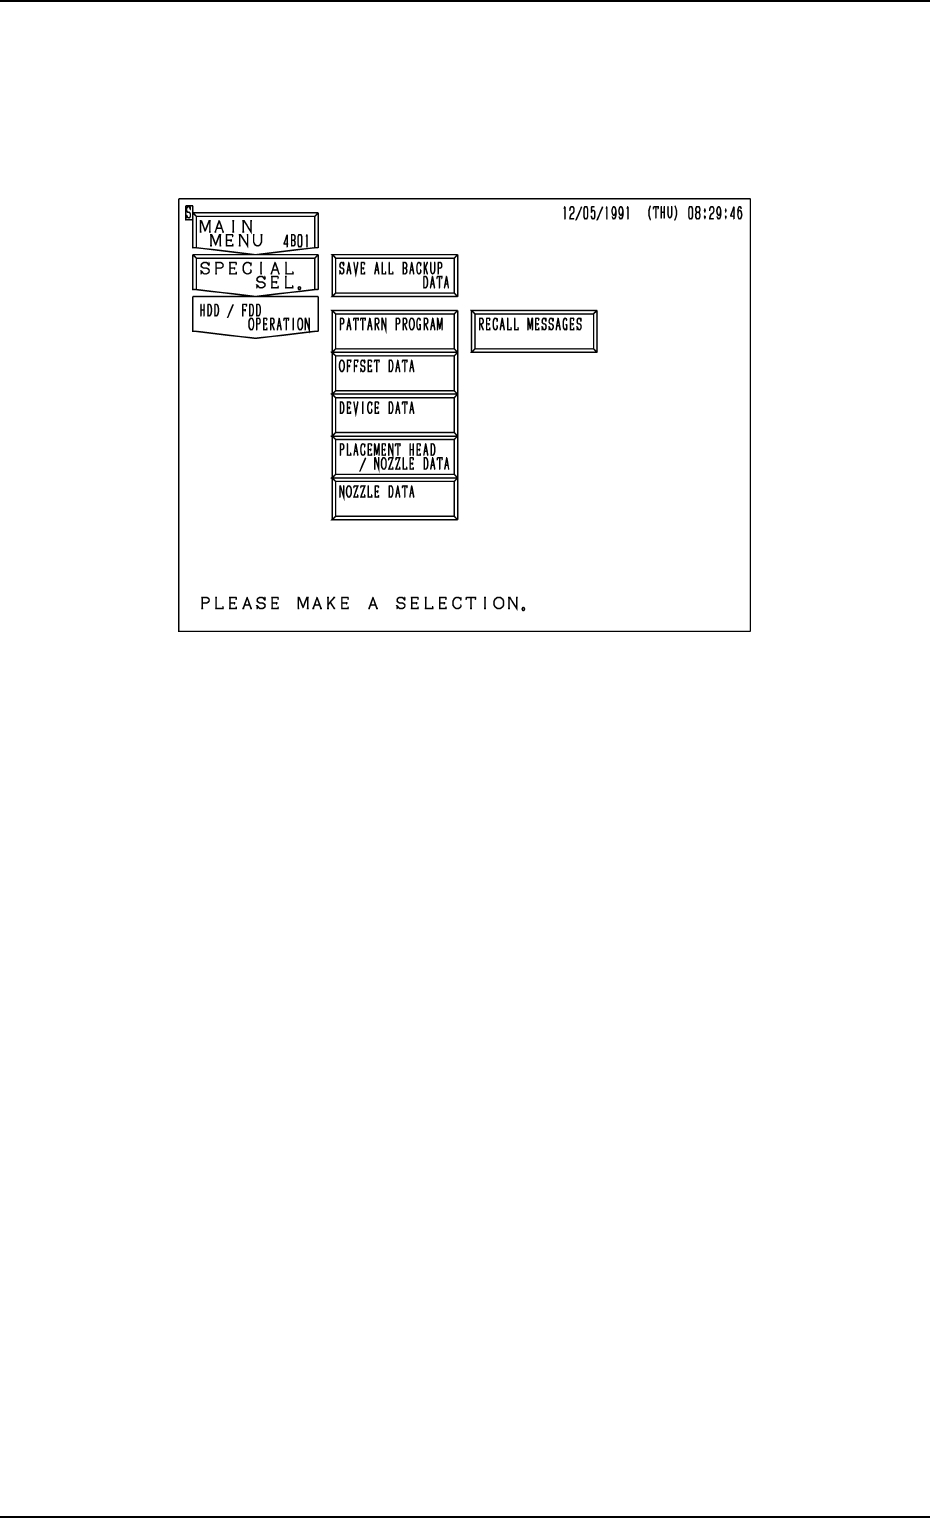
9910-001 Tg0249-PM-MM 10. HDD/FDD OPERA TION Display 3-199 10. HDD/FDD OPERA TION Display When the [HDD/FDD OPERA TION] key is pressed at the “SPECIAL SEL.” display , the following display appears on the screen. [SA VE…
Tg0249-PM-MM
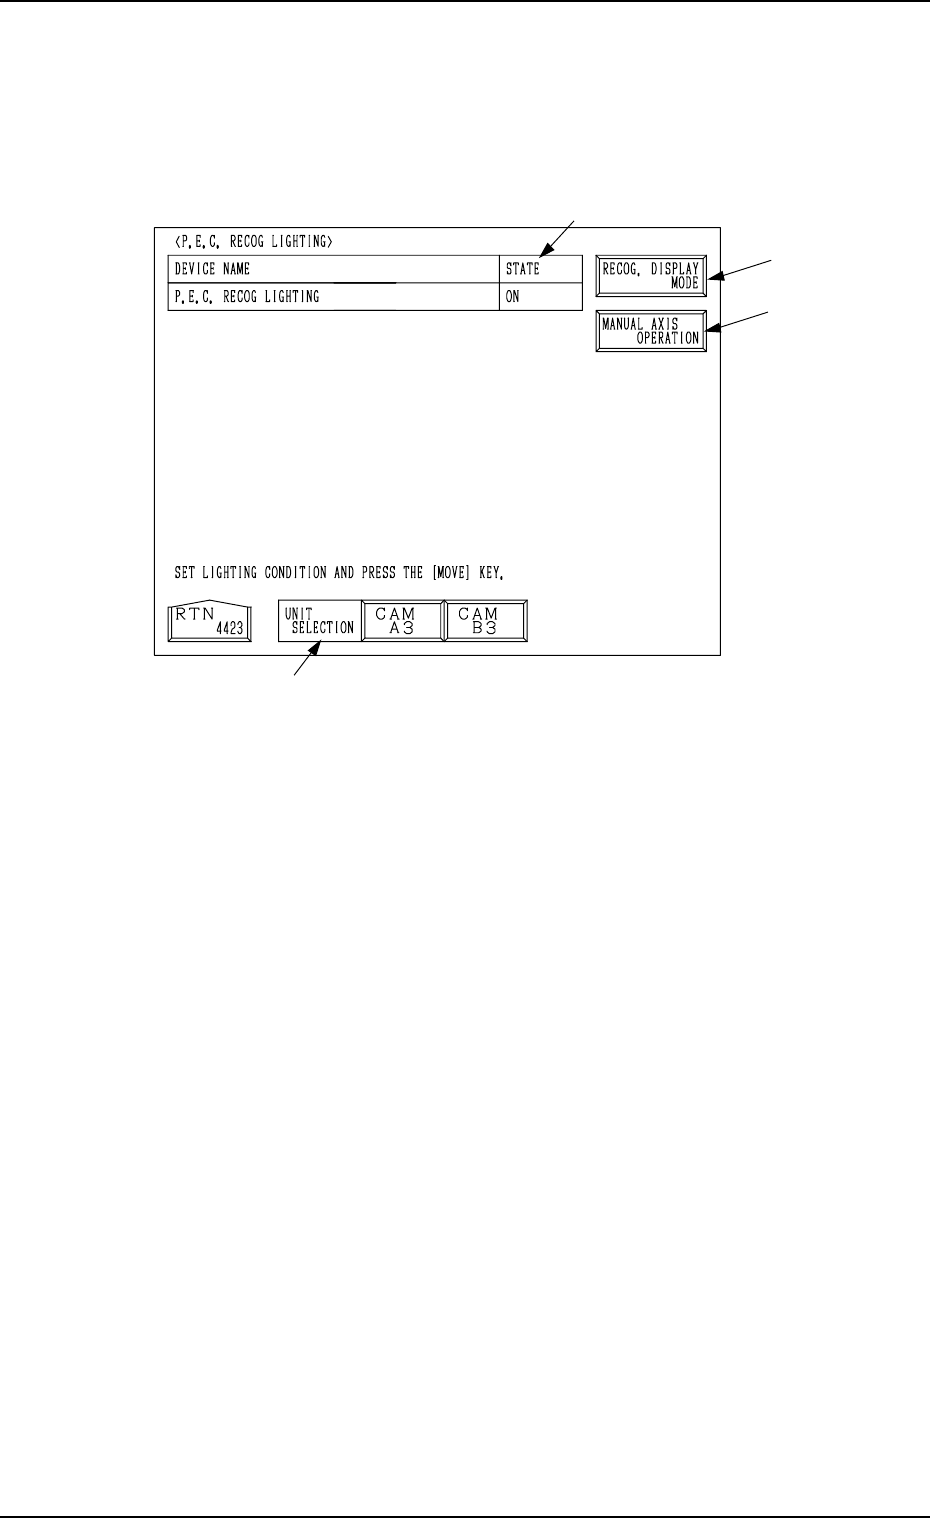
9.4.2 P.E.C. RECOG LIGHTING Display
When the [P.E.C. RECOG LIGHTING] key is pressed at the “RECOGNITION
LIGHTING” display, the following display appears on the screen.
When a lighting unit is selected by pressing the corresponding key beside the
label “UNIT SELECTION” *1 and the [MOVE] button is pressed, the lamps
for P.E.C. recognition lighting can be turned ON or OFF.
*1 UNIT SELECTION
Select a unit for which the lamps for P.E.C. recognition lighting must be
turned ON.
The [CAM A3] or the [CAM B3] key can be selected.
*2 STATE
Shown is the state “ON” or “OFF” of the lamps for P.E.C. recognition light-
ing.
*3 [RECOG. DISPLAY MODE] Key
When this key is pressed, the “RECOG. DISPLAY MODE” display ap-
pears on the screen, enabling the setting of the display mode for the recog-
nition monitor.
Refer to “*6 [RECOG. DISPLAY MODE] Key” in “9.4.1 COMPONENT
RECOG LIGHTING Display” for details.
*4 [MANUAL AXIS OPERATION] Key
When this key is pressed, the “MANUAL AXIS OPERATION” display
appears on the screen, enabling the manual axis operation of each indi-
vidual devices.
The operation is the same as the manual axis operation performed through
manual operations.
Refer to “7. Manual Axis Operation of Section 4 in Volume 1” for details.
9. UNIT ADJUSTMENT Display
9910-001 3-198
Fig. 3.117
*1
*3
*4
*2
9910-001 Tg0249-PM-MM
10. HDD/FDD OPERATION Display
3-199
10. HDD/FDD OPERATION Display
When the [HDD/FDD OPERATION] key is pressed at the “SPECIAL SEL.”
display, the following display appears on the screen.
[SAVE ALL BACKUP DATA] Key
All backup data can be saved from the machine side to floppy disks (4
pcs.).
[PATTERN PROGRAM] Key
The pattern program can be saved on or loaded from floppy disks.
[OFFSET DATA] Key
When this key is pressed, the “HDD/FDD OPERATION - OFFSET DATA”
display appears on the screen, enabling you to save the offset data on a
floppy disk or read it from the floppy disk.
[DEVICE DATA] Key
When this key is pressed, the “HDD/FDD OPERATION - DEVICE DATA”
display appears on the screen, enabling you to save the device data on a
floppy disk or read it from the floppy disk.
[PLACEMENT HEAD/NOZZLE DATA] Key
When this key is pressed, the “HDD/FDD OPERATION - PLACEMENT
HEAD /NOZZLE DATA” display appears on the screen, enabling you to
save the nozzle stocker data on a floppy disk or read it from the floppy disk.
[NOZZLE DATA] Key
When this key is pressed, the “HDD/FDD OPERATION - NOZZLE DATA”
display appears on the screen, enabling you to save the nozzle type data on
a floppy disk or read it from the floppy disk.
[RECALL MESSAGES] Key
When this key is pressed, the “HDD/FDD OPERATION - RECALL MES-
SAGES” display appears on the screen, enabling you to save the recalled
data (recalled messages) on a floppy disk or read it from the floppy disk.
Fig. 3.118
9910-001 Tg0249-PM-MM
10. HDD/FDD OPERATION Display
3-200
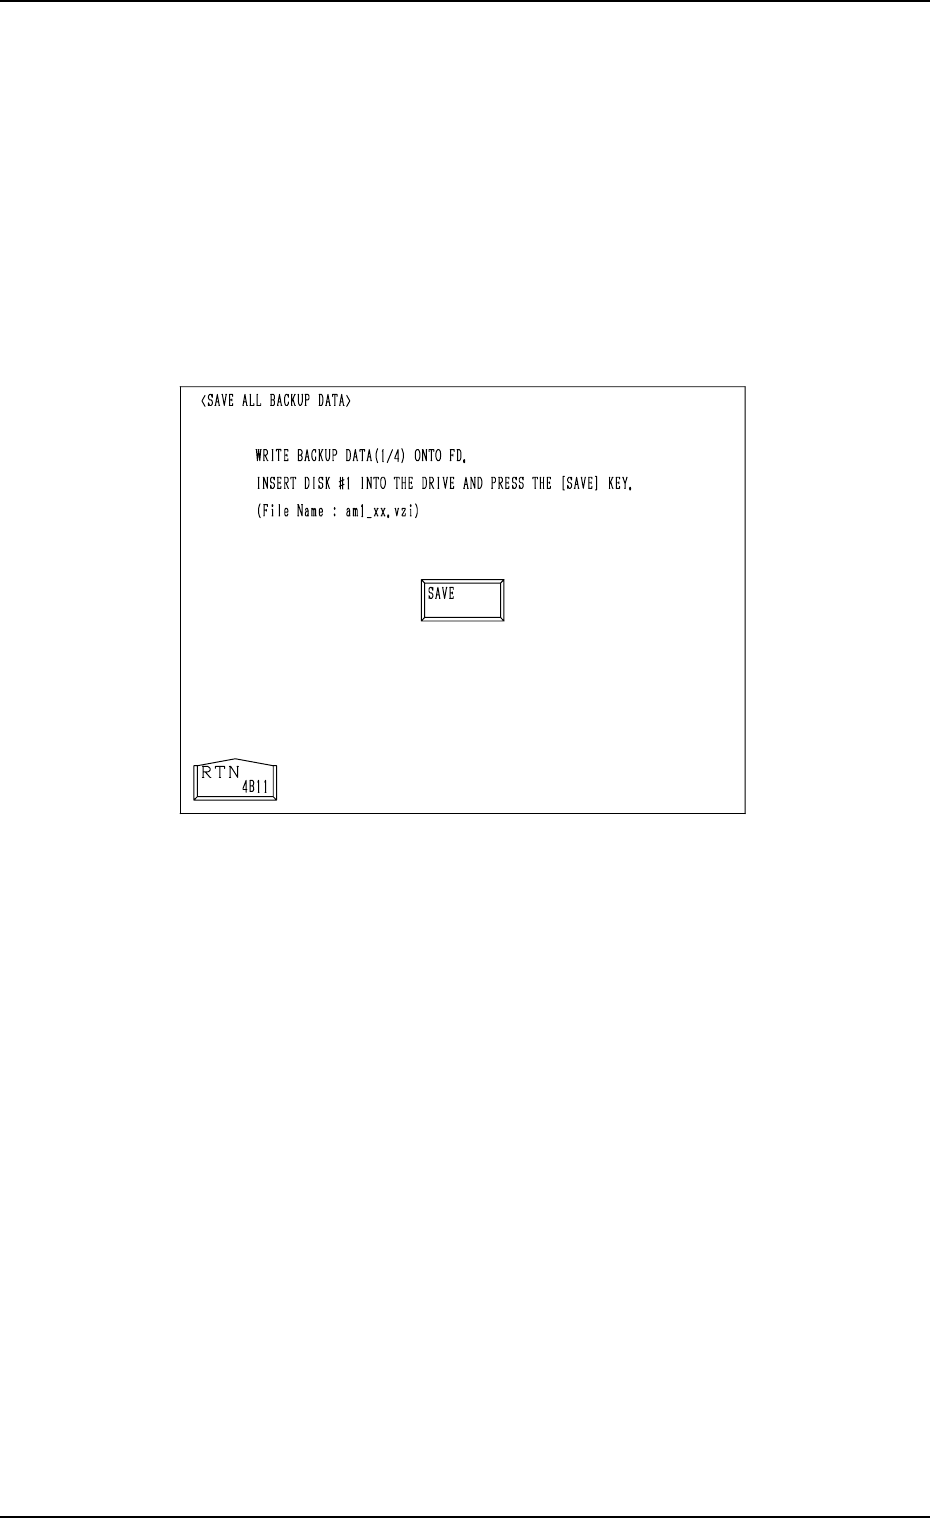
10.1 SAVE ALL BACKUP DATA Display
This function can be used to temporarily save data before version improve-
ment operation of the machine software, analyze data after an error has oc-
curred, and save such data that cannot be exchanged between the machine and
the programming device (option). It is recommended that all backup data should
be saved on floppy disks.
Note: Special operation is required when all backup data must be loaded.
When the [SAVE ALL BACKUP DATA] key is pressed at the “HDD/FDD
OPERATION” display, the following display appears on the screen.
Operation Procedure
(1) Prepare four pieces of 2HD floppy disks (1.44 MB, DOS-Formatted).
Label the floppy disks “1/4”, “2/4”, “3/4”, and “4/4” individually.
(2) Insert the floppy disk (labeled 1/4) into FDD and press the [SAVE] key.
• After the data is written (saved), a message is issued, reminding that
the floppy disk should be replaced with another one.
(3) Insert the floppy disk (labeled 2/4) into FDD and press the [SAVE] key.
(4) Follow the same procedure until all four disks are used up.
(5) After all data is saved, a message is issued, indicating that the save opera-
tion is completed.
• While the data is being saved, a [CANCEL] key and a progress bar
appear in the display.
• When the [CANCEL] key is pressed, the save operation is interrupted
and the “HDD/FDD OPERATION” display appears on the screen.
Fig. 3.119