GL541保养手册.pdf - 第21页
1. Changing a Syringe Purpose Replace a syringe when the glue runs out, or when a different type of adhesive must be used. Procedure Removal 1. Use the inching operation to inch the syringe head to the center of the mach…

Note:
Safety Guidelines
Version 3.6 12 GL-541E Maintenance
1. Changing a Syringe
Purpose
Replace a syringe when the glue runs out, or when a different type of adhesive must be
used.
Procedure
Removal
1. Use the inching operation to inch the syringe head to the center of the machine
where it is easily accessible, then press the EMERGENCY STOP button and cut the
power to the machine.
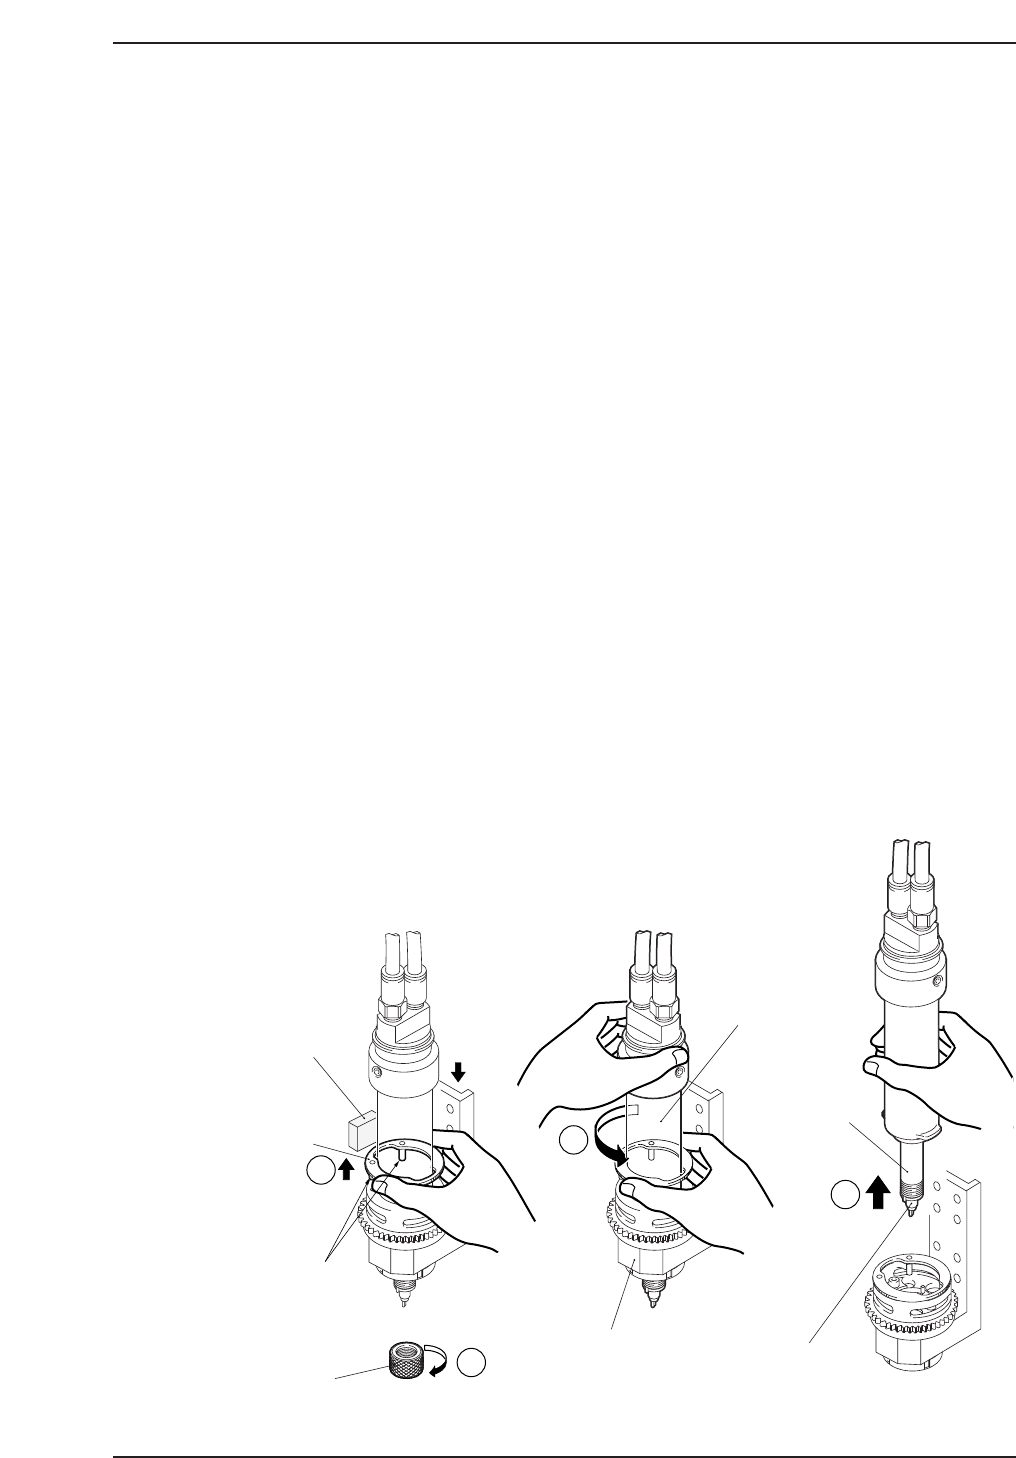
2. Turn the cap nut clockwise as viewed from above and remove it.
3. Remove the syringe assembly from the head as described below.
(1) While pressing the head down with one hand to keep the glue-level check
sensor out of the way, use the other hand to lift the syringe fixing ring
(black) several millimeters. (Lift until the ring's lock pins detach from the
syringe tab.)
Note: The syringe fixing ring is held onto the syringe holder by a magnet.
(2) Rotate the syringe assembly leftward 90 degrees, then pull the assembly
upward to remove it from the syringe holder.
Note: While lifting the syringe assembly, use one hand to push upward on the
needle side to prevent the adaptor from dropping off.
GL541-m76E
2
1
3
4
Glue-level
check sensor
Cap nut
Syringe
fixing ring
Lock pins
Needle
Syringe holder
Adaptor
Syringe assembly
Press
head down
Chapter 3 Changeover
Version 3.6 3-1-1 GL-541E Maintenance
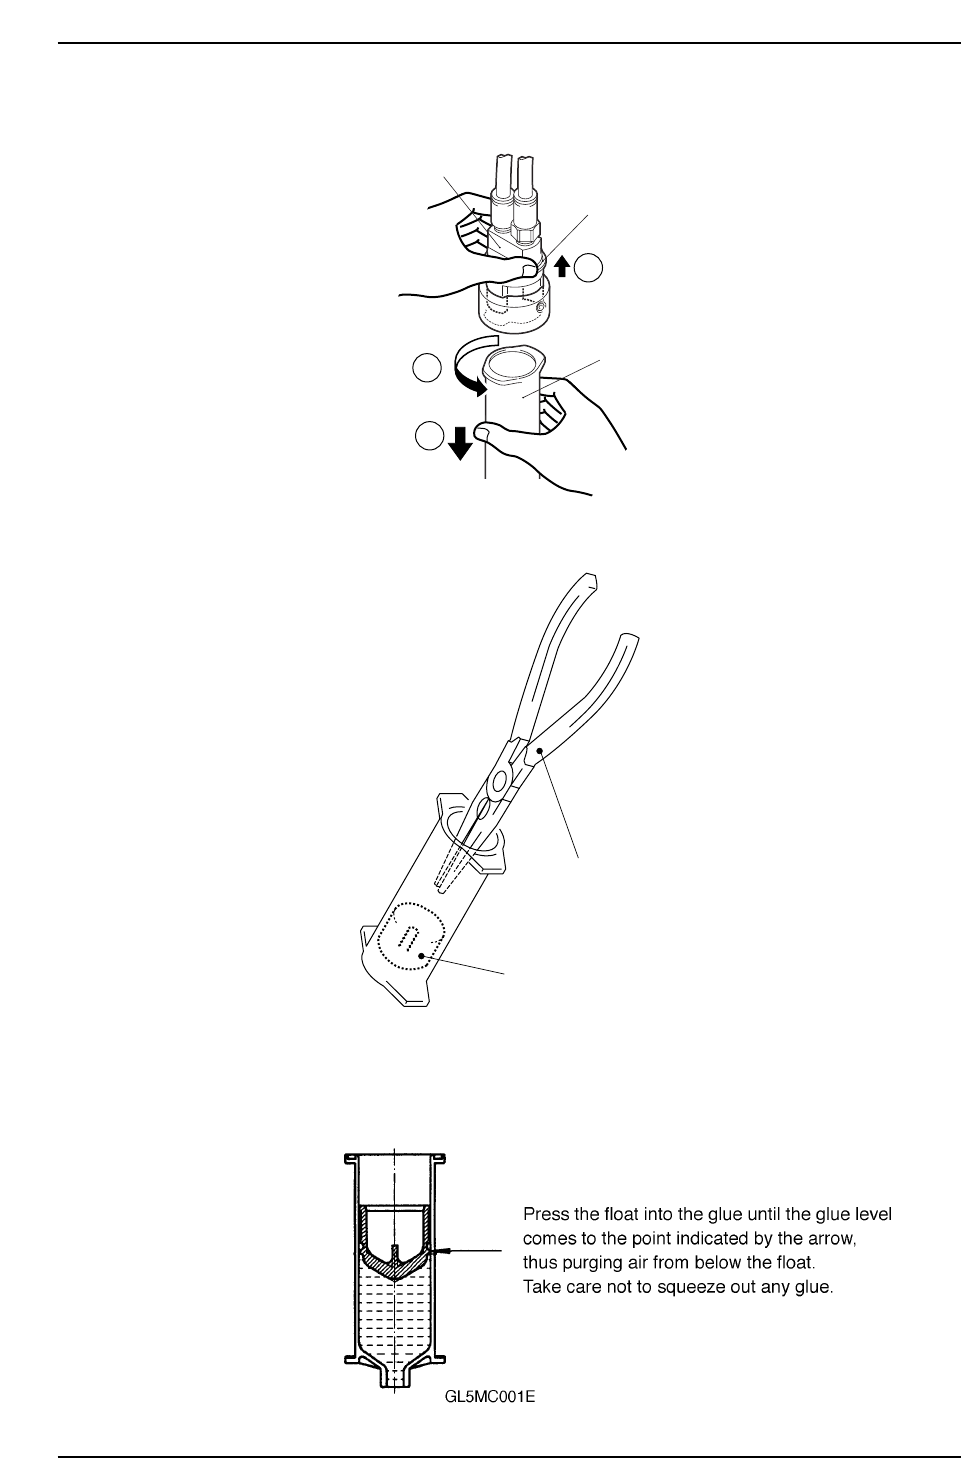
4. Lift off the rotary joint locking flange, then rotate the syringe approximately 90
degrees to detach it from the rotary joint.
5. Use a pair of needle nose pliers to remove the float from the syringe as shown
below.
Installation
1. Insert the float into the syringe so that air is purged as shown in the figure below.
Float
GL541-m29E
Needle nose pliers
GL541-m80E
1
2
3
Syringe
Rotary joint
Locking flange
Chapter 3 Changeover
Version 3.6 3-1-2 GL-541E Maintenance