GL541保养手册.pdf - 第28页
4. Remove the needle from the adapter. Note: Use the jig shown below to remove needles which are stuck to the syringe by dried glue. 1 4 2 3 1. Holder 2. Retainer 3. Plate 4. Nut JRG-0700 HRG-1260 JRG-0690 HRG-1271 Jig J…
3. Changing and Storing Needles
Purpose
Needles are changed to correspond to different production programs or a needle may be
replaced when a nozzle becomes clogged.
Procedure
Removal
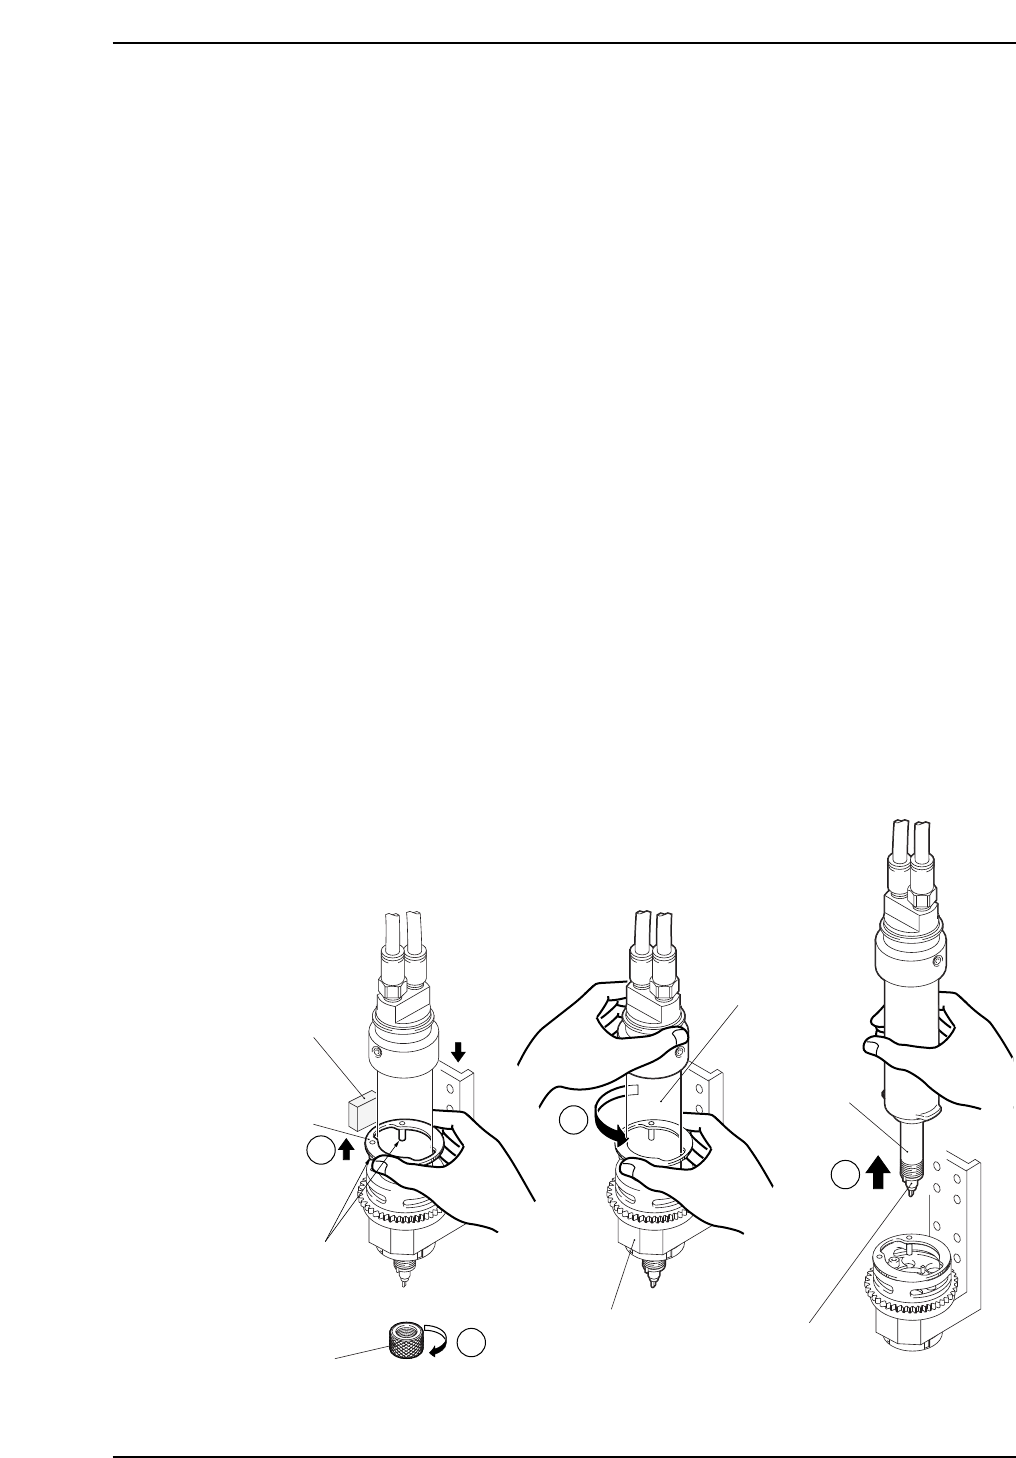
1. Use the inching operation to inch the syringe head to the center of the machine
where it is easily accessible, then press the EMERGENCY STOP button and cut the
power to the machine.
2. Turn the cap nut clockwise as viewed from above and remove it.
3. Remove the syringe assembly from the head as described below.
(1) While pressing the head down with one hand to keep the glue-level check
sensor out of the way, use the other hand to lift the syringe fixing ring
(black) several millimeters. (Lift until the ring's lock pins detach from the
syringe tab.)
Note: The syringe fixing ring is held onto the syringe holder by a magnet.
(2) Rotate the syringe assembly leftward 90 degrees, then pull the assembly
upward to remove it from the syringe holder.
Note: While lifting the syringe assembly, use one hand to push upward on the
needle side to prevent the adaptor from dropping off.
GL541-m76E
2
1
3
4
Glue-level
check sensor
Cap nut
Syringe
fixing ring
Lock pins
Needle
Syringe holder
Adaptor
Syringe assembly
Press
head down
Chapter 3 Changeover
Version 3.6 3-3-1 GL-541E Maintenance
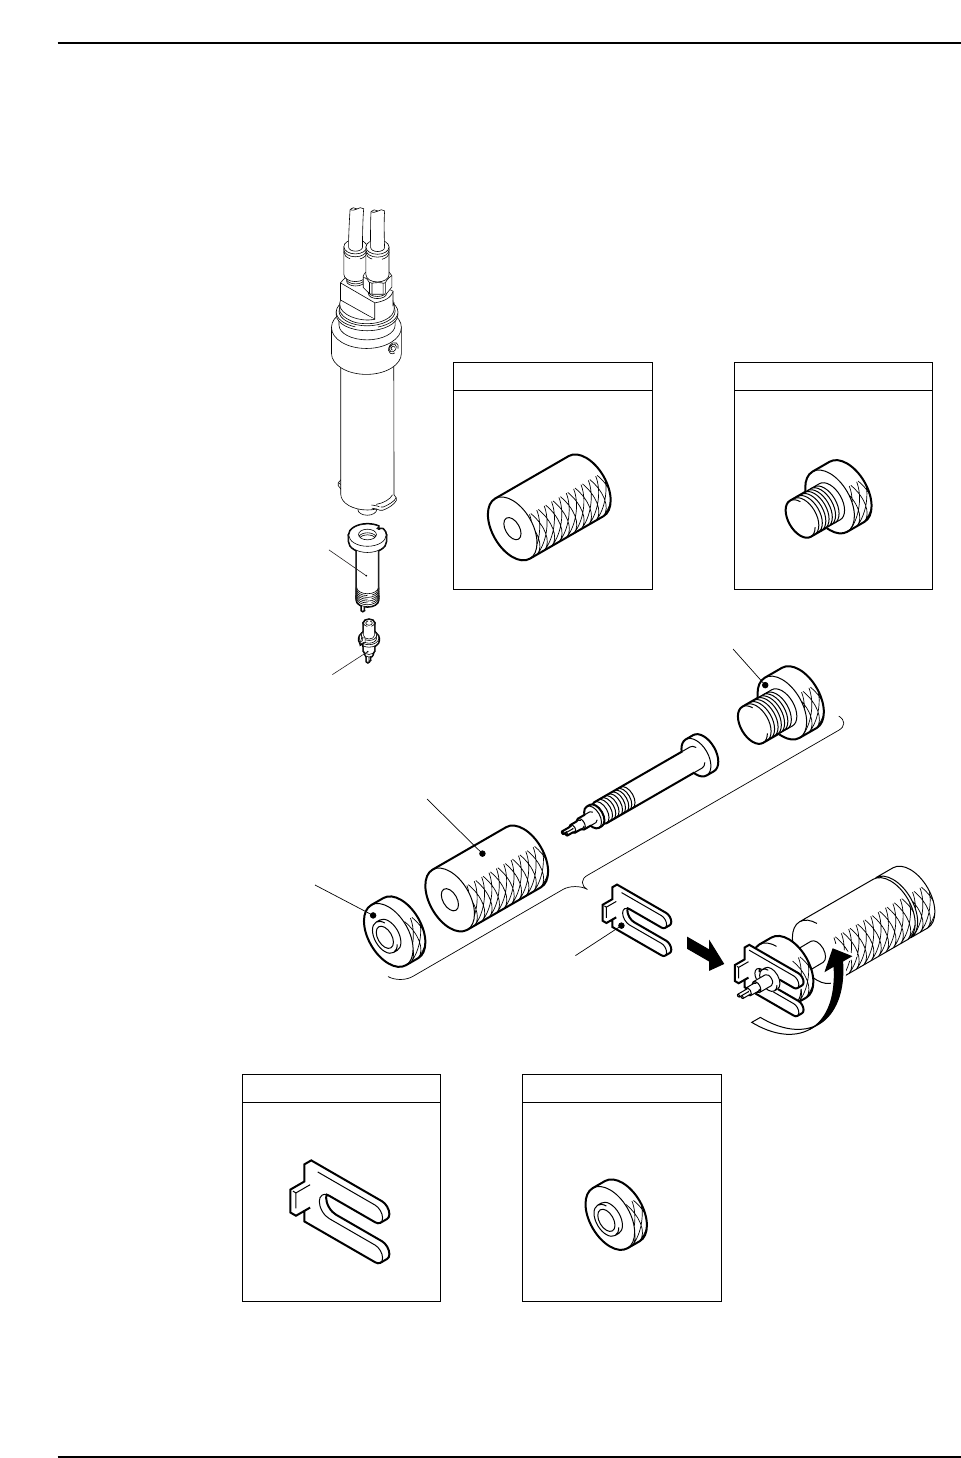
4. Remove the needle from the adapter.
Note: Use the jig shown below to remove needles which are stuck to the syringe by dried
glue.
1
4
2
3
1. Holder
2. Retainer
3. Plate
4. Nut
JRG-0700
HRG-1260
JRG-0690
HRG-1271
Jig
Jig Jig
Jig
GL541-m77E
Needle
Adaptor
Chapter 3 Changeover
Version 3.6 3-3-2 GL-541E Maintenance
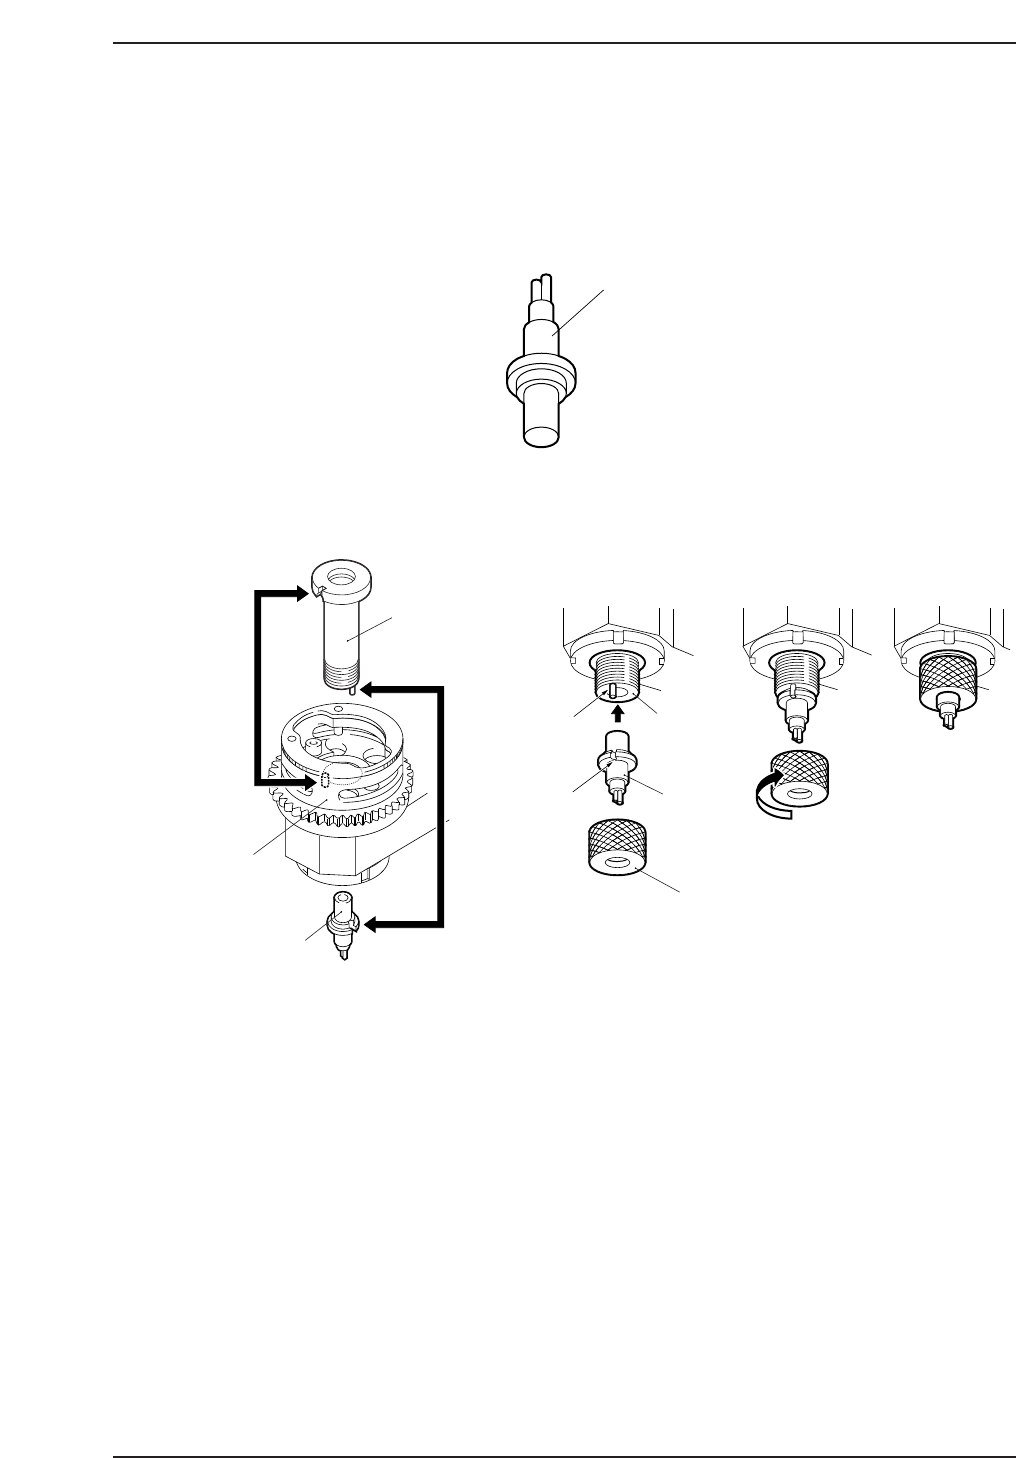
Installation
1. Remove any hardened glue on the end of the adapter or flange surface of the
needle.
Note: The internal diameter is marked on the needle for identification, as shown in the
following figure.
2. First, mount the adaptor and needle on the syringe, then mount the syringe,
adaptor, and needle assembly on the head's syringe holder.
Note: The mounting orientations of the syringe holder and adaptor, and the adaptor and
needle, are determined by the locating pin and the notch. When setting the needle
in the adaptor and tightening the cap nut, be sure that the adaptor pin is securely
positioned in the needle's notch.
Storage of the Needles
1. Soak nozzles that have been removed in one of the solvents listed below and then
store. To reuse the needle, clean off the solvent and any residual glue using
compressed air.
Solvents: Acetone or trichlene.
“Safety Cleaner 41 g” manufactured by Loctite.
“Cleaner S-10” manufactured by Sanei Chemical Co.
Note: For details, refer to the catalogs of glue manufacturers.
Notch
Locating pin
Needle
Needle
Adaptor
Adaptor
Cap nut
Syringe
holder
GL541-m79E
5
Indicates 0.5 mm inner diameter.
GL541-m38E
Chapter 3 Changeover
Version 3.6 3-3-3 GL-541E Maintenance