GL541保养手册.pdf - 第23页
2. Attach the adaptor to the syringe. 3. When necessary, use the centrifugal deairing device (optional) to inject glue into the adaptor. (Refer to section 4. "Removing Air Bubbles in the Glue".) 4. Mount the ne…
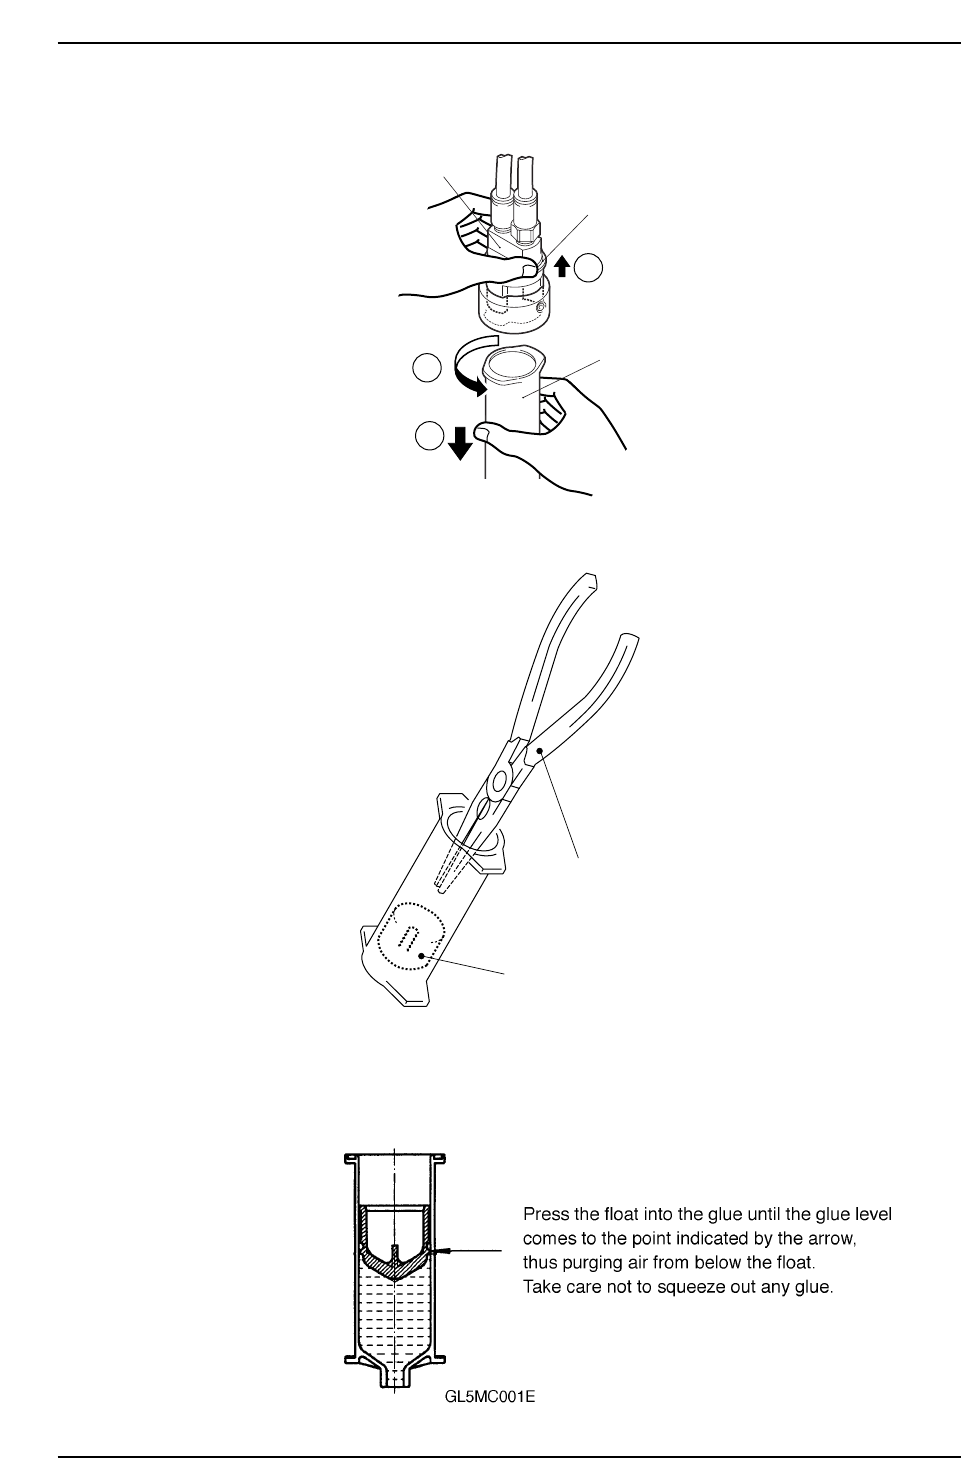
4. Lift off the rotary joint locking flange, then rotate the syringe approximately 90
degrees to detach it from the rotary joint.
5. Use a pair of needle nose pliers to remove the float from the syringe as shown
below.
Installation
1. Insert the float into the syringe so that air is purged as shown in the figure below.
Float
GL541-m29E
Needle nose pliers
GL541-m80E
1
2
3
Syringe
Rotary joint
Locking flange
Chapter 3 Changeover
Version 3.6 3-1-2 GL-541E Maintenance
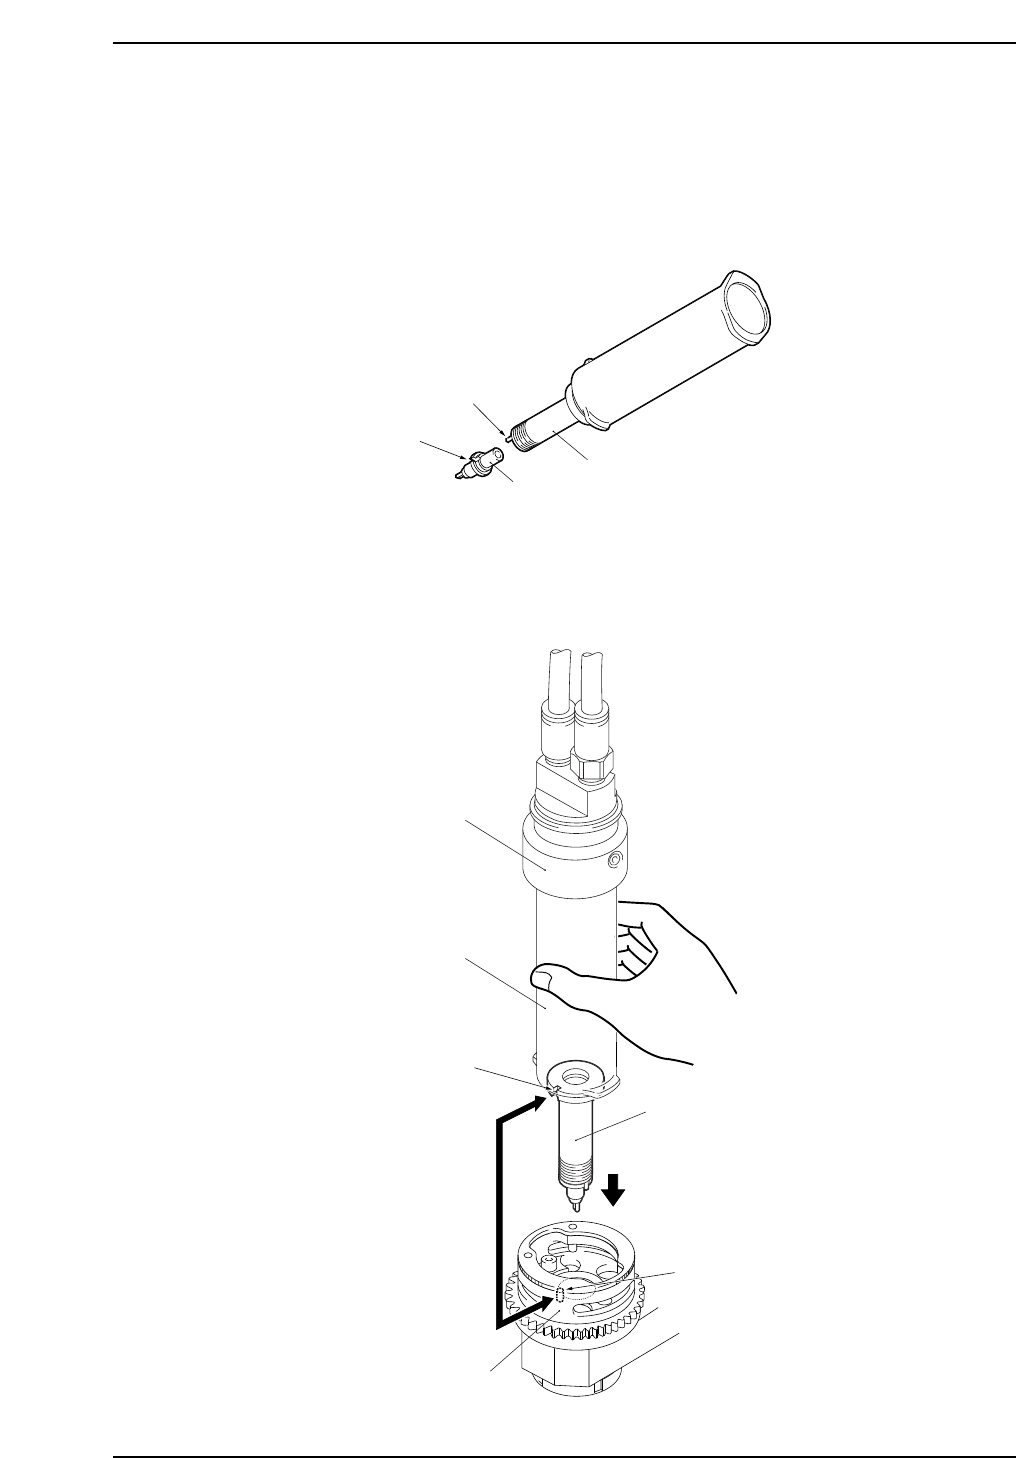
2. Attach the adaptor to the syringe.
3. When necessary, use the centrifugal deairing device (optional) to inject glue into
the adaptor. (Refer to section 4. "Removing Air Bubbles in the Glue".)
4. Mount the needle on the adaptor.
Note: Mount the needle by aligning the adaptor's locating pin with the needle's notch.
5. Push the rotary joint cap all the way to the top end of the syringe, then rotate it
(approximately 90 degrees) until a clicking sound is heard (this locks the cap).
6. Align the adaptor's notch with the syringe holder's pin position, then insert the
syringe assembly into the holder.
Adaptor
Syringe holder
Syringe
Rotary joint
Pin
Notch
GL541-m82E
Notch
Locating pin
GL541-m81E
Adaptor
Needle
Chapter 3 Changeover
Version 3.6 3-1-3 GL-541E Maintenance
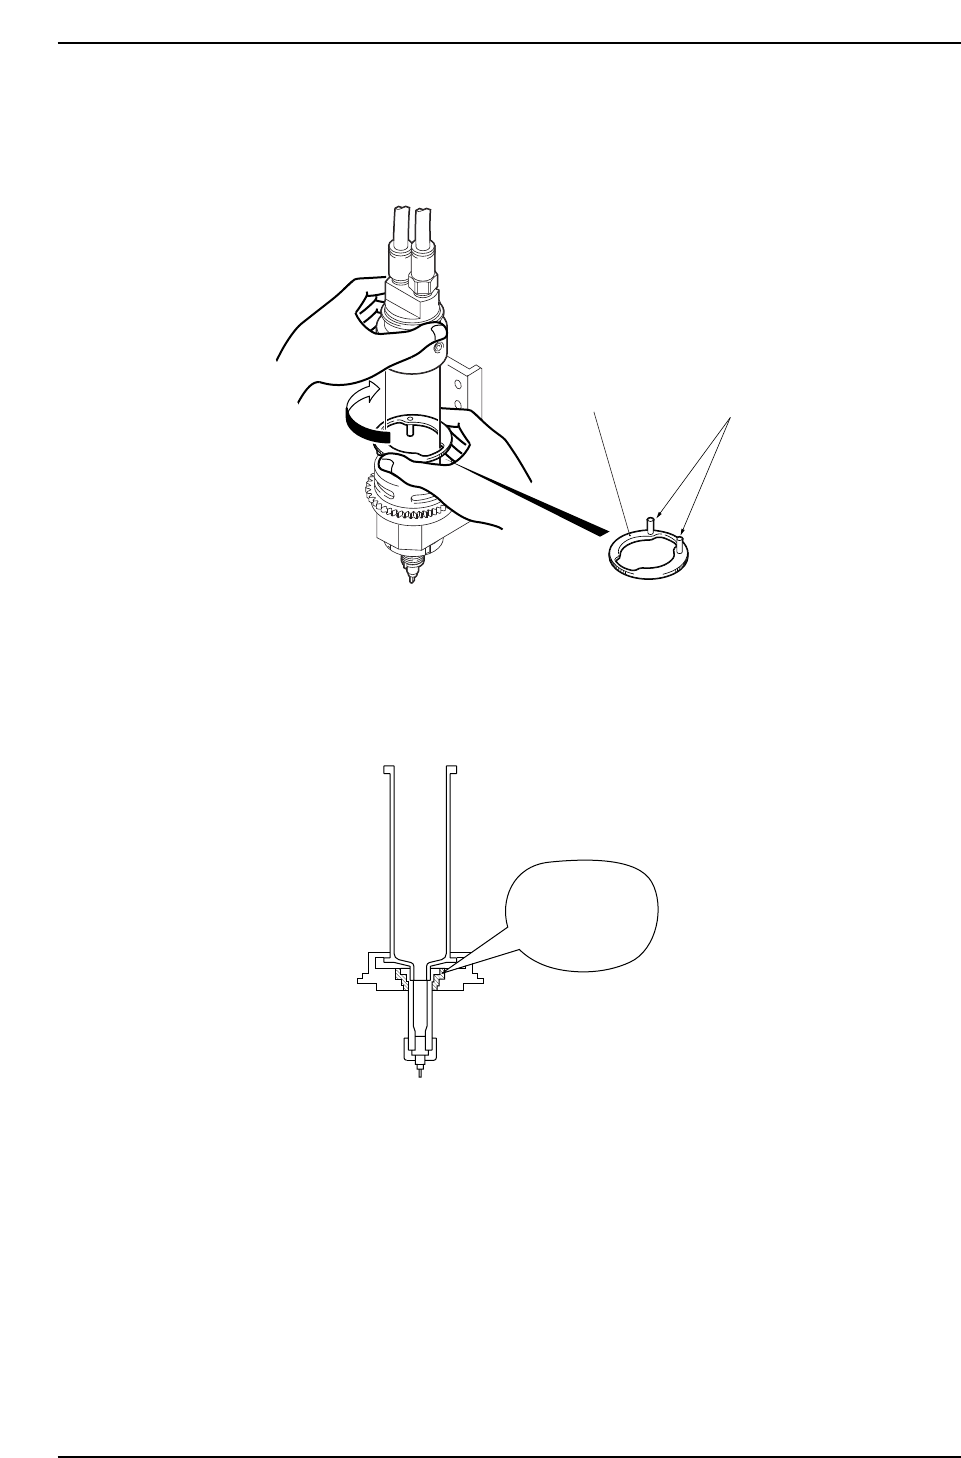
7. Lift the syringe fixing ring (black) several millimeters, rotate the syringe clockwise
approximately 90 degrees, then return the syringe fixing ring to its original
position to lock the tab.
Note: The syringe fixing ring is held on the head by a magnet.
Note: A syringe or adapter taken from the refrigerator must be allowed to reach room
temperature before use in order to prevent condensation, which can cause the
adapter to rust.
Rust prevents
removal.
GL541-m31Ea
GL541-m83E
Syringe fixing ring
Lock pin
Chapter 3 Changeover
Version 3.6 3-1-4 GL-541E Maintenance