SA_MAES4S_en.pdf - 第10页
10 4.2 Adjustment of the Upper Blade Stopper i Notice! The lower stop of the upper blade adjustment is already adjusted by delivery . After a long operation time, while working at strongly varying temperatures or else …
9
4 Test and Change Device Parts
4.1 Changing the Upper Blade
Incaseofwasting,damageormaterialmodiedit'snecessarytochangetheupperblade.
Video
Video: MAESTRO 4S - Changing the upper blade on www.cab.de
Risk of hand injury !
Wear protective gloves while changing the blade.
Danger!
Risk of cutting damage by rotating blade!
Unlink device before you start service work!
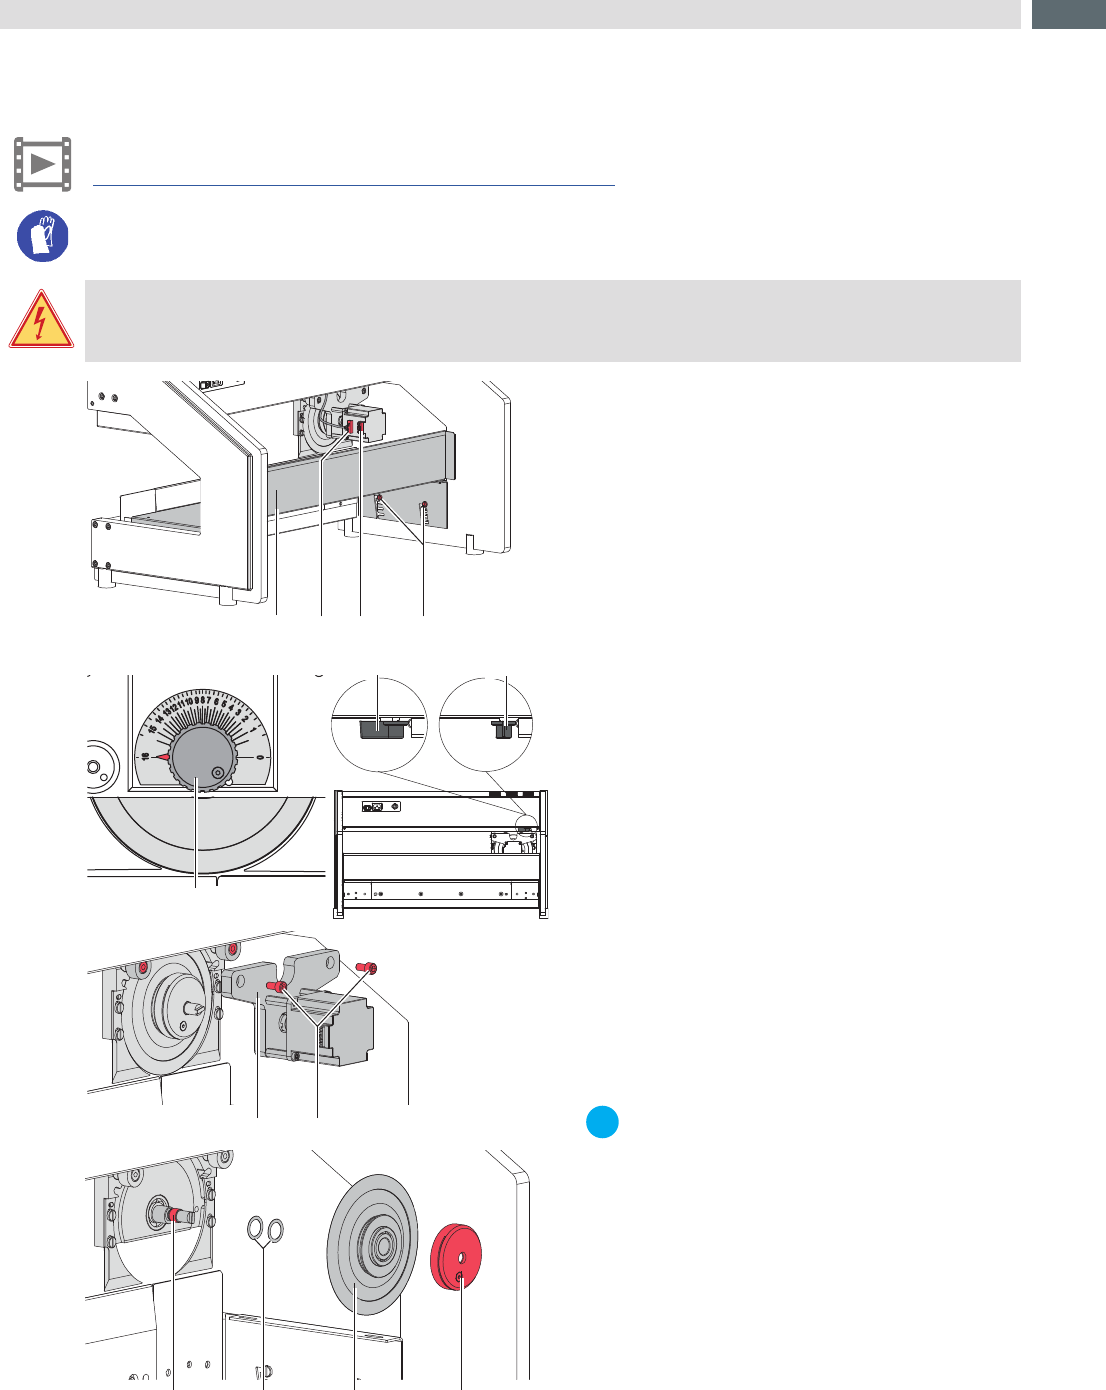
1
2 3 4
87
1211109
5
6
6
Fig.4 Changing the upper blade
1. After switching off the device and unlinking from
power supply, pull connector (2) out from female
connector (3) on the motor.
2. Slide the carriage to the left end position (front view).
Like upper picture.
3. Set the setting knob (5) on value 16 - blade on the
highest position.
4. Swing lever (6) in position a to release.
5. Loosen screws (4) and remove table (1) by
movements back and top.
6. Loosen screws (8).
7. Remove motor carriage with mounted motor (7).
8. Hold the setting knob (5) and loosen the knurled
nut(12) .
9. Remove blade (11) . It's possible that the washer
(10) are adhere on the blade.
Remove the Washer (10) from blade and take it back
on the axle (9).
10. Take the new blade (11) on the axle (9).
11. Hold the setting knob (5) and tighten the knurled
nut(12) .
12. Set the setting knob (5) on value 16.
13. Mount motor carriage with mounted motor (7), check
the connection of the coupling motor/axle and tighten
screws (8) .
14. Swing lever (6) in position b to couple.
15. Hang up the table (1) and tighten screws (4) .
16. Put in connector (2) into female connector (3) on the
motor.
i
Notice!
Adjust the stopper of the upper blade
before you start operation. chapter 4.2
10
4.2 Adjustment of the Upper Blade Stopper
i
Notice!
The lower stop of the upper blade adjustment is already adjusted by delivery.
After a long operation time, while working at strongly varying temperatures or else after replacing a
blade, it is recommended to re-adjust the lower stop.
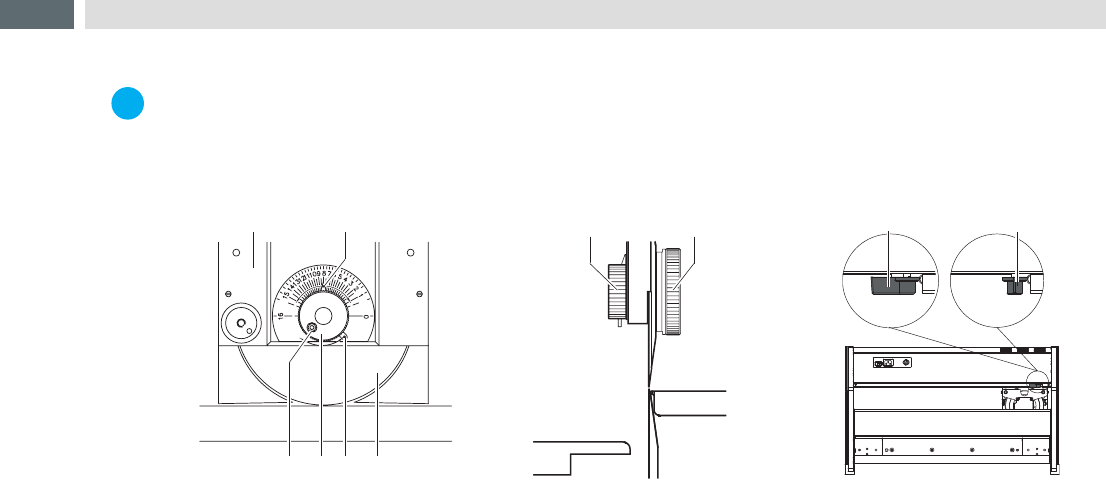
3 5 6
1 2
4
74
Fig.5 Adjustment of the upper blade stopper
1. Move the lever (8) to the position 'a'. The motor drive to the blade carrier (1) is now disconnected.
2. Rotate the pointer (2) with the knob (4) counterclockwise to position "16".
3. Move the upper blade carrier (1) in the middle position of the lower blade.
4. Loosen the screw (3).
5. Move the knob (4) clockwise until the upper and lower blades are in a distance of 0.03 mm. Use a thickness
gauge.
6. Swing the strut (5) clockwise until you reach the stop and tighten the screw (3). This adjustment locks the upper
blade in place to prevent it from moving out of adjustment.
7. Move the lever (8) to the position 'b'. The motor drive to the blade carrier (1) is now reconnected.
4 Test and Change Device Parts
11
4 Test and Change Device Parts
4.3 Changing the Linear Blade
Video
Video: MAESTRO 4S - Changing the linear blade on www.cab.de
!
Warning!
Risk of cutting injury in handling of the linear blade.
Risk of hand injury !
Wear protective gloves while changing the blade.
x
z
y
x
z
y
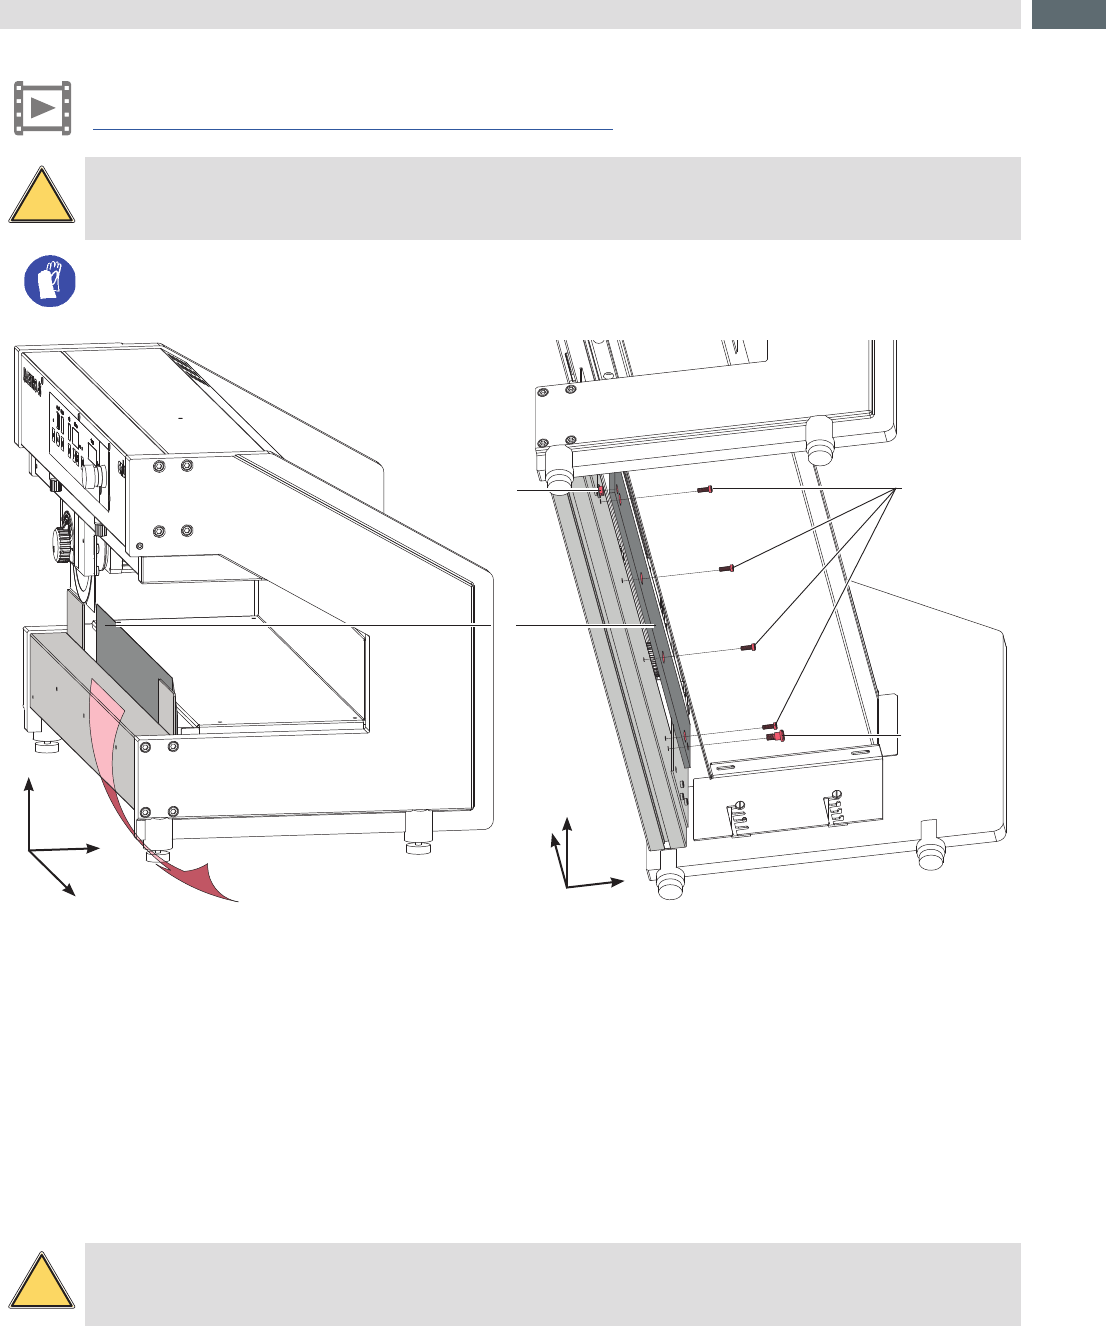
3
4
2
1
Fig.6 Changing the linear blade
(Front view - inclined)
Fig.7 Changing the linear blade
(Bottom view - inclined)
1. Loosen shouldered screw (4).
2. Hold the linear blade (1) to avoid an uncontrolled fall of the blade.
3. Loosen screws (3) . The eccentric (2) will used for guiding and will not loosened .
4. Pull out the linear blade (1) in direction of the device rear side from eccentric (2).
5. Move out the linear blade (1).
6. Mounting of the new linear blade in revers order.
4.4 Adjusting the Linear Blade
!
Warning!
Risk of cutting injury in handling of the linear blade.
To ensure a constant cutting quality and to prevent damaging of the blades must adjust the linear blade so that the
distance between upper blade and linear blade is constant of the full cutting length.