00191376-07.pdf - 第56页
7 4-monthly maintenance jobs HS Preventive Maintenance 01/2006 US E dition 56 7

HS Preventive Maintenance 7 4-monthly maintenance jobs
01/2006 US Edition
55
Valve adjustment drives 7
a Clean the locating disk and the gap between the locating disk and the motor bracket of both
valve adjustment drives with a lint-free cloth.
s Clean the ball bearing with a dry lint-free cloth.
: Check that the ball bearing is working correctly.
: Remove any visible dirt.
Turning station 7
: Clean the locating disk and the gap between the locating disk and the motor bracket of both
valve adjustment drives with a lint-free cloth.
d Wipe the black O-ring of the turning station with a lint-free cloth moistened with ethyl alcohol.
7
This O-ring must not be greased. 7
7
: Check the O-ring for damage. Replace, if required.
: Check the toothed belt for damage, Replace, if required.
7
The O-ring of the turning station can be cleaned while still installed using a cottonwool bud moist-
ened with ethyl alcohol. 7
7
For DLM2 only: 7
f Press the friction wheel of the turning station against the spring.
f Clean the stop surfaces using a cottonwool bud moistened with ethyl alcohol.
7
Assembly 7
: Insert the two O-rings into the back part of head.
: Carefully insert the distributor into its seat.
7
The small O-ring may be damaged if it is seated on the distributor during assembly. 7
Make sure that the star is turned half a revolution. 7
7
: Fit the front part of head and screw it tight.
: Attach the ribbon cables to the appropriate connectors.
: Connect the compressed air hoses.
7 4-monthly maintenance jobs HS Preventive Maintenance
01/2006 US Edition
56
7

HS Preventive Maintenance 7 4-monthly maintenance jobs
01/2006 US Edition
57
Vacuum generator 7
: Detach the vacuum generator hoses (if this has not already been done).
Use suitable pliers to do this. 7
7
7
7
7
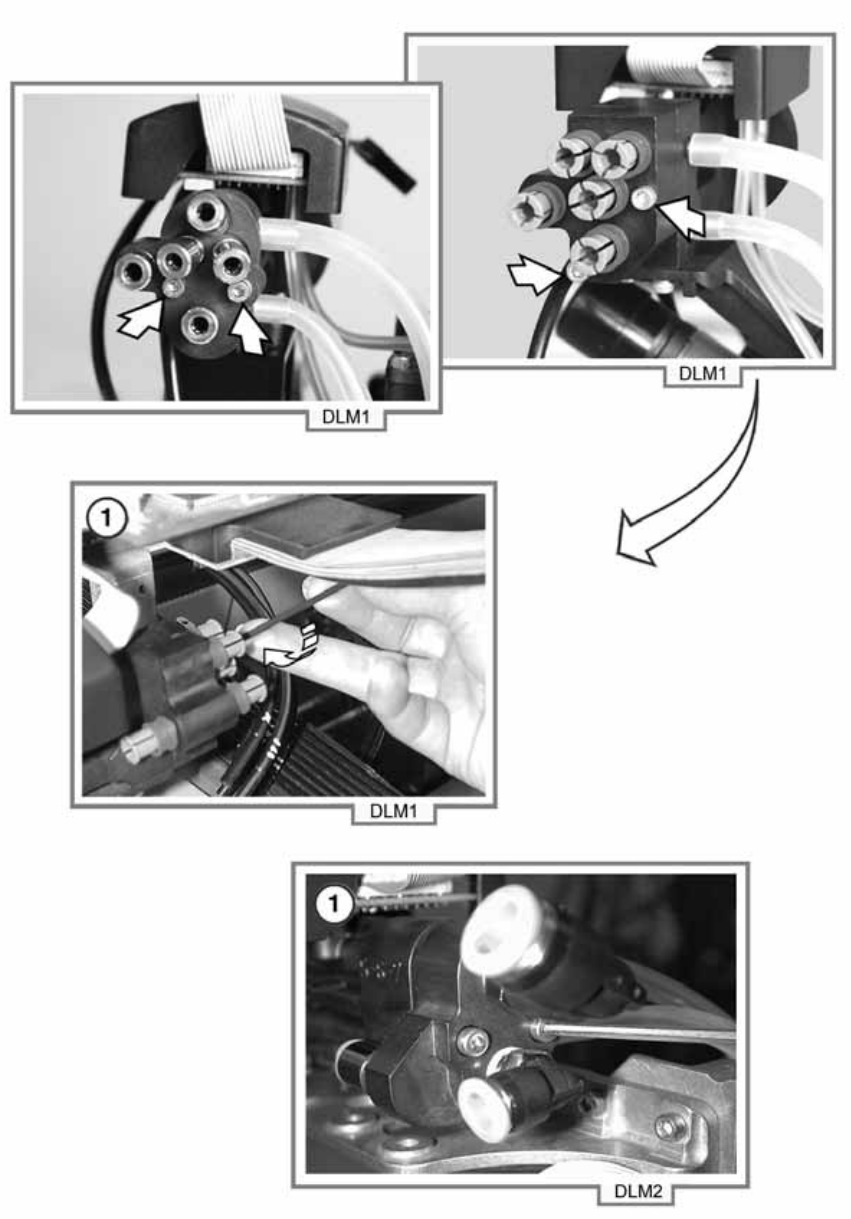
We recommend that you label or otherwise mark the compressed air hoses before you remove
them. 7
On the DLM1 heads, the hoses are already labeled and have a fixed assignment. 7
7
a Unscrew the block with the 2 Venturi nozzles using a 2.5 mm hexagon socket spanner.
7
7
7
7
7
7
7
7
7
7
7
7
7
7
7
7
7
7
7
7