00191376-07.pdf - 第66页
8 Annual maintenance work HS Preventive Maintenance 01/2006 US E dition 66 8
HS Preventive Maintenance 8 Annual maintenance work
01/2006 US Edition
65
Greasing the Y-axis gantries 8
8
a Turn the grease gun counter-clockwise to open.
8
s Pull back the grease gun plunger.
It must lock into place.
8
d Fill the grease gun with ISOFLEX TOPAS NCA 52 grease.
8
: Turn the grease gun clockwise to close.
8
f Release the lock.
The spring force moves the plunger forward.
8
g Push back the ball on the vent screw to vent the grease gun.
8
: Press the trigger until the grease emerges.
The grease gun is now ready for use.
8
8
8
8
8
8
8
8
8
8
8
8 Annual maintenance work HS Preventive Maintenance
01/2006 US Edition
66
8

HS Preventive Maintenance 8 Annual maintenance work
01/2006 US Edition
67
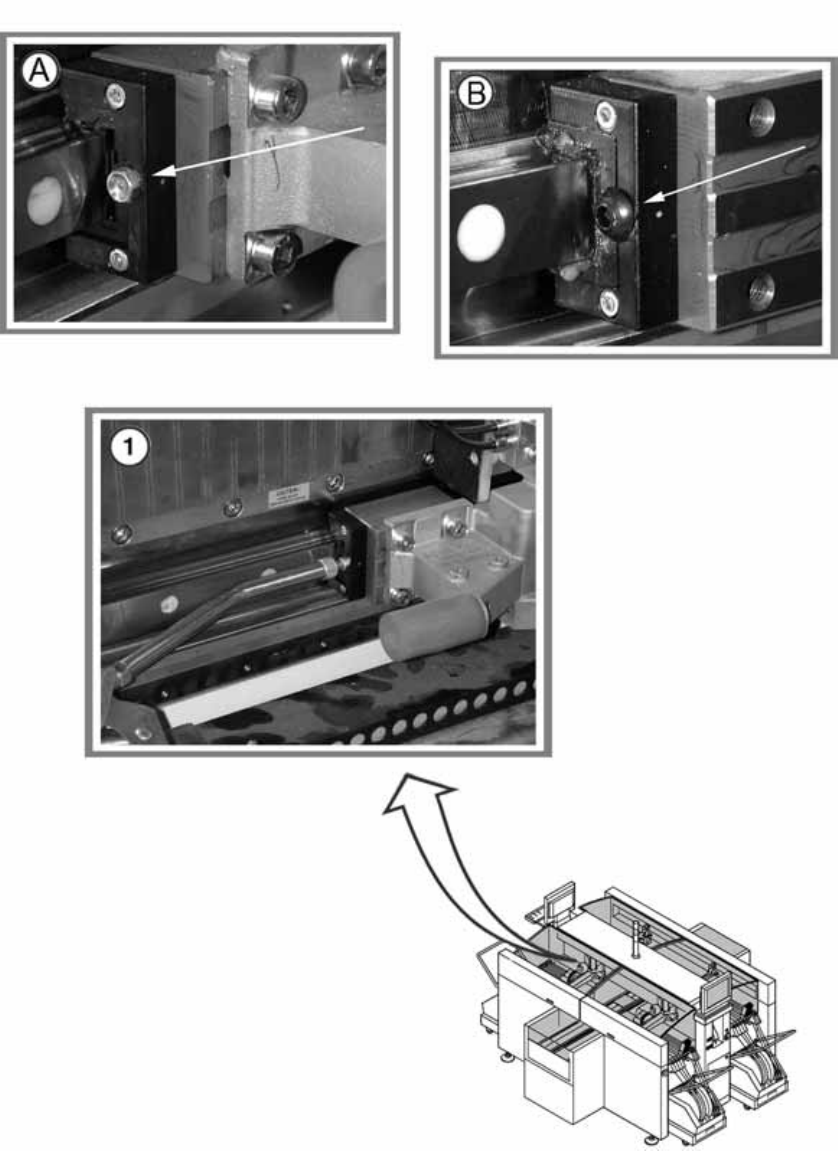
: The Y axis gantry must have a grease nipple (figure A) in order to be able to use the grease
gun.
If this is not the case, remove the screw (figure B) and insert a grease nipple.
a Place the grease gun (item no.: 00366174-01), filled with ISOFLEX TOPAS NCA 52, straight
onto the grease nipple.
: Apply one squeeze of the grease gun.
8
If the grease emerges from the grease nipple, then either the bearing is already full or the grease
nipple is not sealing correctly. In the latter case, use a new grease nipple. 8
8
: Grease the other trolleys on the gantry in the same way.
8
Always grease both of the visible grease nipples on each gantry, i.e. a total of eight grease nipples
on the HS. 8
8
: Move the gantry approx. 30 cm to distribute the grease.
: Repeat the pressing and moving process three more times. This ensures that the right amount
of grease is applied.
: Use a cloth to remove any excess grease from on and around the grease nipple.
8
: Repeat the greasing process on all four gantries.
8
8
: Switch the placement system on again at the main switch.
8
8
8
8
8
8
8