00191376-07.pdf - 第61页
HS Preventive Maintenance 7 4-monthly m aintenance jobs 01/2006 US Edition 61 Silencer 7 : T urn the silencer counter- clockwise to remove . a Clean the hol es to the V enturi nozzles with a cotto nwool bud m oistened wi…
7 4-monthly maintenance jobs HS Preventive Maintenance
01/2006 US Edition
60
7

HS Preventive Maintenance 7 4-monthly maintenance jobs
01/2006 US Edition
61
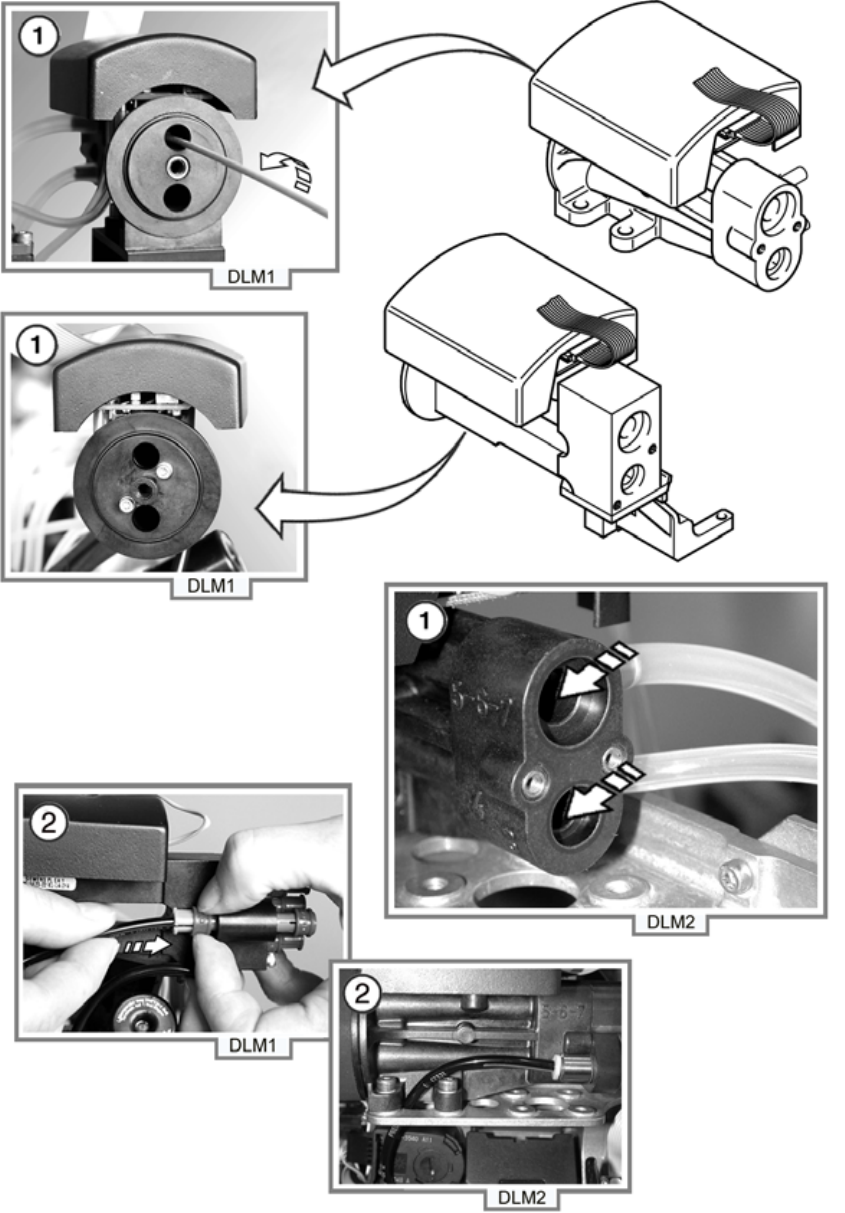
Silencer 7
: Turn the silencer counter-clockwise to remove.
a Clean the holes to the Venturi nozzles with a cottonwool bud moistened with ethyl alcohol.
: Check the silencer for dirt.
If there are any signs of discoloration, replace the silencer and reverse the sequence described
above to fit.
7
Don't forget the O-ring. 7
7
7
7
Assemble the vacuum generator 7
: Assemble the block with the Venturi nozzles and carefully screw tight.
s Attach the compressed air hoses once more.
Make sure that the connections are seated correctly. 7
The hoses must engage correctly in the couplings. 7
7
7
: Fit the head cover.
7
: Switch the placement machine on at the main switch.
: Use the Single Functions" menu to pick up the nozzles once more.
7
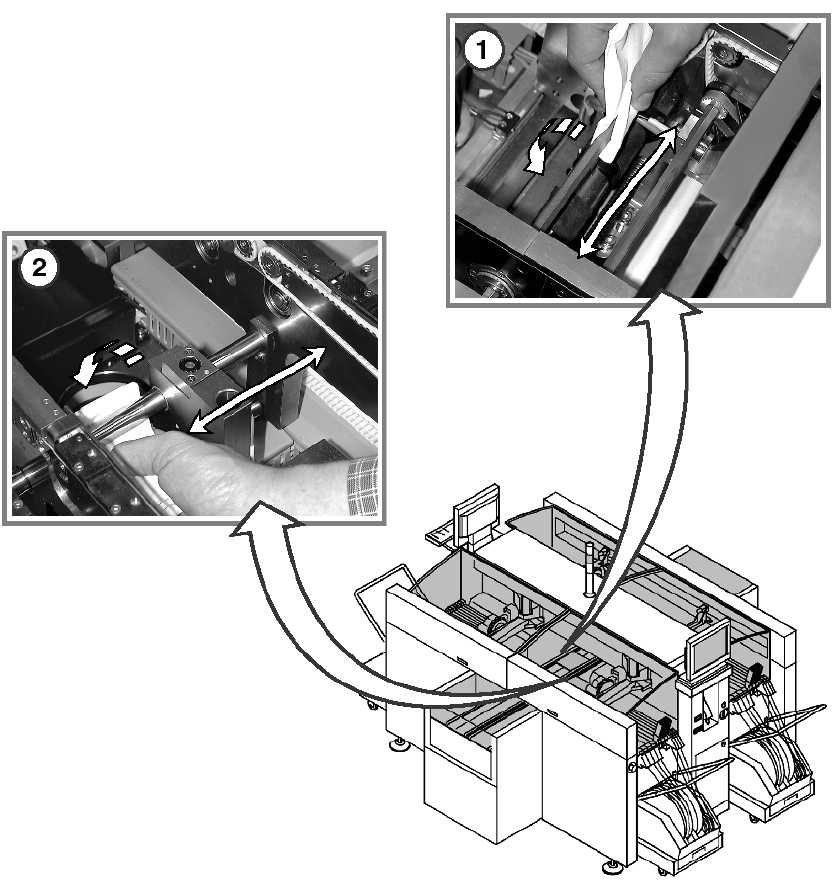
Test placement 7
The distance between the component camera and the PCB camera can be changed by separating
the front and back parts of the head. 7
: Carry out a test placement run to test whether the placement accuracy is still guaranteed.
: If the placement accuracy is not guaranteed, remeasure the placement head.
7
8 Annual maintenance work HS Preventive Maintenance
01/2006 US Edition
62
8 Annual maintenance work
8