00191376-07.pdf - 第82页
10 Maintain the v alve plungers HS P reventive Maintenance 01/2006 US E dition 82 10 Maint ain the valve plungers 10
HS Preventive Maintenance 9 Maintain the sleeves
01/2006 US Edition
81
Standard sleeves only 9
a Check that the O-ring is lying closely against the sleeve. Replace the O-ring if it is too far away
or damaged.
9
s Grease the new O-ring by rubbing with UNISILKON L250L (ideally between your fingers). Then
carefully pull the O-ring over the suction plate and into the groove.
Check that the O-ring is seated firmly in the groove.
9
9
9
10 Maintain the valve plungers HS Preventive Maintenance
01/2006 US Edition
82
10 Maintain the valve plungers
10

HS Preventive Maintenance 10 Maintain the valve plungers
01/2006 US Edition
83
10
10
For maintaining the valve plungers you will need: 10
– Valve plunger C&P 12 (6-pack) (item no. 00351498-03)
– ISOFLEX TOPAS NCA 52 (item no. 00328369-01, 00330850-01, 50g tube)
– Lint-free cloths.
10
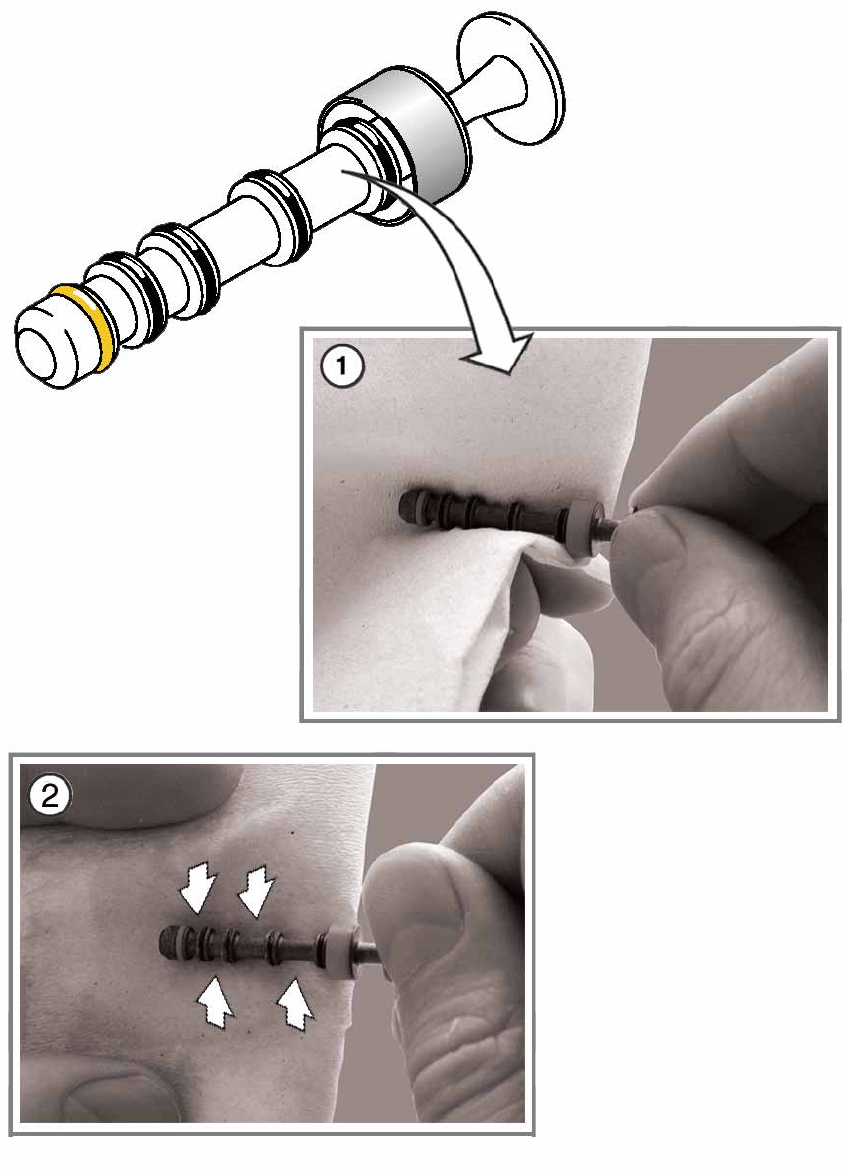
a Wipe the valve plunger using a dry, lint-free cloth.
: Check the sealing lips, spring O-ring and sleeve for damage.
Replace the valve plunger if they are damaged.
If the sleeve is still intact, but has worked loose, simply attach it again.
Distinguish between the dirty and cleaned valve plungers by marking the packaging accordingly,
for example. 10
10
10
10
While inserting:
Make sure that the valve plungers do not move too easily. 10
10
Replace any that move too easily or are difficult to move.
Move the valve plungers back and forth several times.
Make sure that the valve plunger is inserted as far as the stop. 10
10
During operation:
The "Segment leaking" error message indicates that a valve plunger is moving too easily. 10
10
10
s Grease the sealing lips extremely sparingly using a lint-free cloth dipped in ISOFLEX TOPAS
NCA 52. No grease residues must be seen.
10
10
The marked grooves must be free from grease. 10
10
10
10
New valve plungers also have to be greased before they are used for the first time.
10
10
10
10