00197455-01_IM_TX150SS8_en.pdf - 第26页
Installing Prim ergy TX 150 S8 with W indows S erver 20 12 07/2012 Edit ion 26 ► In mos t cases , there is no v alid gatewa y in the SIPLACE LAN, thus leave t h e Gatew ay f ield blank . ► Click the Next button t o conti…
Installing Primergy TX150 S8 with Windows Server 2012 07/2012 Edition
25
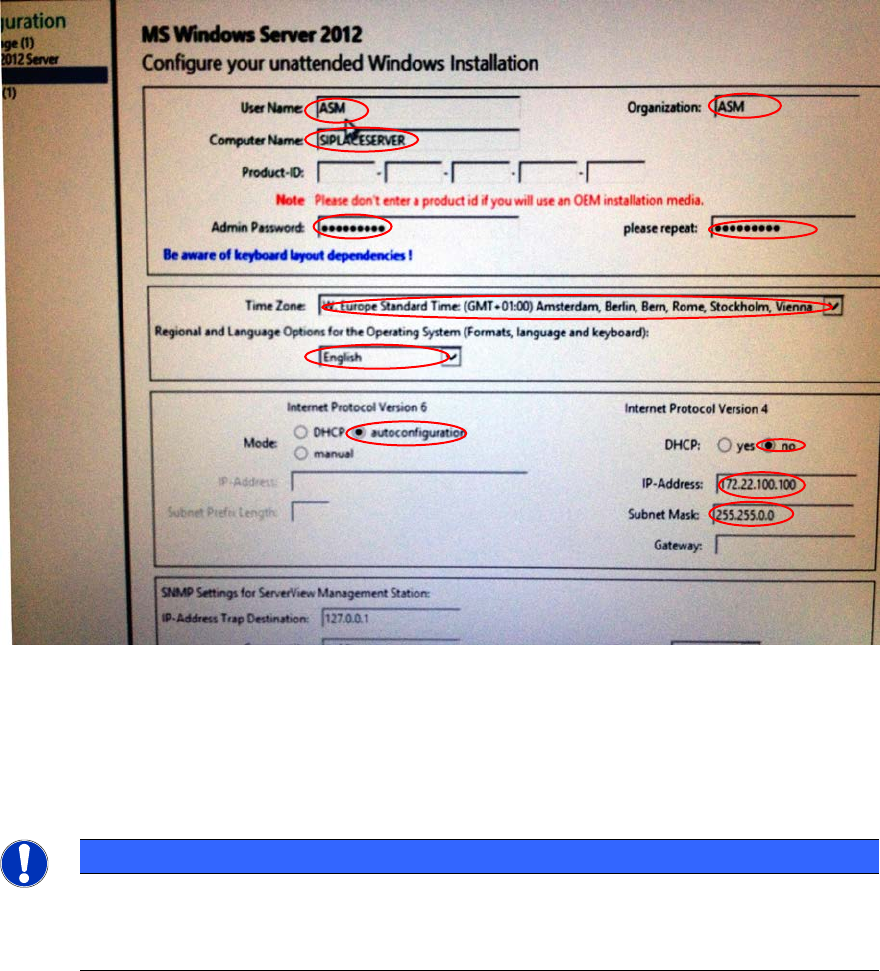
The next configuration screen appears.
Figure 3-12: Settings screen with additional options
► Enter a name for the user and organization.
This information will only be used for registration information – no account will be generated.
► Enter the name of the computer as required.
NOTICE
Ensure that the computer name is valid!
Please select the computer name carefully. Some products, like SQL Server strongly
depend on the computer name and may stop working when you change it afterwards!
► Leave the Product ID field blank.
► Enter the administrator password. For SIPLACE default installations please see the technical
information TI2008-04V08 in which all SIPLACE default passwords are listed.
► Select the appropriate time zone.
► Select English for the Regional and Language Options.
► Select the radio button besides autoconfiguration in the Internet Protocol Version 6 field.
► In the Internet Protocol Version 4 field :
► Select no besides DHCP.
► Enter the IP address for the SIPLACE LAN connection besides IP-Address.
► Enter the appropriate mask besides Subnet Mask. In this documentation, 255.255.0.0 is
used.
Installing Primergy TX150 S8 with Windows Server 2012 07/2012 Edition
26
► In most cases, there is no valid gateway in the SIPLACE LAN, thus leave the Gateway field
blank.
► Click the Next button to continue.
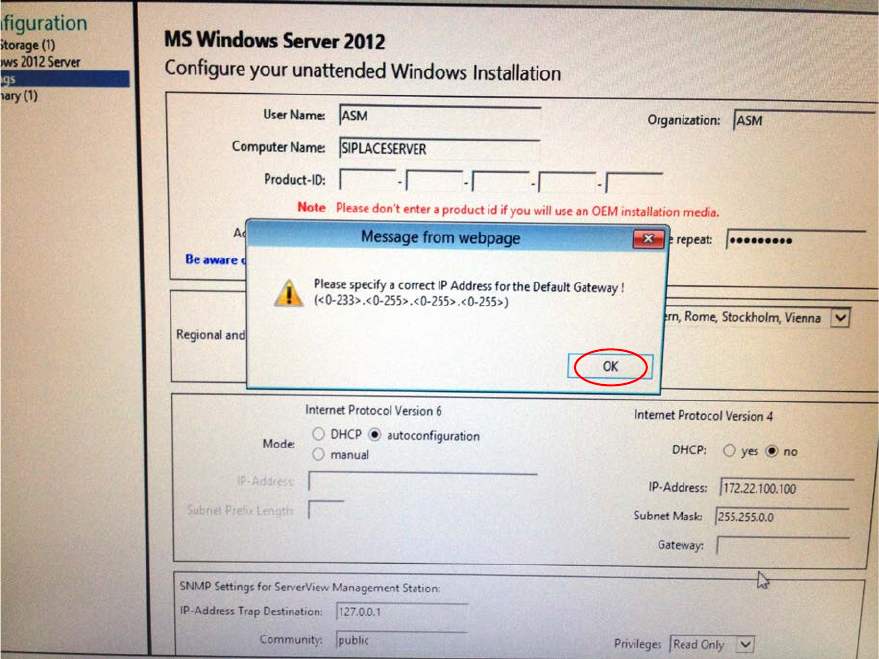
An error message is displayed, prompting you to enter a gateway:
Figure 3-13: Installation Manager prompts to enter a gateway
► Click OK to accept the message.
Installing Primergy TX150 S8 with Windows Server 2012 07/2012 Edition
27
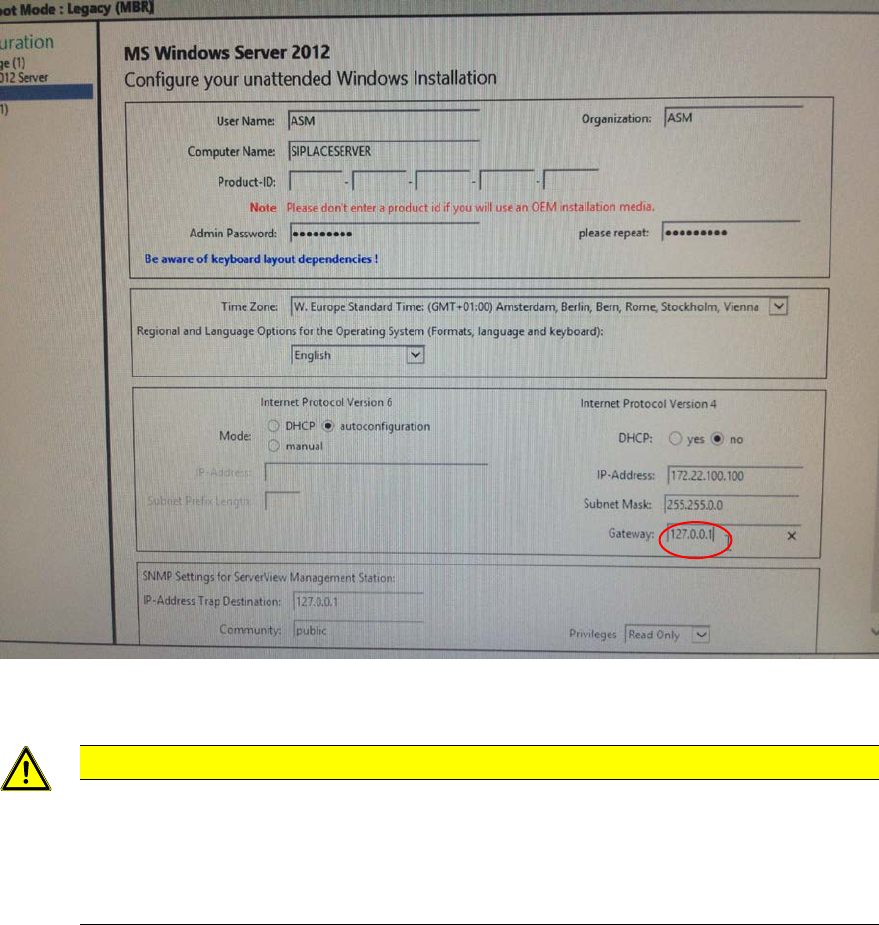
► Enter 127.0.0.1 for the gateway (only temporary!) and click the Next button.
Figure 3-14: Dummy Gateway 127.0.0.1 entered
CAUTION
Wrong default gateway
To proceed with the installation, the value 127.0.0.1 was entered
for the default gateway.
Please keep in mind to remove this IP configuration setting after installation, since wrong
default gateway settings cause network routing problems! Additionally, only existing
gateways should be entered.