00197455-01_IM_TX150SS8_en.pdf - 第43页
Installing Prim ergy TX 150 S8 with W indows S erver 20 12 07/2012 Edit ion 43 The following w indow appe ars. Figure 4-5: Uninstalling AI S – ready to configure w indow ► Click the Nex t > button to continue . After …
Installing Primergy TX150 S8 with Windows Server 2012 07/2012 Edition
42
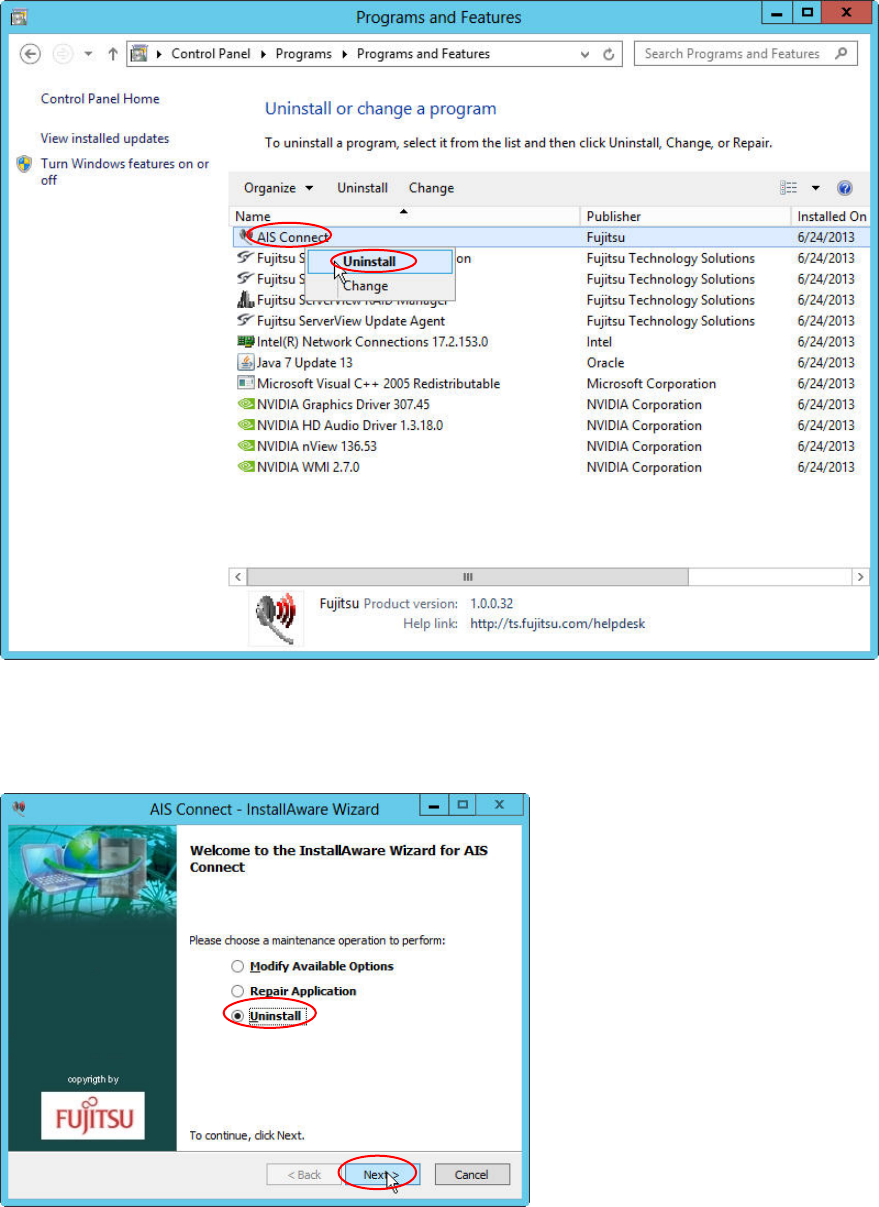
The Programs and Feature window opens.
Figure 4-3: Uninstalling AIS – picture #1
► Right-click on the AIS Connect entry and select Uninstall.
The following window appears.
Figure 4-4: Uninstalling AIS – selecting Uninstall option
► Ensure the option Uninstall is selected.
► Click the Next > button to continue.
Installing Primergy TX150 S8 with Windows Server 2012 07/2012 Edition
43
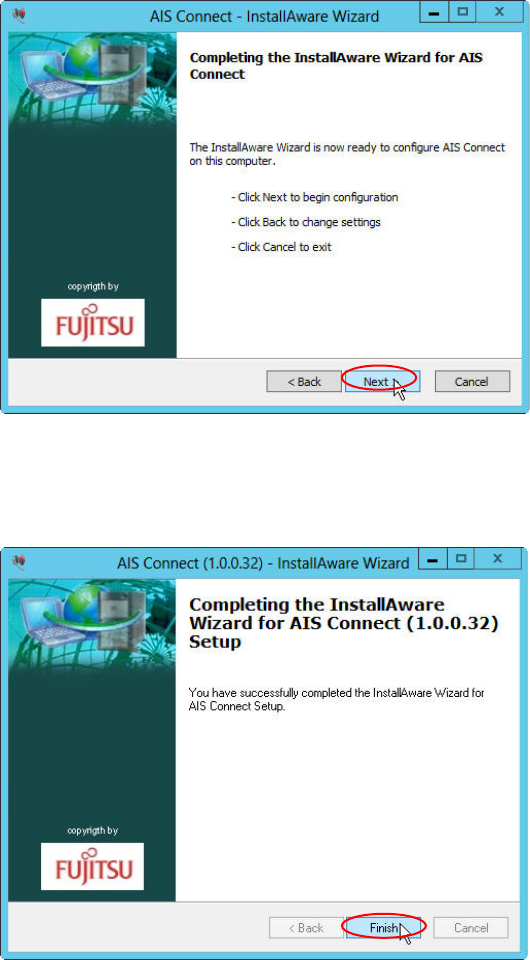
The following window appears.
Figure 4-5: Uninstalling AIS – ready to configure window
► Click the Next > button to continue.
After some seconds, the following window appears.
Figure 4-6:Uninstalling AIS – Setup completed
► Click the Finish button to complete the setup.
Installing Primergy TX150 S8 with Windows Server 2012 07/2012 Edition
44
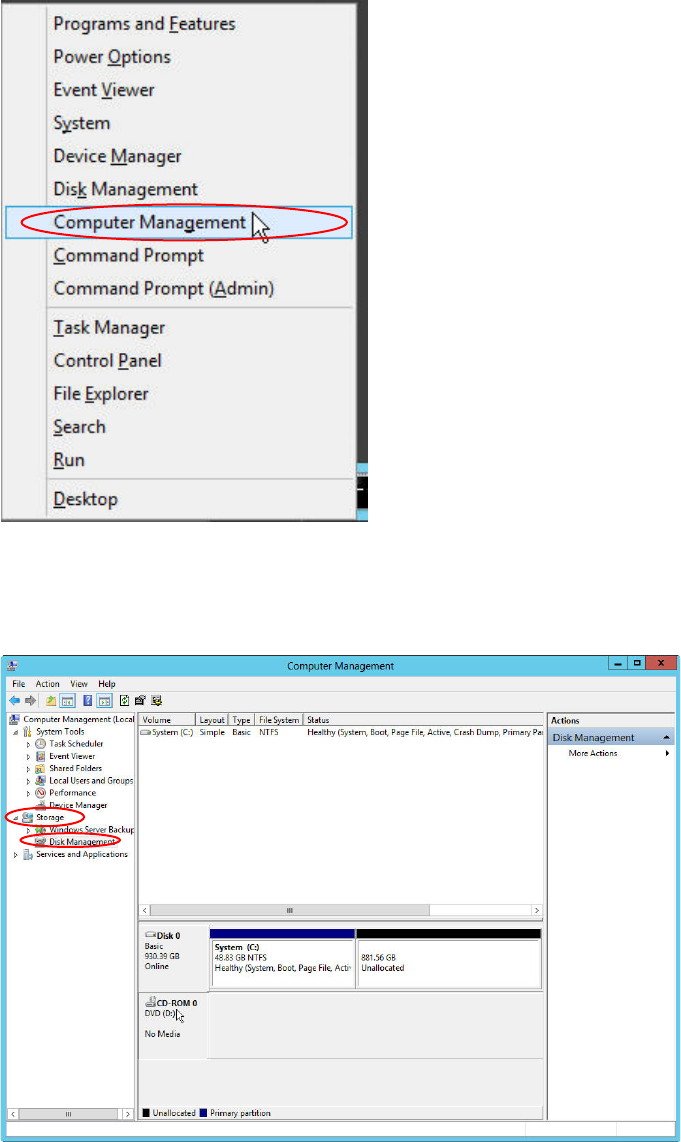
4.2 Changing DVD Drive Letter
To be ready for additional partitions and other new drives, it is recommended to change the letter of
the DVD drive.
Figure 4-7: Starting Computer Management
► Press the Windows key on your keyboard and the “x” key. Click on Computer Management.
The Computer Management opens.
Figure 4-8: Server Manager – Starting Disk Management
► On the left side, select Storage – Disk Management.