00197455-01_IM_TX150SS8_en.pdf - 第51页
Installing Prim ergy TX 150 S8 with W indows S erver 20 12 07/2012 Edit ion 51 Figure 4- 22 : Network Adapters – SIPLACE LAN adapter connect ed You see t wo network adapters displa yed . I f you followed th is docum enta…
Installing Primergy TX150 S8 with Windows Server 2012 07/2012 Edition
50
4.4 Removing Default Gateway
As mentioned before, you have to remove the dummy default gateway that was entered during the
Installation Manager guided setup.
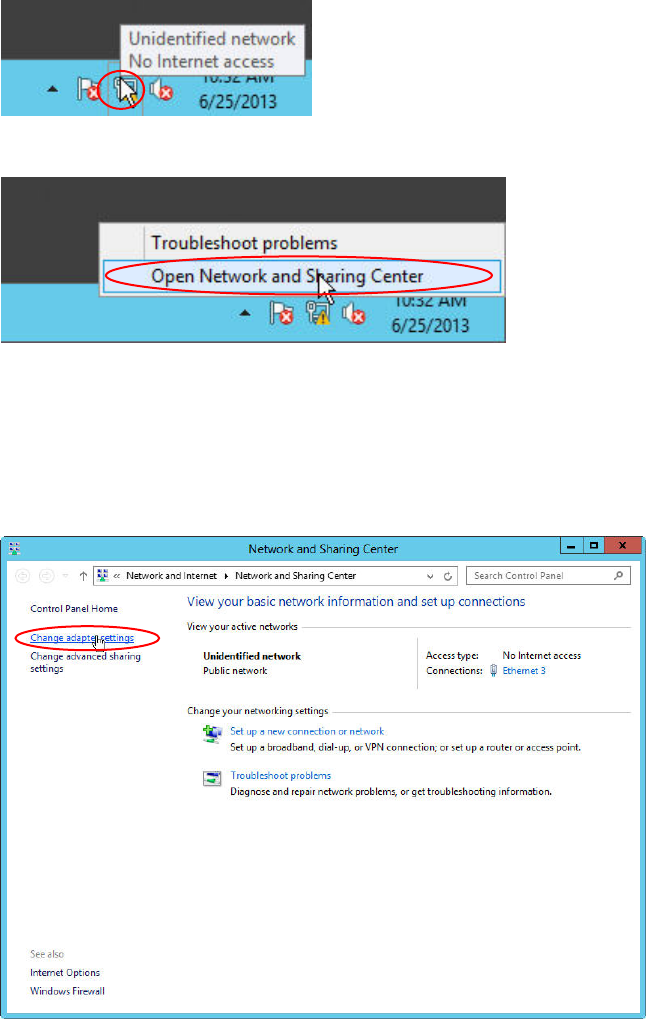
Figure 4-19: Network Icon
Figure 4-20: Opening Network Settings
► Right-click on the Network Icon in the lower right corner and select Open Network and Sharing
Center.
The Network and Sharing Center opens.
Figure 4-21: Network Sharing Center – clicking change adapter settings
► Click on Change adapter settings on the left side.
Installing Primergy TX150 S8 with Windows Server 2012 07/2012 Edition
51
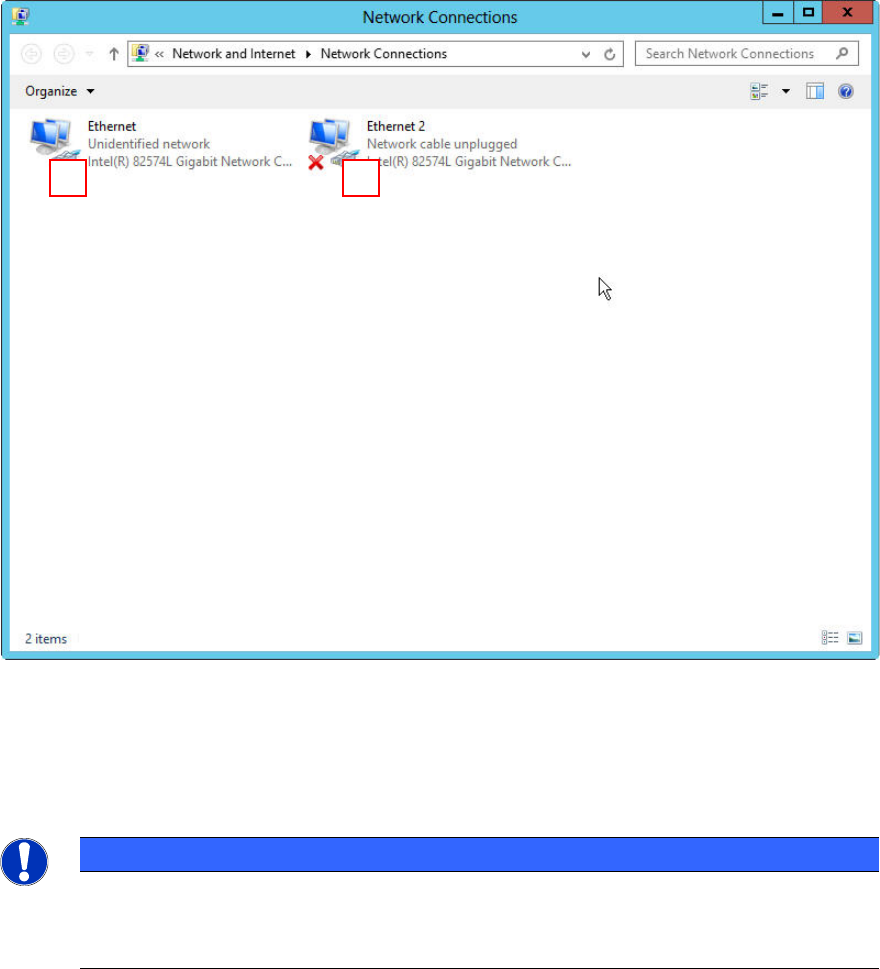
Figure 4-22: Network Adapters – SIPLACE LAN adapter connected
You see two network adapters displayed. If you followed this documentation, only the adapter with
the connection to the SIPLACE LAN should be connected (in this picture #1).
The other adapter is disconnected – it has a red “X” in the symbol (in this picture #2).
NOTICE
Network Card identification
This procedure only works if you have disconnected all other network cables except the
SIPLACE connection, as mentioned in the first chapter.
Now, we need to remove the default gateway from the configuration of the SIPLACE LAN network
adapter.
1
2
Installing Primergy TX150 S8 with Windows Server 2012 07/2012 Edition
52
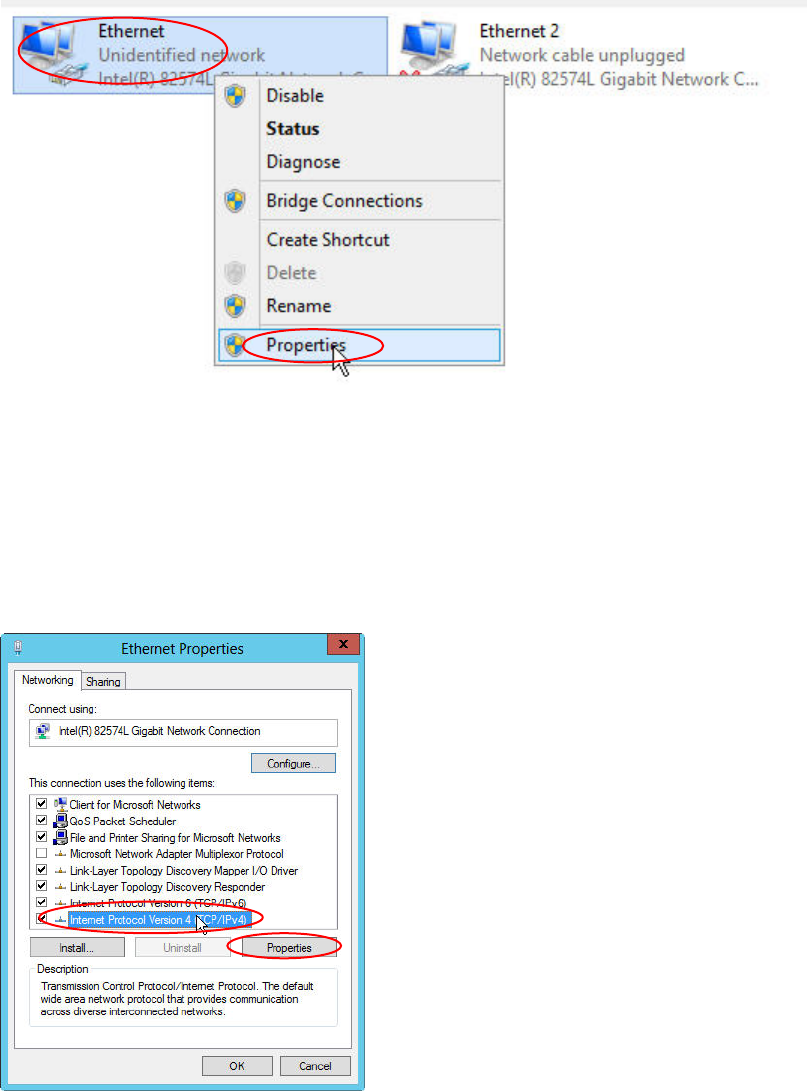
Figure 4-23: Selecting Properties of the connected SIPLACE LAN adapter
► Right-click on the connected SIPLACE LAN network adapter (the other adapter has the state
“Network cable unplugged”)
► Select Properties.
Figure 4-24: Ethernet Properties
► Click the Internet Protocol Version 4 (TCP/IPv4) text (not the checkbox!) and select Properties.