OperatorManual.pdf - 第36页
Networking Use the network to store recip es/products Described here is only working with recipes. The sa me appli es for working with products . Go to the main menu and select [File][Recipe editor] .In the offline recip…
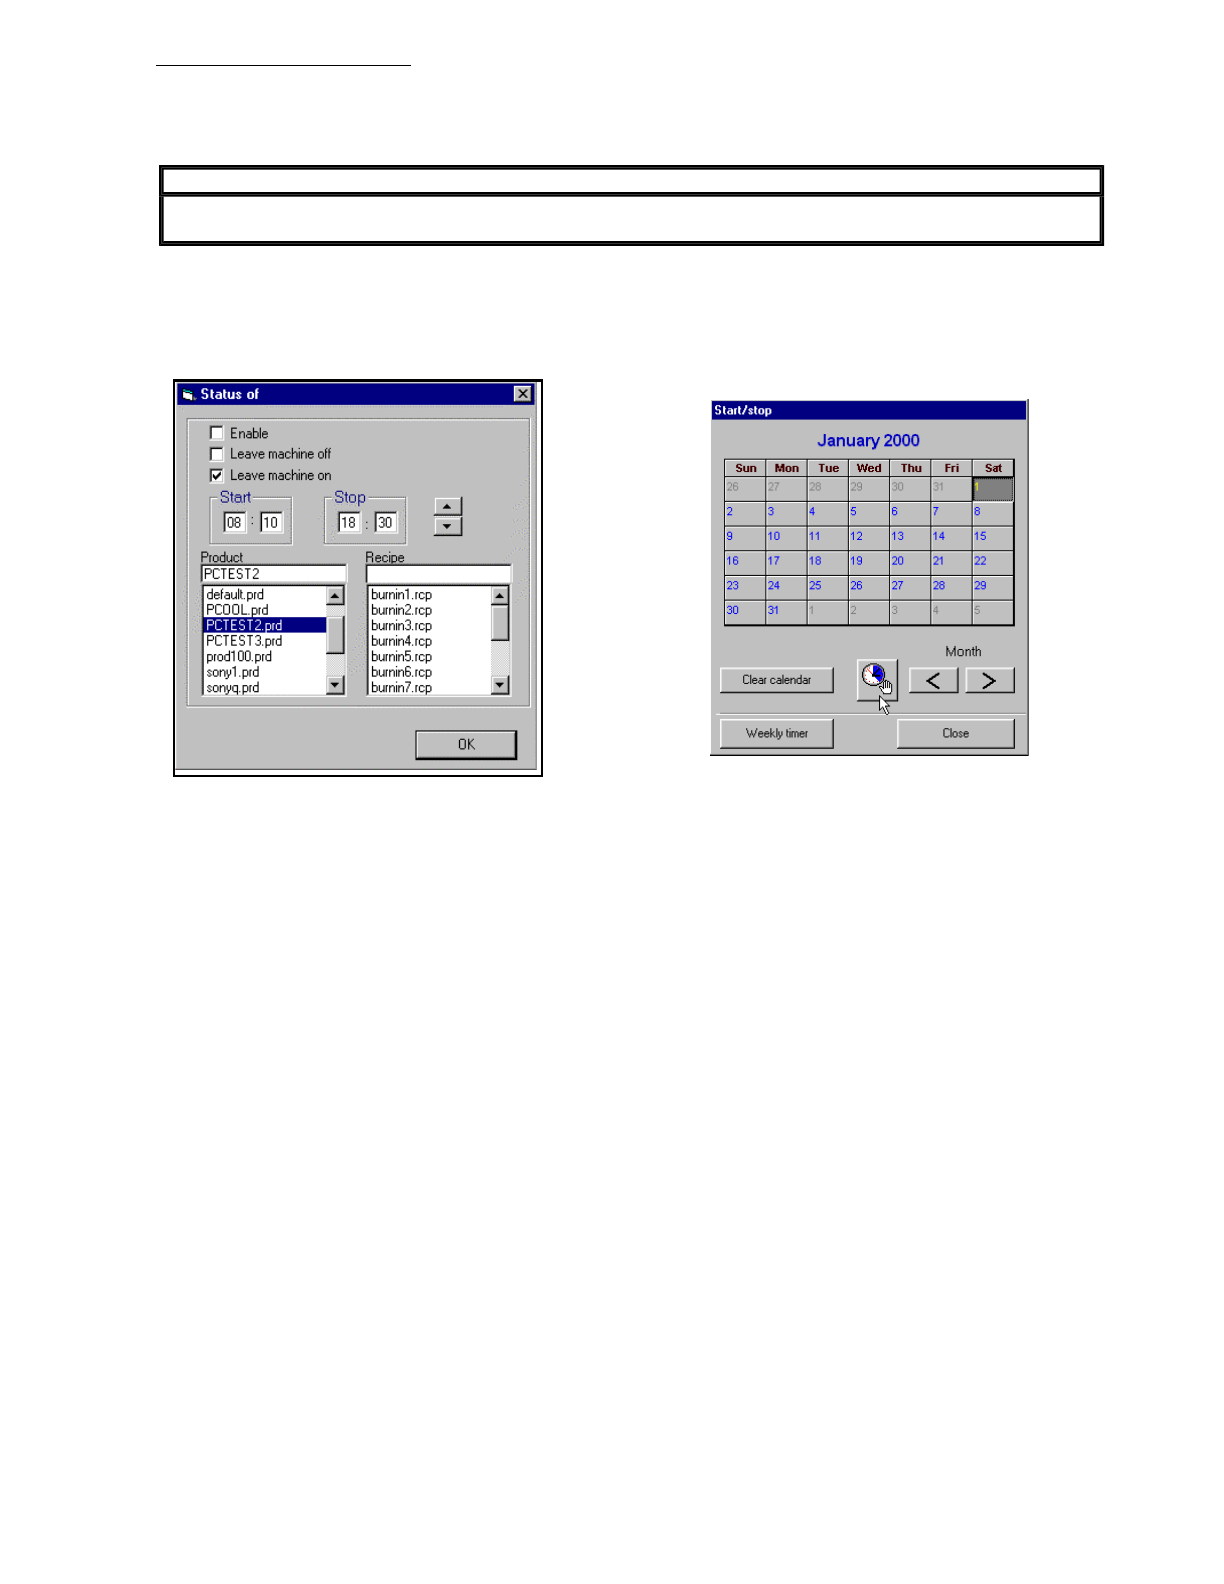
The special event calendar
A
monthly calendar
is displayed with the current day highlighted when entering the special event calendar.
Double click
on a day in the calendar to activate a dialog box to set an event for that day.
There is a choice to
not
start the oven on the selected day or to use the oven on the selected day. Selecting to
use the oven permits times to be entered for the oven to start and stop on the selected day along with a
product/recipe combination to use when starting the oven. All settings are stored in the Windows registry.
A green LED appears on the monthly calendar for the selected day if an event has been programmed.
How does the timer work?
The timer function emulates a programmable seven day home appliance timer with an active and a standby mode.
Active mode is after the timer has started the oven by closing its contact. The timer function icon button is
displayed in green with its contact closed while the timer is in active mode. Standby mode is after the timer has
stopped or shutdown the oven by opening its contact. The timer function icon button is displayed in grey with its
contact open while the timer is in standby mode. The timer shuts down the oven and changes to standby mode
when the current time is equal to the stop time setting for the current day. When the timer is in standby mode the
oven can only restarted by clicking on the timer Icon, changing the timers mode from standby to active, which
changes its contact from an open to a closed state. The timer starts the oven and changes to active mode when
the current time is equal to the start time for the current day. When the timer is in active mode the oven can be
shutdown and restarted at any time. A time setting of 00:00 for a stop or start event is disregarded and indicates
that no event has been set. This allows the timer to maintain the last state of contact over several days if required.
For example an oven can be started at the beginning of the work week with a start event setting and stopped or
shutdown at the end of the work week with a stop event setting.
IMPORTANT
Events are not permitted to be set for the current day or earlier. A message dialog is displayed
with an attem
p
t to set an invalid event.
Operator manual 35 August 2003

Networking
Use the network to store recipes/products
Described here is only working with recipes. The same applies for working with products. Go to the main menu
and select
[File][Recipe editor]
.In the offline recipe editor, it is possible to set the recipe directory to a path on the
network instead of the local XPM recipe directory structure.Press the button in the Recipe network directory area
to browse the network for the folder you want to store your recipes in.
In the same area you can check the Use network directory to activate the use of that folder.
Using the network folder gives you the following functionality:
1.
change recipe(s) and/or product(s)on the network folder
2.
copy recipe(s)/product(s) from the local XPM path to the network folder
3.
startup a recipe/product from the network folder
1
. Change recipe(s) on the network folder
Changing recipe(s) on the network folder works in the same way as changing them on the local XPM path.
2
. Copy recipe(s) from the local XPM path to the network folder
To copy recipe(s) from your local XPM path to the network folder, you have to uncheck the Use network directory
so that you have access to the local recipes. Select the local recipe you want to save on the network, right click
the mouse and choose the send to network directory menu item.
3
. Startup a recipe from the network folder
Make sure that the Use network dir is checked, if you want to use it. To run a recipe from the network folder works
in the same way as running a recipe from the local XPM path.
How to setup a recipe using edit online
z Go to the main menu and select [File][Recipe/product editor].
z
Uncheck the Use network dir option. This will give you access to the recipes on the local PC.
At this point, edit online is available.
z
After setting up your new recipe, go back to the [File][Recipe/product editor].
z Copy the new recipe to the network.
z Check the Use network dir option so that the network folder will be us
IMPORTANT
The network location
y
ou want to use has to be ma
pp
ed on the machine PC
RESTRICTIONS
The machine PC has to be connected to a network.You cannot have a pool of recipes with
different XPM machine types. If you have different machine types, you will have to use different
directories on the network. You are not allowed to use edit online. If you want to change a recipe
on the network folder,
y
ou have to co
py
them from the local XPM
p
ath or edit them offline
.
IMPORTANT
If you create a new recipe, the recipe template used will be the default recipe/product in the local
XPM reci
p
e
p
ath root director
y
Operator manual 36 August 2003
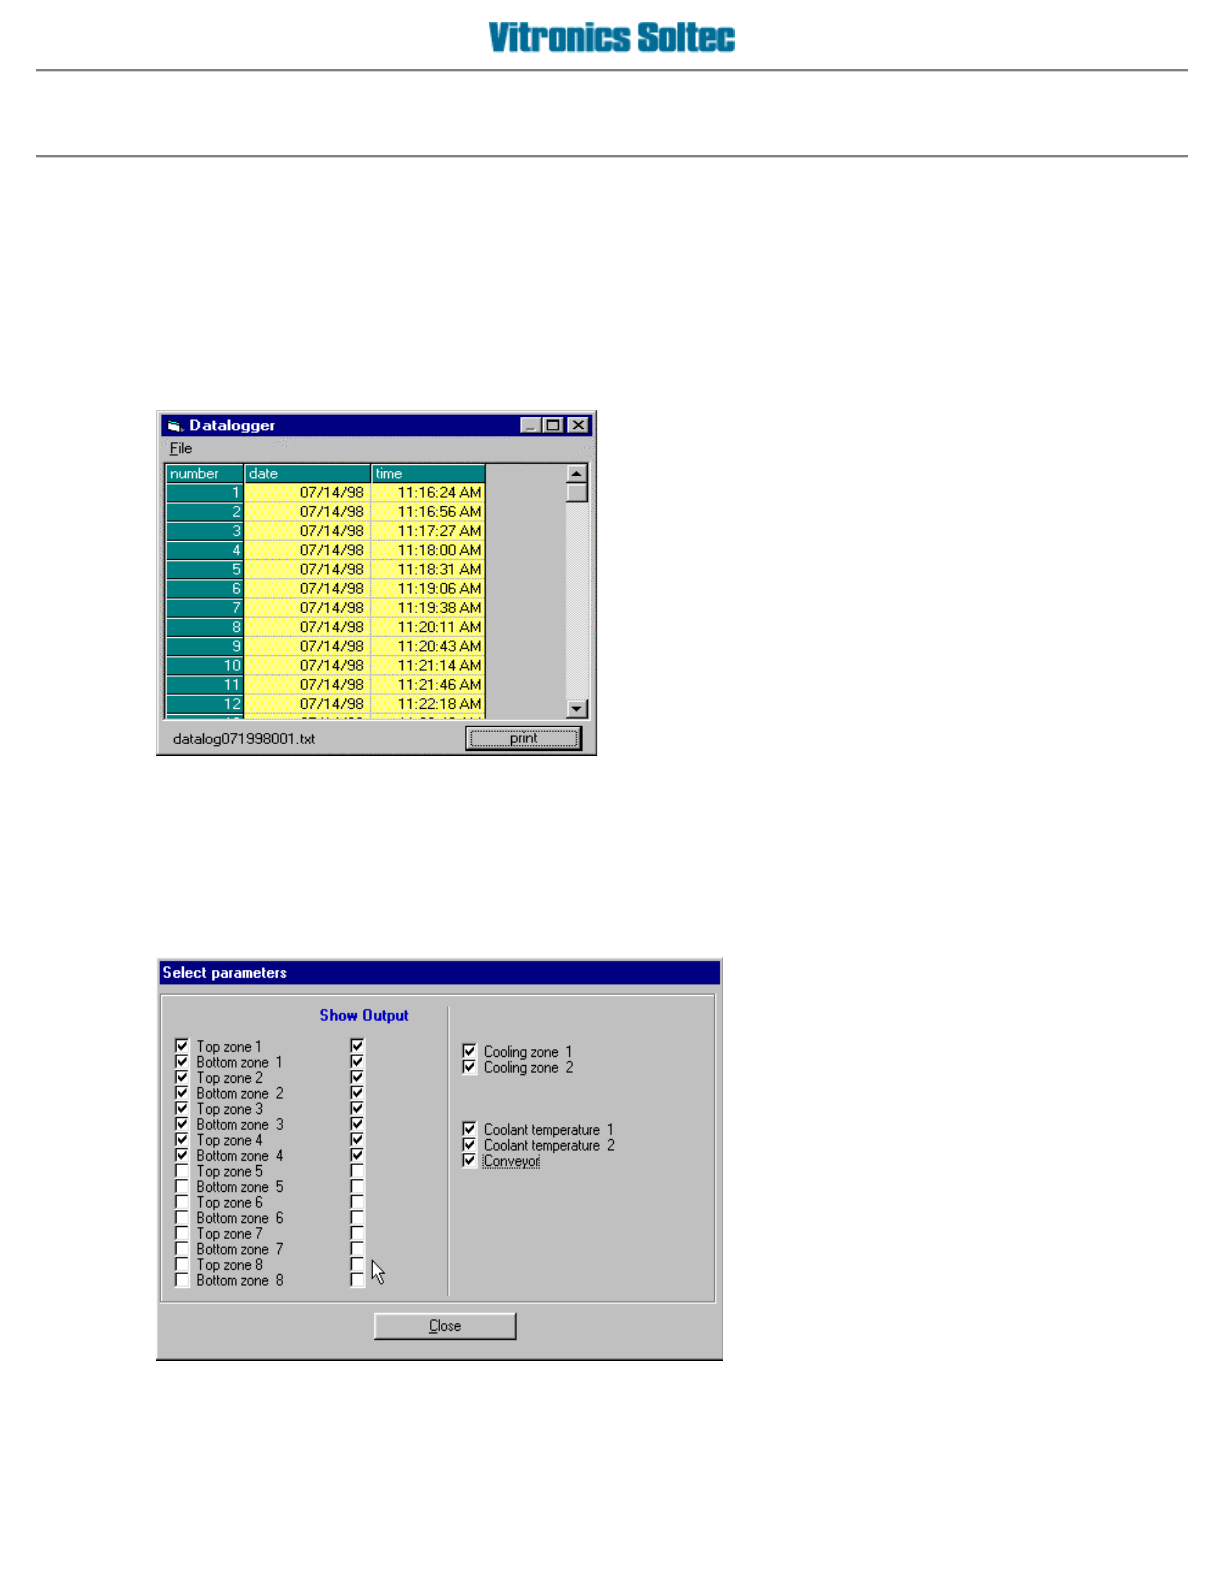
Datalog
The Datalog keeps a record of set point measured values and output values, and is periodically recorded
.
The
record is stored on the hard disk and cannot be erased within the Oven Control Program. When the space
allocated for the datalog files is full, the oldest entries are discarded. Viewing and/or printing the Datalog is
achieved by selecting
Log
, then
View,
then
Datalog
, to display the
Datalog Dialogue Box:
PRINT
will send ALL the data in the DATALOG files to a connected printer, or to disk by selecting Print to file in
the Print Dialog Box. (See Printing in Table of Contents) The print-out range is NOT selectable)
DATALOG ENTRY DESCRIPTIONS
At the Main Pull-Down Menu, select:
Log
,
View
,
Data
Log, File
, and
Select
Parameters
to display this Dialogue
Box.
The Datalogger records ALL events listed in this Dialogue Box, however, which ones are displayed for viewing is
selectable by ‘clicking’ the small white boxes to display the check-marks
The columns can be stretched to display information as
desired
Operator manual 37 August 2003