JUKI FX-3R MAINTENANCE GUIDE.pdf - 第137页
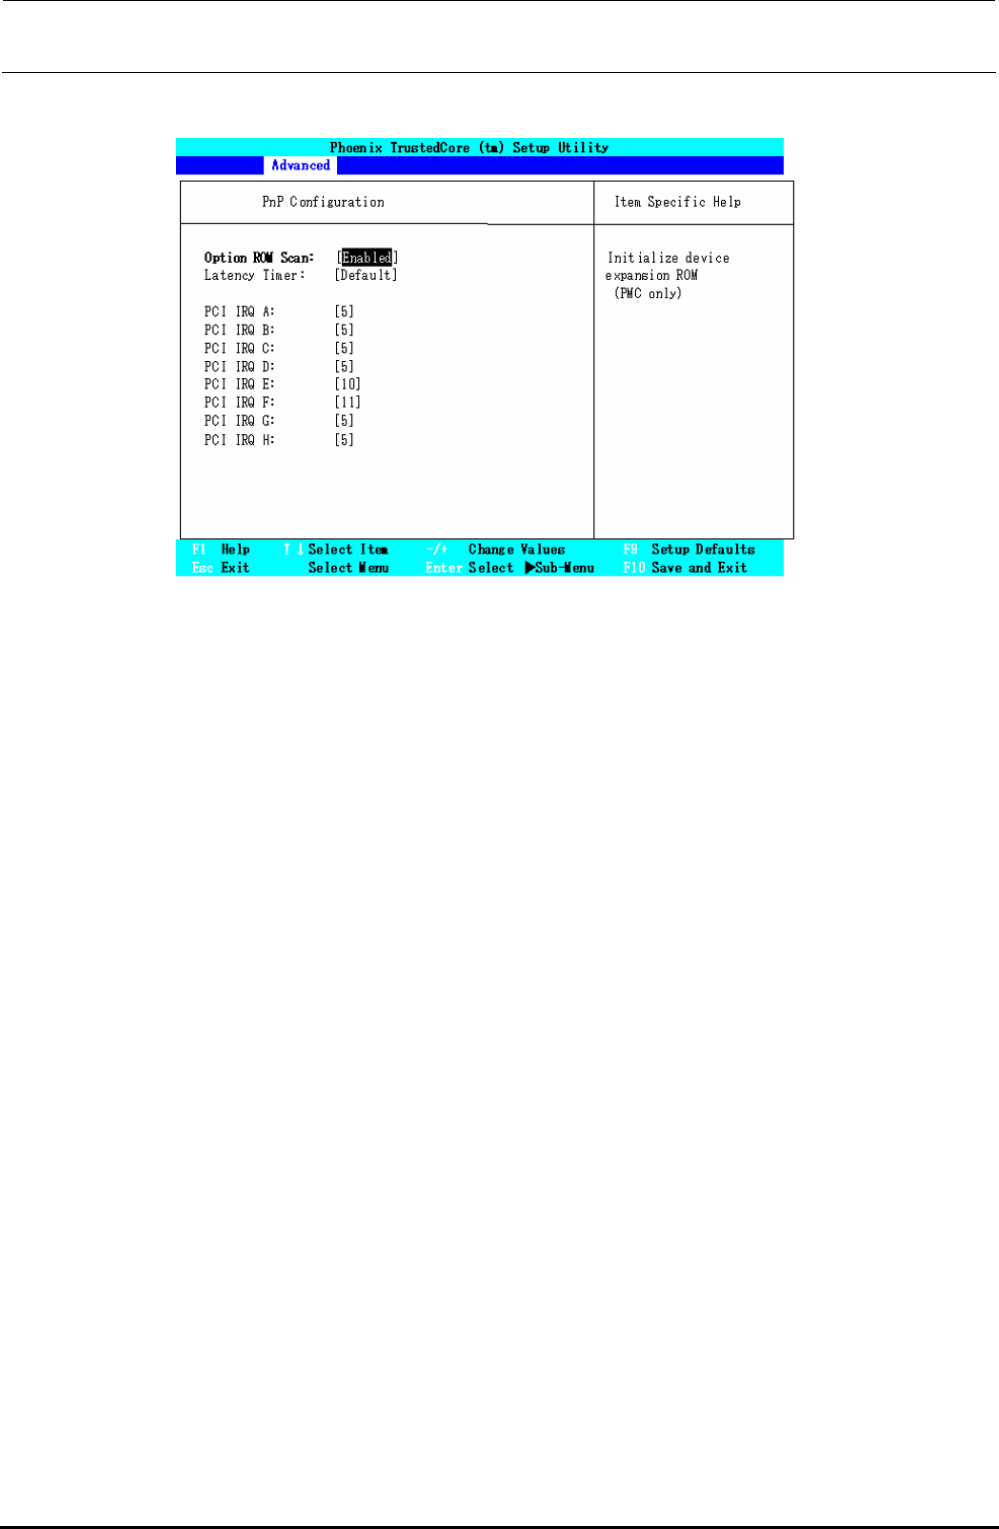
FX-3R Maintenance Guide 12-8 4) Set “ PnP Configuration ” . Set “ PCI IRQ ” on this screen. Figure 12-2-2-1-4 BIOS Screen (PnP Configuration Screen) Move the cursor with the [ ↑ ] or [ ↓ ] key and press the <+> or …
FX-3R Maintenance Guide
12-7
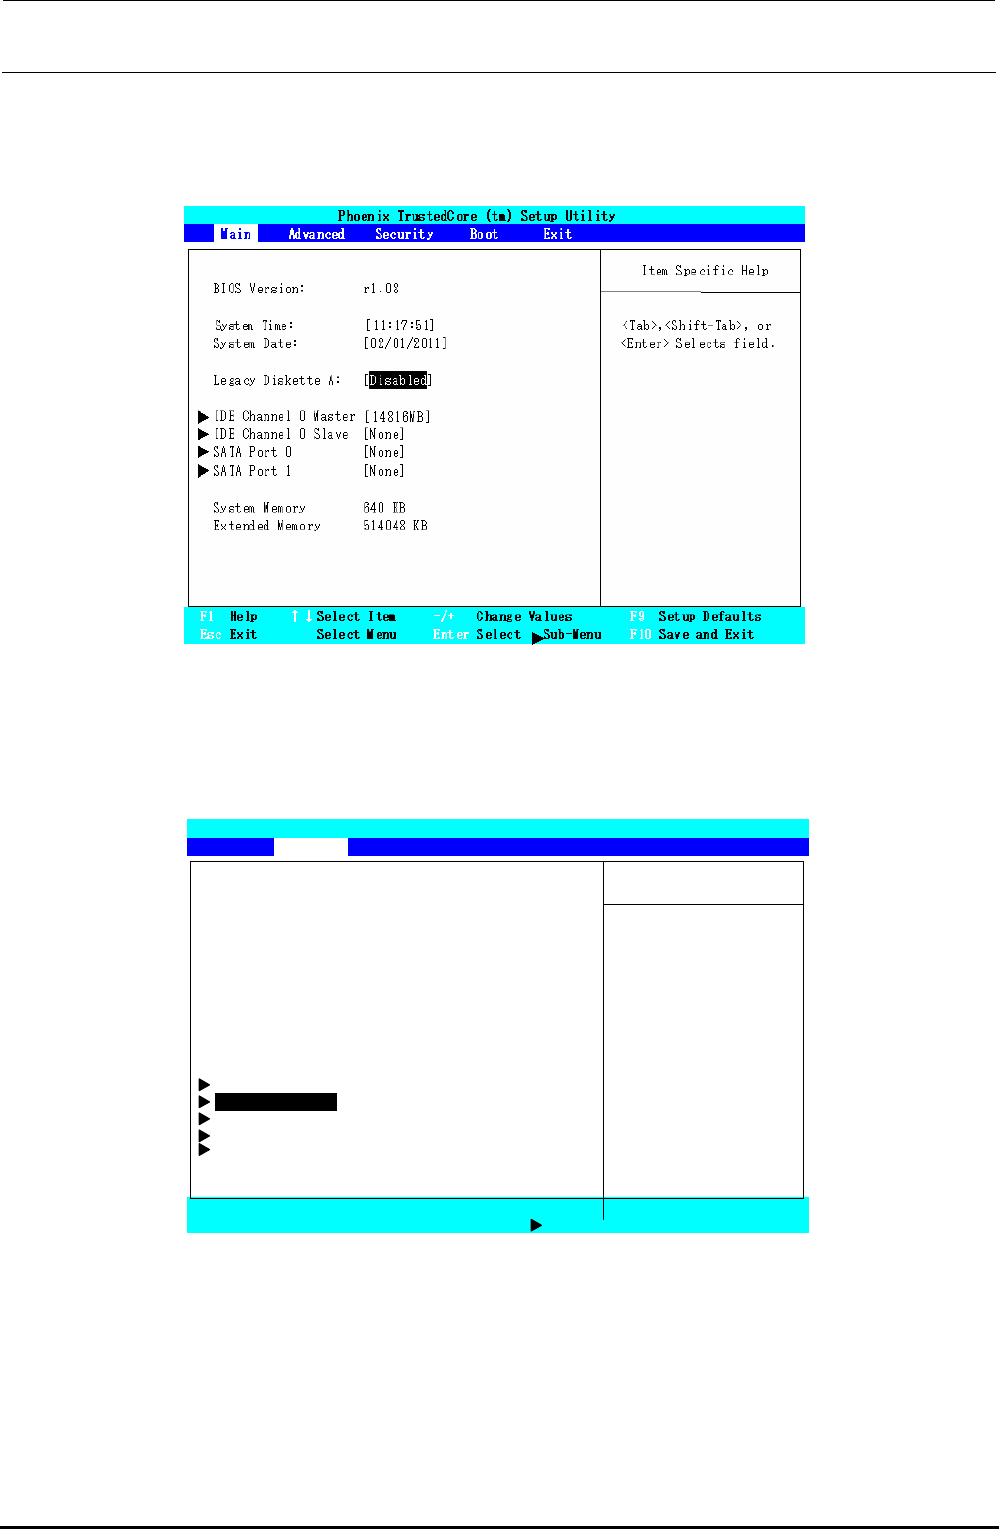
2) Set the floppy disk drive.
Select the “Main” menu screen with the [←] or [→] key. Move the cursor (highlighted
portion) to “Legacy Diskette A:” with the [↑] or [↓] key, and press the <ENTER> key. Select
“Disabled”, and press the <ENTER> key.
Figure 12-2-2-1-2 BIOS Screen (Main Screen)
3) Select the “PnP Configuration” screen.
Select the “Advanced” menu screen with the [←] or [→] key. Move the cursor (highlighted
portion) to “PnP Configuration” with the [↑] or [↓] key, and press the <ENTER> key.
Phoenix TrustedCore (tm) Setup Utility
Main Advanced Security Boot Exit
Item Specific Help
Reset Configuration Data: [No]
Large Disk Access Mode: [DOS]
Local Bus IDE adapter: [Primary] Select
‘
Yes
’
if you
Legacy USB Support: [Enabled] Want to clear the
Summary Screen: [Disabled] Extended System
Boot-time Diagnostic Screen: [Disabled] Configuration
QuickBoot Mode: [Enabled] Data (ESCD) area.
Extended Memory Testing: [Just Zero it]
PXE OPROM: [Disabled]
Keyboard Features
PnP Configuration
CPU Control Sub-Menu
ICH Control Sub-Menu
SIO Control Sub-Menu
F1 Help ↑↓Select Item -/+ Change Values F9 Setup Defaults
Esc Exit Select Menu Enter Select Sub-Menu F10 Save and Exit
Figure 12-2-2-1-3 BIOS Screen (Advanced Screen)
Rev. 1.00
FX-3R Maintenance Guide
12-8
4) Set “PnP Configuration”.
Set “PCI IRQ” on this screen.
Figure 12-2-2-1-4 BIOS Screen (PnP Configuration Screen)
Move the cursor with the [↑] or [↓] key and press the <+> or <−> key, or the <ENTER> key.
Change the setting with the [↑] or [↓] key. So, change the following items.
・ Change “PCI IRQ A:”.
Move the cursor to “PCI IRQ A:” and set “5”.
・ Change “PCI IRQ B:”.
Move the cursor to “PCI IRQ B:” and set “5”.
・ Change “PCI IRQ C:”.
Move the cursor to “PCI IRQ C:” and set “5”.
・ Change “PCI IRQ D:”.
Move the cursor to “PCI IRQ D:” and set “5”.
・ Change “PCI IRQ E:”.
Move the cursor to “PCI IRQ E:” and set “10”.
・ Change “PCI IRQ F:”.
Move the cursor to “PCI IRQ F:” and set “11”.
・ Change “PCI IRQ G:”.
Move the cursor to “PCI IRQ G:” and set “5”.
・ Change “PCI IRQ H:”.
Move the cursor to “PCI IRQ H:” and set “5”.
After the setting has been completed, press the <ESC> key to return to the screen, on which
you can select a desired menu.
Rev. 1.00

FX-3R Maintenance Guide
12-9
5) Set “Boot priority order”.
Select the “Boot” menu screen with the [←] or [→] key. Set “Boot priority order” to the order
shown in the Fig. below while referring to the operating procedures.
Figure 12-2-2-1-5 BIOS Screen (Boot Screen)
・ “Boot” menu screen operating procedures
(1) Changing the order in “Boot priority order:”
Move the cursor to an item you want to move with the [↑] or [↓] key.
Move the cursor up or down with the <+> or <−> key.
(2) Moving from “Excluded from boot order:” to “Boot priority order:”.
Move the cursor to an item you want to move with the [↑] or [↓] key.
Move to “Boot priority order:” with the <X> key.
∗ In the same manner, you can move from “Boot priority order:” to “Excluded
from boot order:”.
Rev. 1.00