TR7600 SIII_Series_Installation_en_v_2_0_2.pdf - 第38页
Test Research, Inc . TR7600 SII I Series U ser Guide – I nstallatio n 28 Change the plug type If your power is 220V 3-p has e, but the plug type is different from that of TRI , you can check the wi ring diagrams listed…
Test Research, Inc.
TR7600 SIII Series User Guide – Installation 26
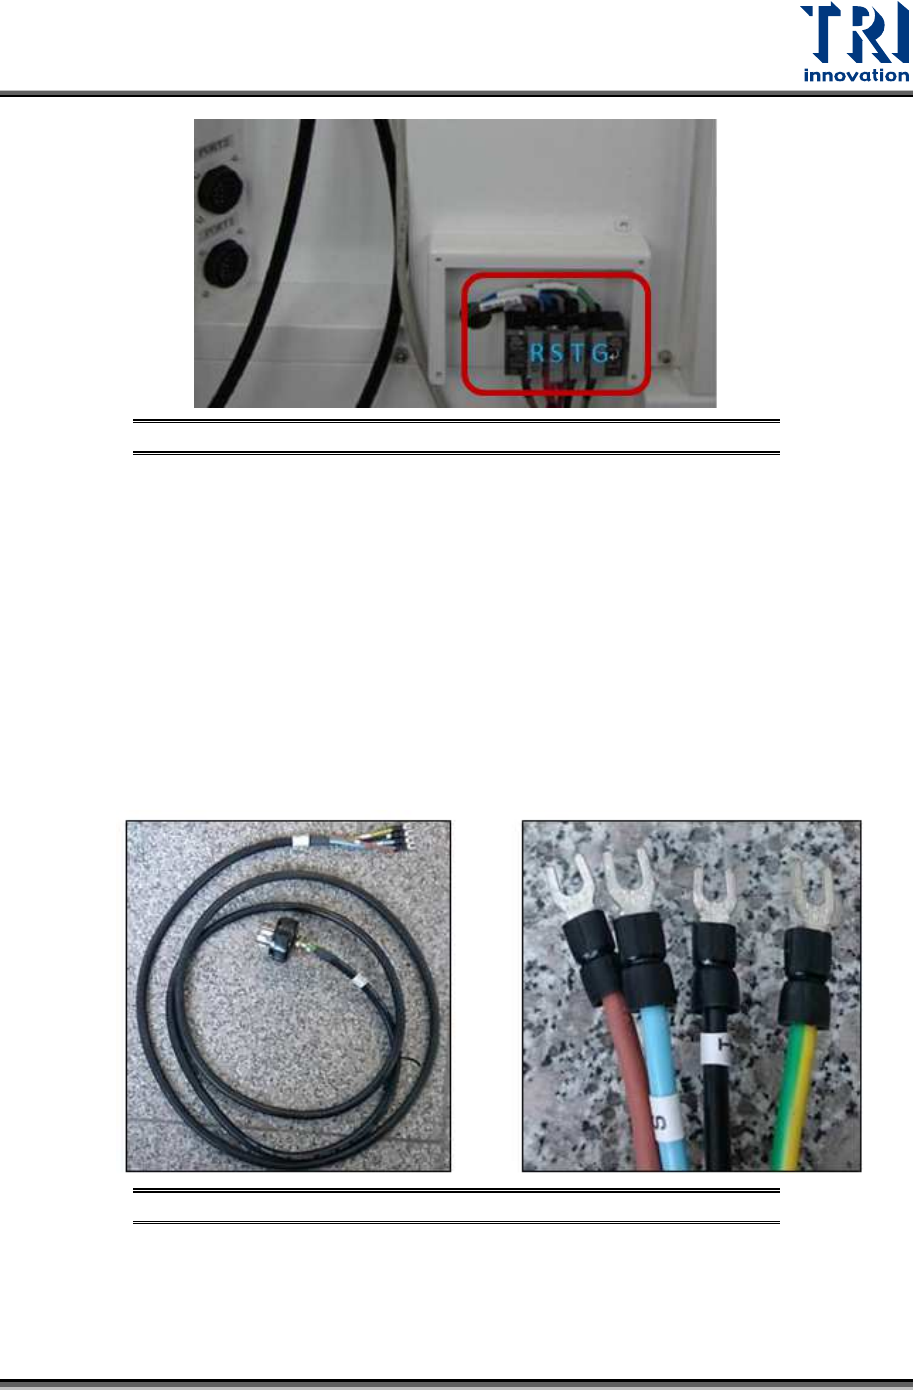
Figure 47: Phase Terminals
Never connect the grounding wire to any of the live wires(R-S-T) or the neutral wire. It is
very dangerous. Additionally, if you don’t want to use a plug, you can use your factory
cables and connect them to the designated terminals.
2.14 Switching on the System
If the power at customer site is 220V 3-phase
In this case, you can follow the steps below to turn on the power.
1) Take TRI cable from the accessory box and connect the brown, blue, black, and
yellow-green wires to the terminals in sequence.
Figure 48: TRI 3-phase Cable Wiring
2) Insert the plug into the factory wall socket.
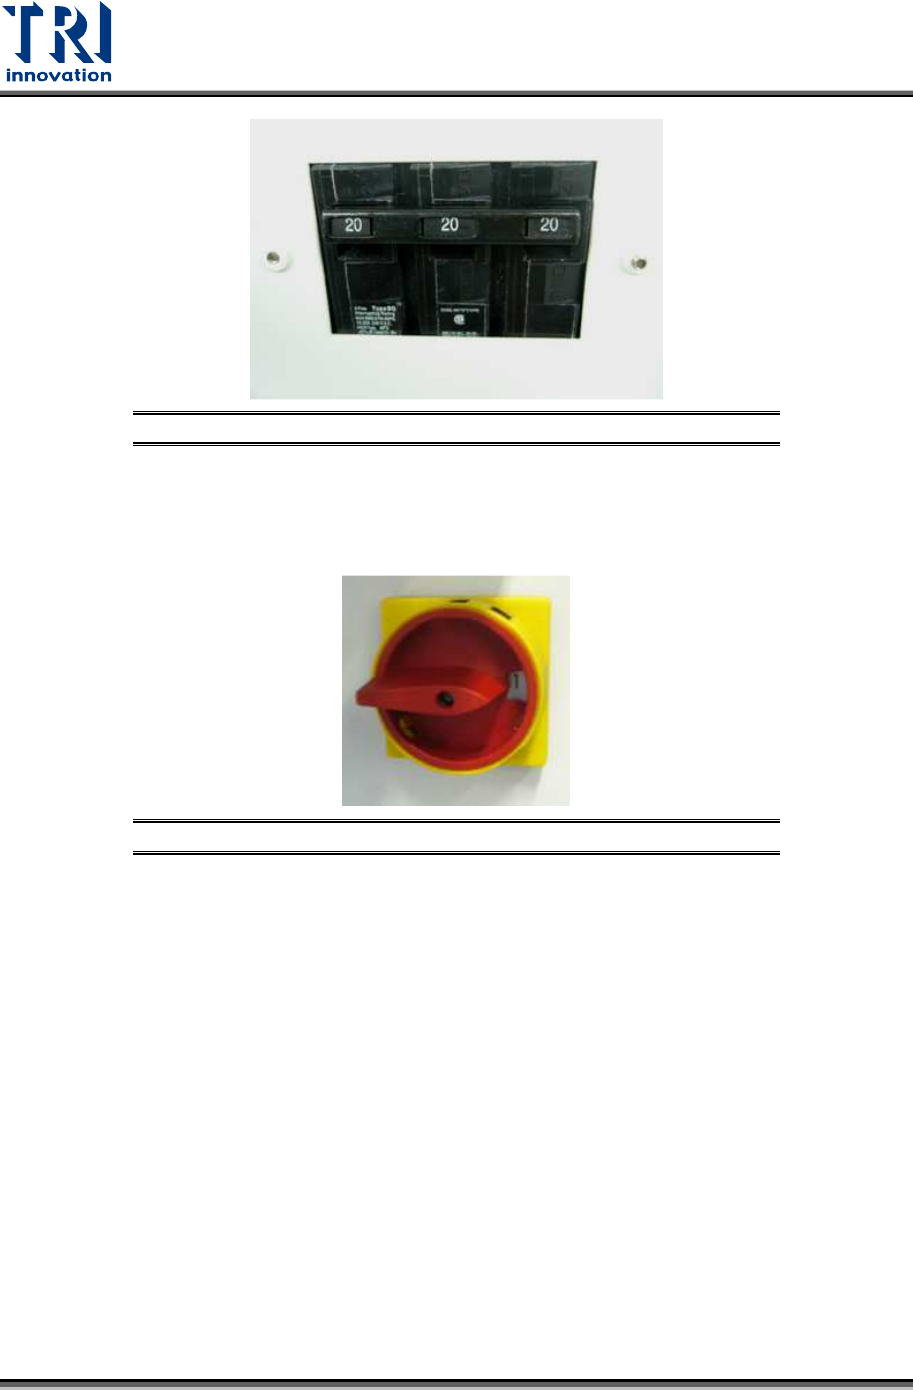
3) Turn on the no fuse power switch. You can pull up the switch lever to turn on the
mains power, or push the lever down to cut the mains power.
Test Research, Inc.
27 TR7600 SIII Series User Guide – Installation
Figure 49: No Fuse Power Switch
4) Turn the power switch shown below clockwise to see the number 1 and then the
power of the machine will be turned on. If you want to turn off the power, you can turn
this power switch counterclockwise to see the number 0 and then the power of the
machine will be turned off.
Figure 50: Turn the Power Switch Clockwise to Turn Power On
If the power at customer site is NOT 220V 3-phase (ex. 380V 3-phase or 480V 3-
phase)
1) You must use a transformer.
2) Please discuss the transformer setup with a TRI sales representative or FAE.
Test Research, Inc.
TR7600 SIII Series User Guide – Installation 28
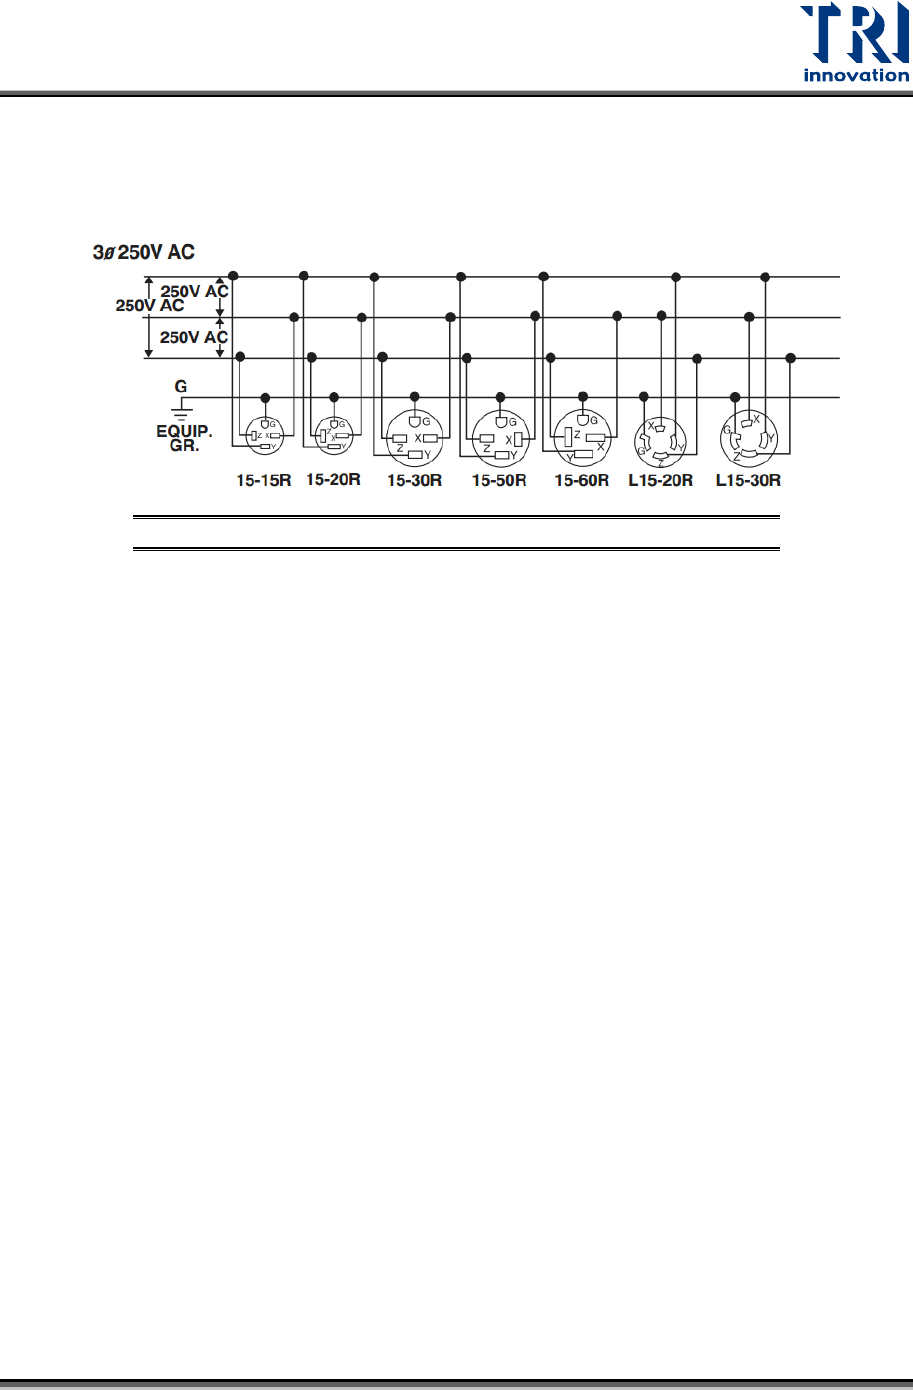
Change the plug type
If your power is 220V 3-phase, but the plug type is different from that of TRI, you can
check the wiring diagrams listed below to change TRI plug to fit your factory.
Figure 51: Change the Plug Type
2.15 Tube Warm Up
1) Open the main program and start to warm up the X-ray tube.
2) It will take a longer time, about 30-50 minutes, to finish the first time warm-up.
After the warm-up is complete, the status of tube will display Ready.