IPC-7721(S).pdf - 第52页
NOTE For bubble free epoxy, remove the clip separating the resin and activator. Cut open one end of the Epoxy tube and squeeze the contents into a mixing cup. Slowly stir the mixture with the mixing stick. Be sure to sti…
OUTLINE
This procedure covers epoxy mixing and handling. The epoxy covered by this pro-
cedure has multiple uses including solder resist repair, base board repair, circuitry
over-coating and delamination repair.
NOTE
For high strength or high temperature applications two part epoxies will generally
have the best properties.
REFERENCES
2.1 Handling Electronic Assemblies
2.2 Cleaning
2.5 Baking and Preheating
TOOLS AND MATERIALS
Balance/Scale
Cleaner
Color Agent, Various Colors
Epoxy
Foam Swab
Heat Lamp
Mixing Cup
Mixing Stick
Oven
Wipes
PRINTED WIRING BOARD PREPARATION
The area where the epoxy is to be applied should be prepared prior to mixing the
epoxy. This preparation may include preheating the affected area to improve absorp-
tion of the applied epoxy. The entire printed wiring board may also be heated in an
oven or with a heat lamp.
CAUTION
Some components may be sensitive to high temperatures.
CAUTION
Avoid skin contact with epoxy materials.
PROCEDURE - Prepackaged Two Part Epoxy
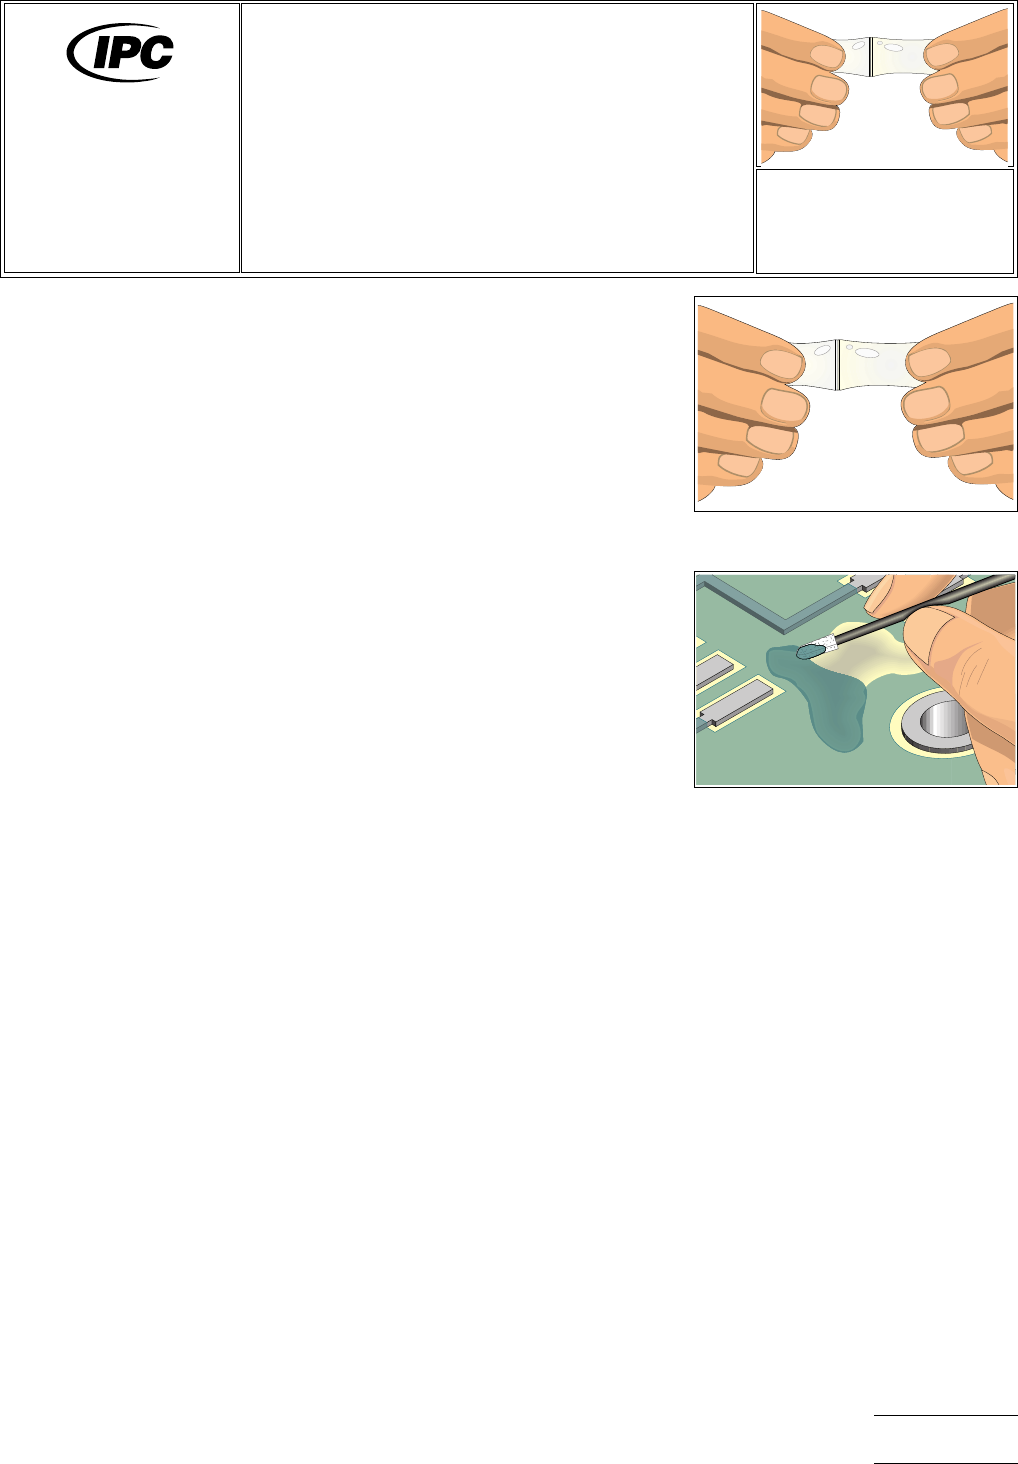
1. Remove the clip separating the resin and activator. Mix by squeezing both halves
together with your fingers. Mix for at least one minute to ensure a complete mix
of the resin and activator. (See Figure 1.)
2. Cut open one end of the epoxy tube and squeeze the contents into a mixing cup.
Mix again with a mixing stick to ensure a thorough mixture of the resin and acti-
vator.
Figure 1 Mix resin and activator
inside package of prepackaged epoxy.
Figure 2 Apply epoxy. Foam swab
may be used to add texture.
7721
Repair and
Modification of
Printed Boards and
Electronic Assemblies
Revision:
Date: 2/98
Epoxy Mixing
and Handling
Number: 2.6
Product Class: R, F, W, C
Skill Level: Intermediate
Level of Conformance: High
Material in this manual was voluntarily established by Technical Committees of the IPC. This material is advisory only and its
use or adaptation is entirely voluntary. IPC disclaims all liability of any kind as to the use, application, or adaptation of this
material. Users are also wholly responsible for protecting themselves against all claims or liabilities for patent infringement.
Equipment referenced is for the convenience of the user and does not imply endorsement by the ipc.
Page1of2

NOTE
For bubble free epoxy, remove the clip separating the resin and activator. Cut
open one end of the Epoxy tube and squeeze the contents into a mixing cup.
Slowly stir the mixture with the mixing stick. Be sure to stir the mixture for at least
2 minutes to ensure that all the resin and actuator have completely mixed.
3. If needed, add color agent to the mixed epoxy. Stir slowly to prevent bubbles.
CAUTION
Be sure the color agent is compatible with the epoxy mixture.
4. Apply or use as needed. (See Figure 2.)
5. Cure the epoxy per the manufacturer’s recommendations.
EVALUATION
1. Visual examination of epoxy for texture and color match.
2. Testing of epoxy surface for complete cure.
3. Electrical tests as applicable.
NOTES
IPC-7721
Number: 2.6
Revision:
Date: 2/98
Subject: Epoxy Mixing and Handling
Page2of2
OUTLINE
This method can be used to add, change or replace legend and markings on printed
boards or printed board assemblies. This method uses epoxy ink and an ink stamp
to place the legends on the printed board surface in much the same manner as tak-
ing a ‘‘finger print.’’
REFERENCES
2.1 Handling Electronic Assemblies
2.2 Cleaning
2.5 Baking and Preheating
2.6 Epoxy Mixing and Handling
TOOLS & MATERIALS
Cleaner
Cleaning Wipes
Epoxy Ink
Ink Plate
Ink Roller
Knife
Microscope
Oven
Peg Stamps
PROCEDURE
1. Clean the area.
2. Scrape off any remaining character or legend with a knife and clean the area.
CAUTION
Abrasion operations can generate electrostatic charges.
3. Select the appropriate characters from the peg stamp set or have a special stamp
made up.
4. Mix the epoxy ink. White is the most common color. Spread a thin even coating
of the epoxy ink on the ink plate or on a smooth surface.
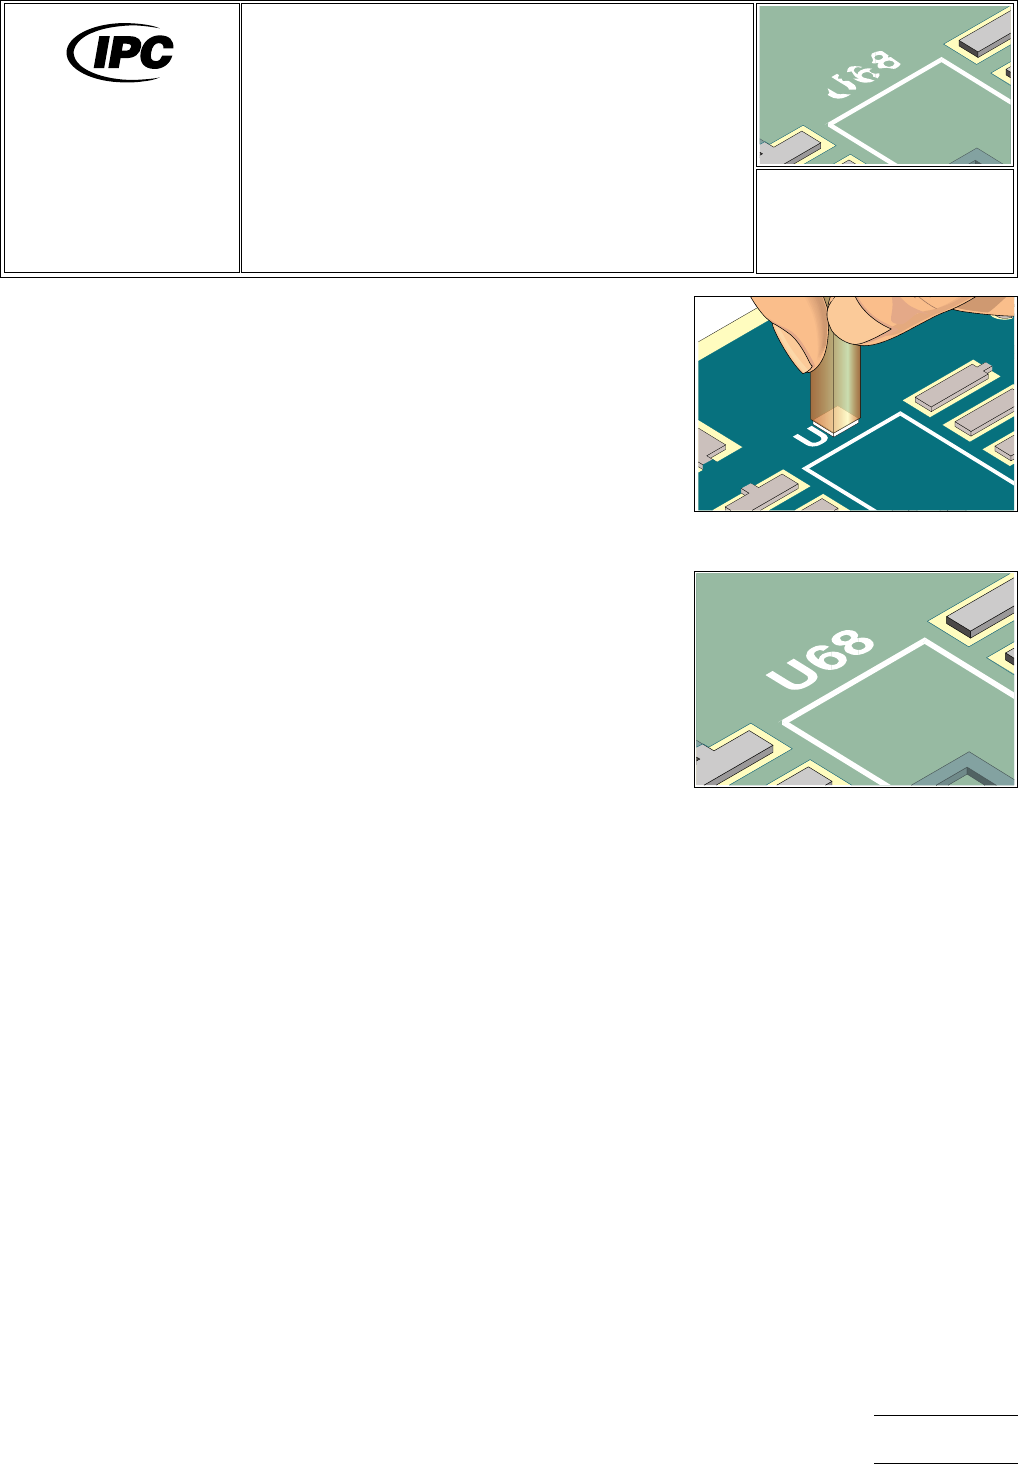
5. Gently press the peg stamp into the epoxy coating to coat the character surface.
6. Gently press the peg stamp onto the desired location on the printed wiring board
surface. (See Figure 1.)
7. Cure the epoxy ink per the manufacturer’s instructions.
EVALUATION
1. Visual examination for proper characters, positioning and legibility.
Figure 1 Apply legend using a peg
stamp.
Figure 2 Completed legend repair.
7721
Repair and
Modification of
Printed Boards and
Electronic Assemblies
Revision:
Date: 2/98
Legend/Marking,
Stamping Method
Number: 2.7.1
Product Class: R, F, W, C
Skill Level: Intermediate
Level of Conformance: High
Material in this manual was voluntarily established by Technical Committees of the IPC. This material is advisory only and its
use or adaptation is entirely voluntary. IPC disclaims all liability of any kind as to the use, application, or adaptation of this
material. Users are also wholly responsible for protecting themselves against all claims or liabilities for patent infringement.
Equipment referenced is for the convenience of the user and does not imply endorsement by the ipc.
Page1of2