JAKA Zu 7电控柜V2.1-硬件手册(英文版).pdf - 第13页
1 1 T erminal Ty p e T ablet PC OS Android 8.0 or above CPU Kirin695or Snapdra gon 660 ROM 32GB RAM 4GB Screen Size 8.0 inch Network WIFI T able2-1 Operation T erminal Requ ired Har dware Configu rations The oper ation t…
10
2 Welcome from JAKA Zu Robot
2.1 Overview of robot configurations
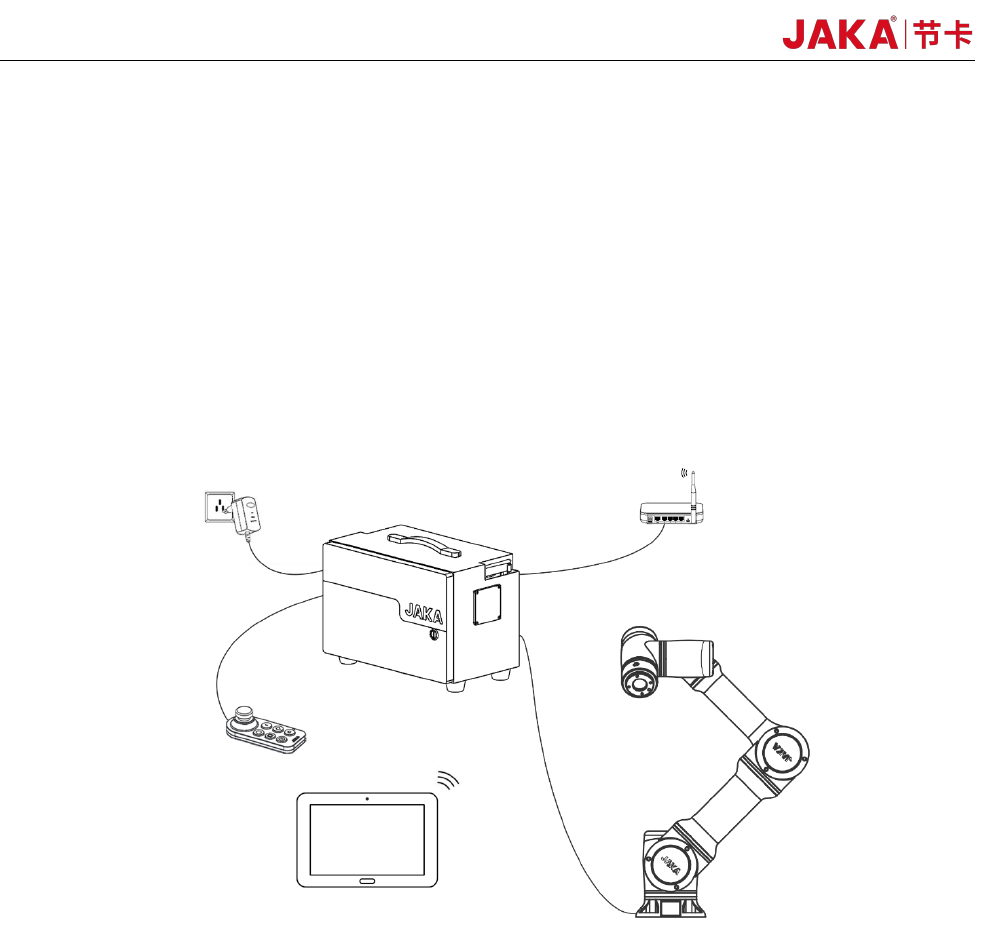
Fig 2-1 Overview of robot configurations
Electrical Cabinet and Control Stick:The cabinet contains the robot controller and many different kinds
of electrical interface,And also equipped with a control stick.
Router and network cables:The Ethernet port of the cabinet is connected to the router, so as the
operation terminal. It is recommend that a dedicated router is used to ensure reliable connection.
2.2 Operation Terminal
JAKA Zu and C APP is provided by JAKA on Android system, and the required configurations are as
follows:
JAKA Zu 7 V2.5
Before reading this chapter, please ensure that chapter 1 Safety has been read and fully understood.
In this chapter the basics of JAKA Zu Robots would be introduced , for future hardware
specifications and software usages please refer to other chapters.
During using of JAKA Zu robots,if quick help is needed, feel to free to dail our hotline
:(+86)400-006-2665.
As shown in Fig 2-1, JAKA Zu robots uses wireless connection, and the followings are needed:
Operation Terminal:Device used to program and set robot.
Robot Arm:The core moving part of robot to achieve designated movements. And at the end of the arm,a
ring indicator, buttons used to drag and tech, TIO interface are located.
11
Terminal Type Tablet PC
OS Android 8.0 or above
CPU Kirin695or Snapdragon 660
ROM 32GB
RAM 4GB
Screen Size 8.0 inch
Network WIFI
Table2-1 Operation Terminal Required Hardware Configurations
The operation terminal can be requested during purchasing or provided by user themselves.
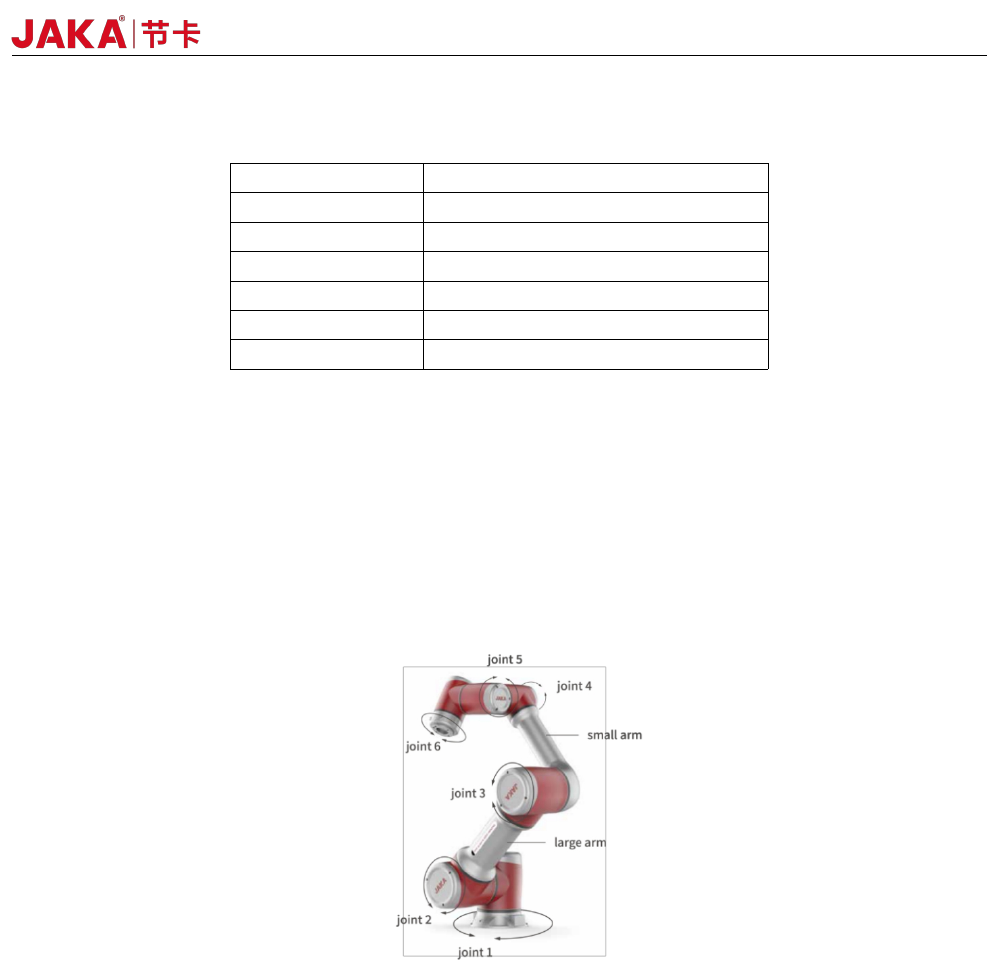
2.3 Robot Arm
The robot arm is shown as Fig 2-1, and is composed of six rotation joints with two linkages. And at the end
of the arm,a ring indicator, buttons used to drag and tech, TIO interface are located.
Fig 2-1 Robot Arm
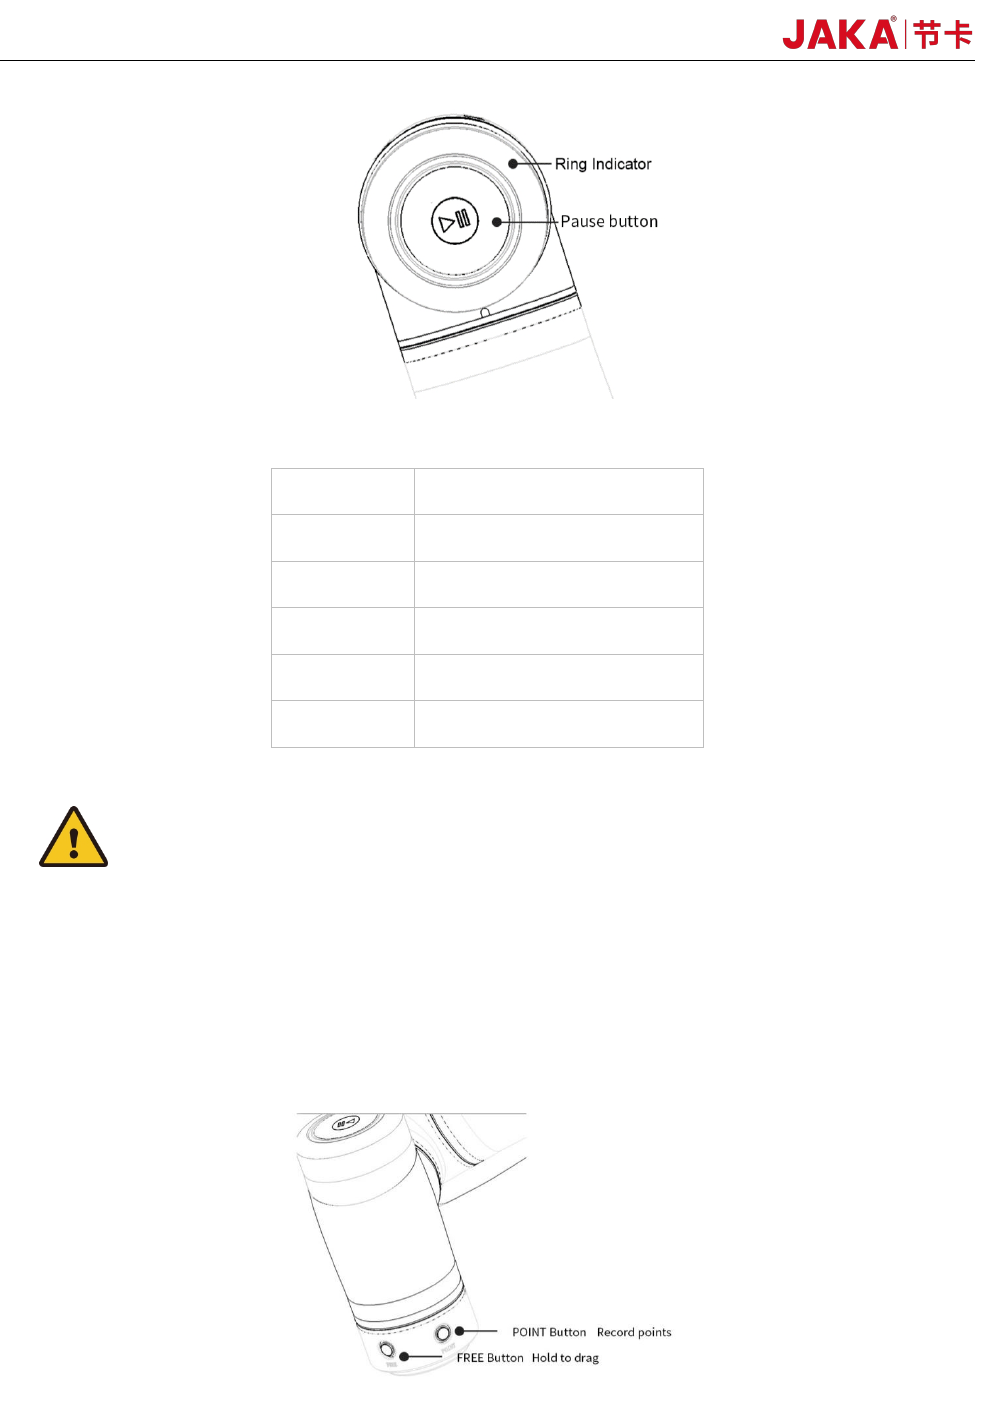
2.3.1 Robot End
At the end of the robot, an indicator and apause button is located.
The indicator and the pause button is located as Fig 2-2 and the meanings of different color are listed in
table 2-2. When the robot is running program, press the pause button could pause and resume the program.
JAKA Zu 7 v2.5
12
Fig 2-2 Ring Indicator and Pause Button
Color Robot Status
Blue Power on
Green Enabled
Red Fault
Yellow Drag Mode
Flashing
Yellow
Pause Mode
Table 2-2 Indicator Meanings
Warnings:
The risks related to using of pause button should be evaluated carefully, the contact of robot and personnel
could cause server injury of personnel or damage of equipment.
2.3.2 Flange Buttons and interfaces
On the side of flange located two buttons and TIO interface.The buttons are FREE button and POINT
button Respectively, shown as below:
The detailed description of TIO is in chapter 4.
When the free button is pressed, the robot would enter free-drive mode.
JAKA Zu 7 V2.5