JAKA Zu 7电控柜V2.1-硬件手册(英文版).pdf - 第20页
18 3.2 I nstallation 3.2.1 Gen eral installation steps 1.Determ ine the working range of the robot ; 2.Mount the robot on the base ; 3.Install the required tools at the end of the robot. 3.2.2 Impo rtant safety instru ct…
17
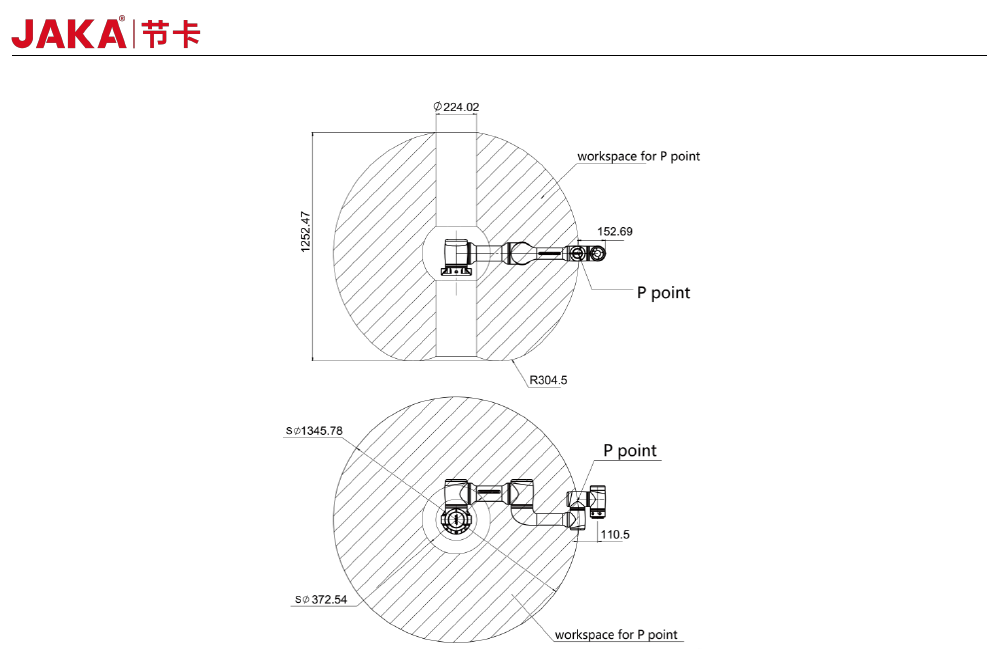
Fig3-4
JAKA Zu 7 v2.5
18
3.2 Installation
3.2.1 General installation steps
1.Determine the working range of the robot;
2.Mount the robot on the base;
3.Install the required tools at the end of the robot.
3.2.2 Important safety instructions
DANGER:
1. Make sure the robot is properly and securely bolted in
place.
2. The mounting surface must be shockproof and sturdy.
DANGER:
1. Make sure the tool is properly and securely bolted in place.
2. Make sure that the tool is constructed such that it cannot
create a hazardous situation by dropping a part unexpectedly.
DANGER:
1. Make sure that the electrical cabinet and cables do not
come into contact with liquids. A wet electrical cabinet could
cause death.
2. The electrical cabinet must not be exposed to dusty or wet
environments that exceed IP20 rating. Pay special attention to
environments with conductive dust.
CAUTIONS:
If the robot is bathed in water over an extended time period it might be damaged. The robot should not be
mounted in water or in a wet environment.
3.2.3 Robot Body Installation
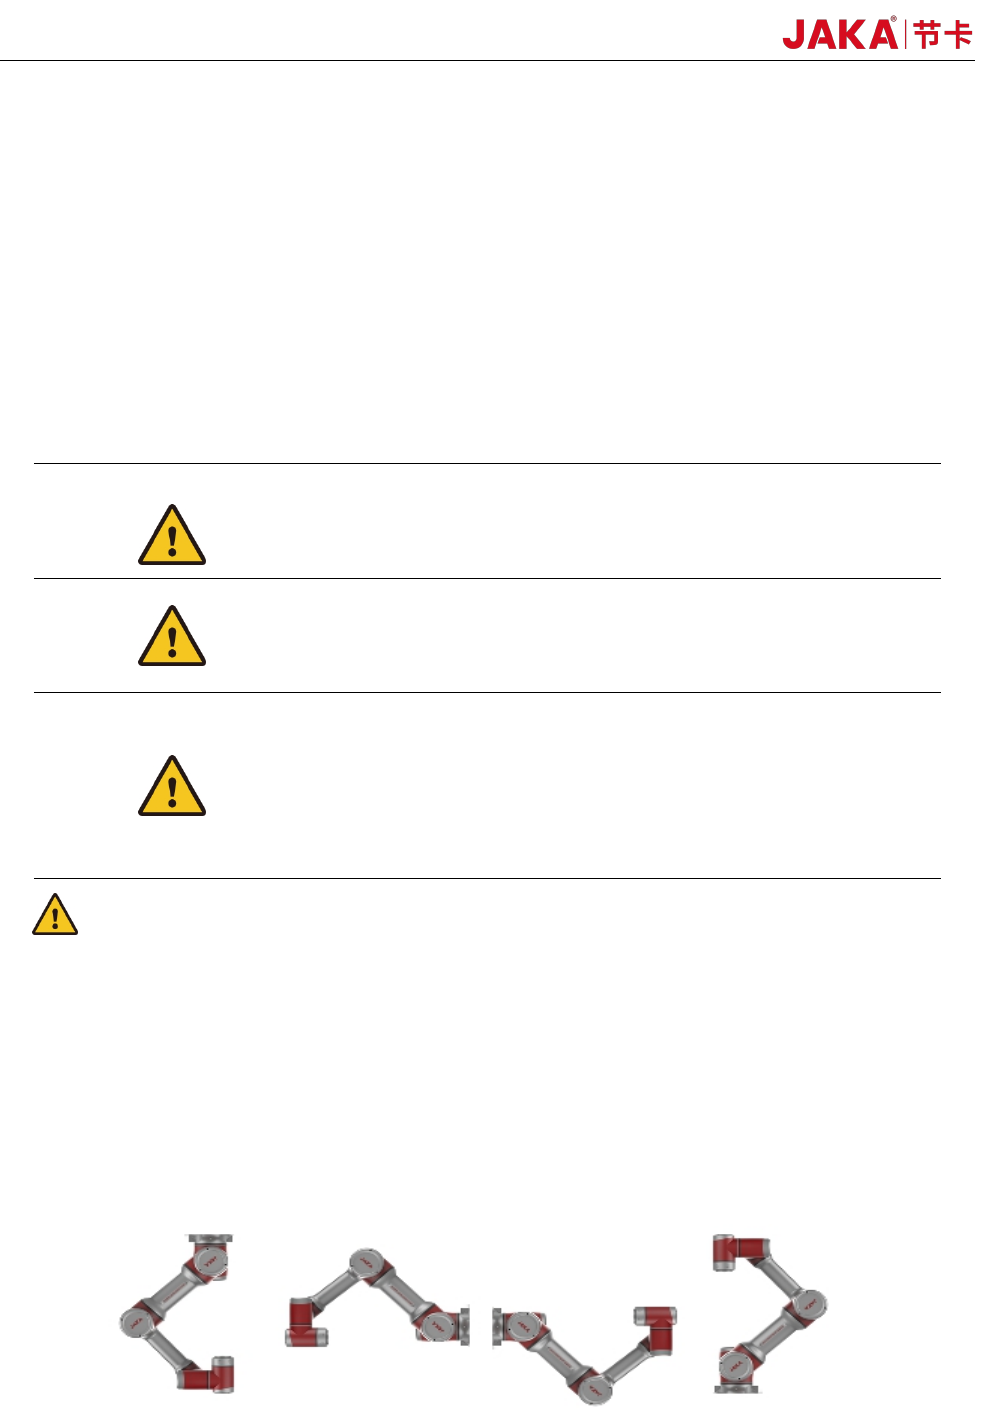
The robot has an attitude and position adaptation function. It can be mounted in various ways, such as
ground, wall, and celling mounting. As shown in Fig 3-5:
Fig 3-5
JAKA Zu 7 V2.5
19
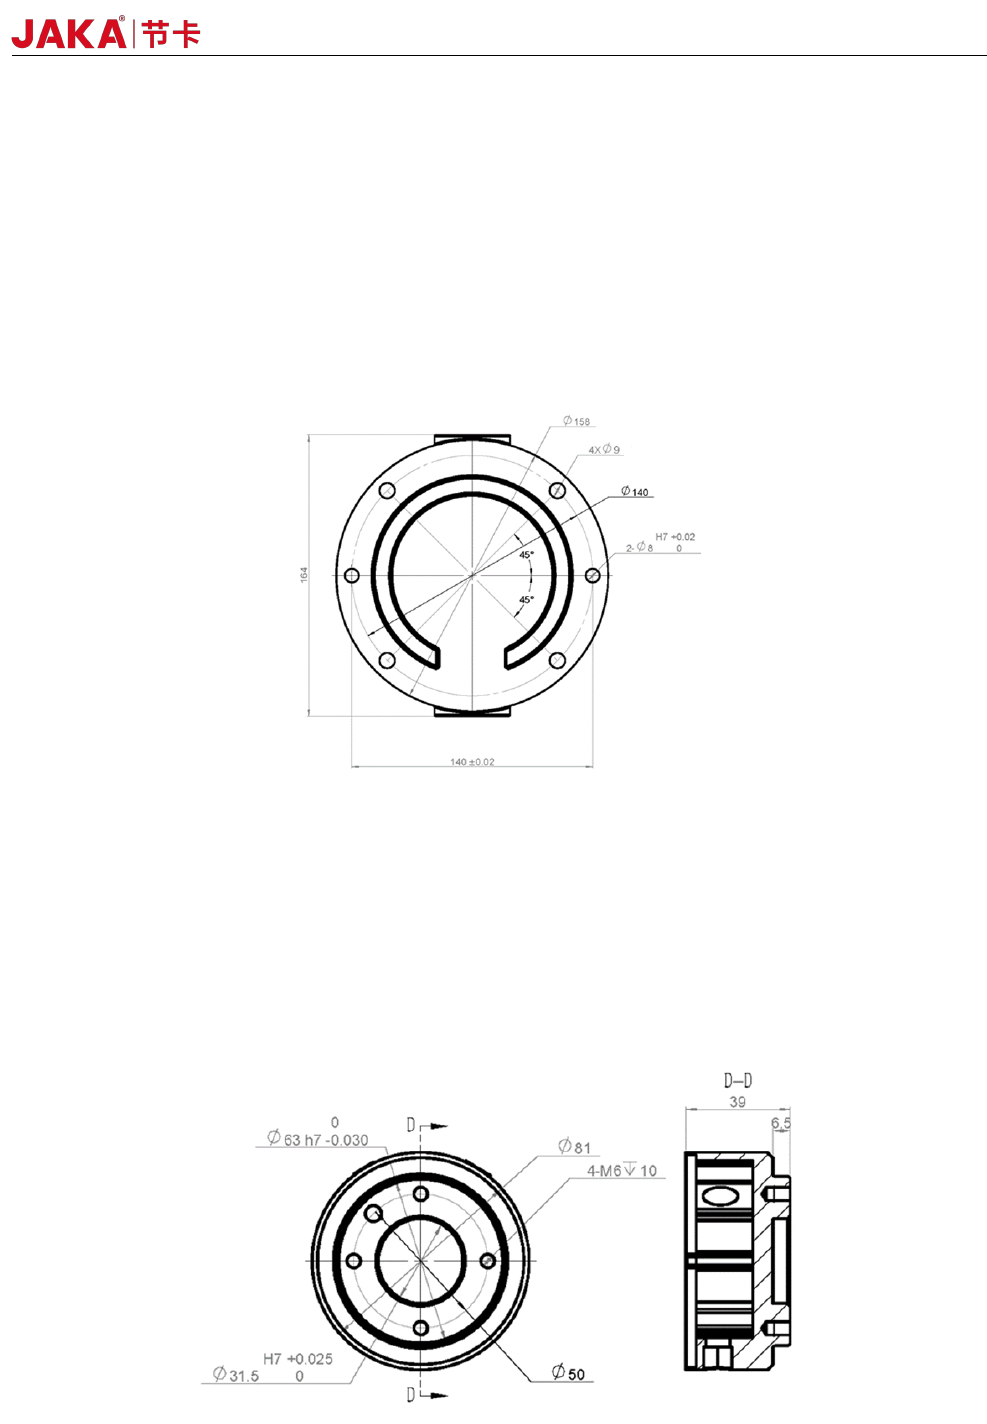
Using four M8 bolts to mount the robot through the four 9mm through holes on the robot base. It is
recommended to tighten these bolts with a torque of 40 Nm. If you need to adjust the robot installation
position very accurately, you can also drill two φ8 pin holes and fix them with pins. It is also possible to
purchase an accurate base counterpart as an accessory. Mount the robot on a sturdy surface that is strong
enough to withstand at least ten times the full torque of the base joint and at least five times the weight of
the robot arm. Furthermore the surface shall be vibration free. If the robot is mounted on a linear axis or a
moving platform then the acceleration of the moving mounting base shall be very low. A high acceleration
might cause the robot to stop, thinking it bumped into something. Fig. 3-7 shows the robot mounting holes.
All measurements are in mm.
Fig 3-6
3.2.4 End effector Installation
The robot end flange has four M6 tapped holes to mount the end effector. When screws are installed
in these threaded holes, the screws need to be tightened with a torque of 15 Nm. If you need to adjust the
tool position very accurately, you can also drill a φ6 pin hole and fix it with a pin. Fig. 3-7 shows the drilling
position and the screw mounting position. All measurements are in mm.
Fig 3-7
JAKA Zu 7 v2.5