00198501-02_IM_711.1_R18-1_EN.pdf - 第30页
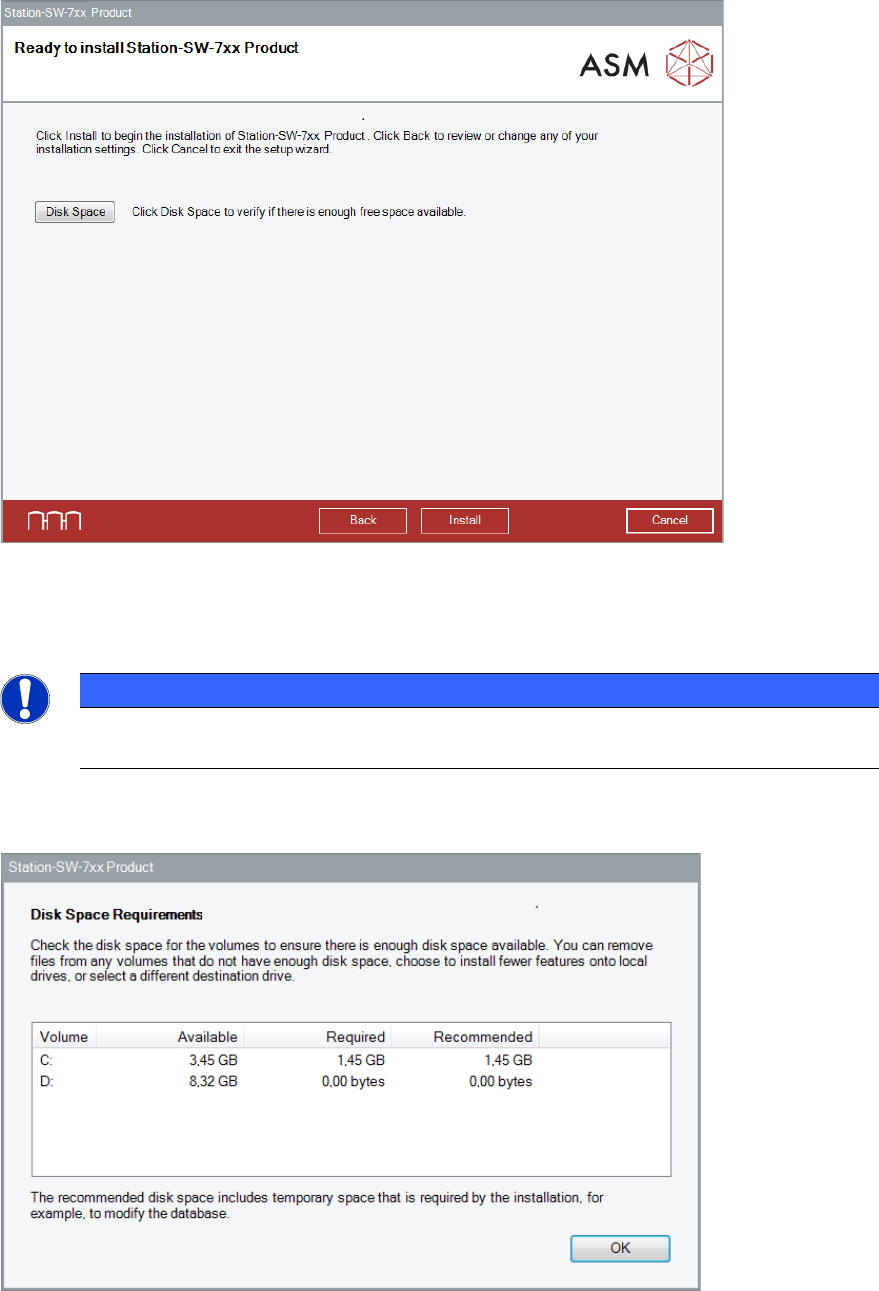
Station Software V ersion 711.1 (R 18 - 1) / Installat ion Manual 05/2018 Edition 30 The station soft ware is now ready t o be installed. The f ollowing dialog box is di splayed. Figure 5-12: Checking disk s pace Before …
Station Software Version 711.1 (R18-1) / Installation Manual 05/2018 Edition
29
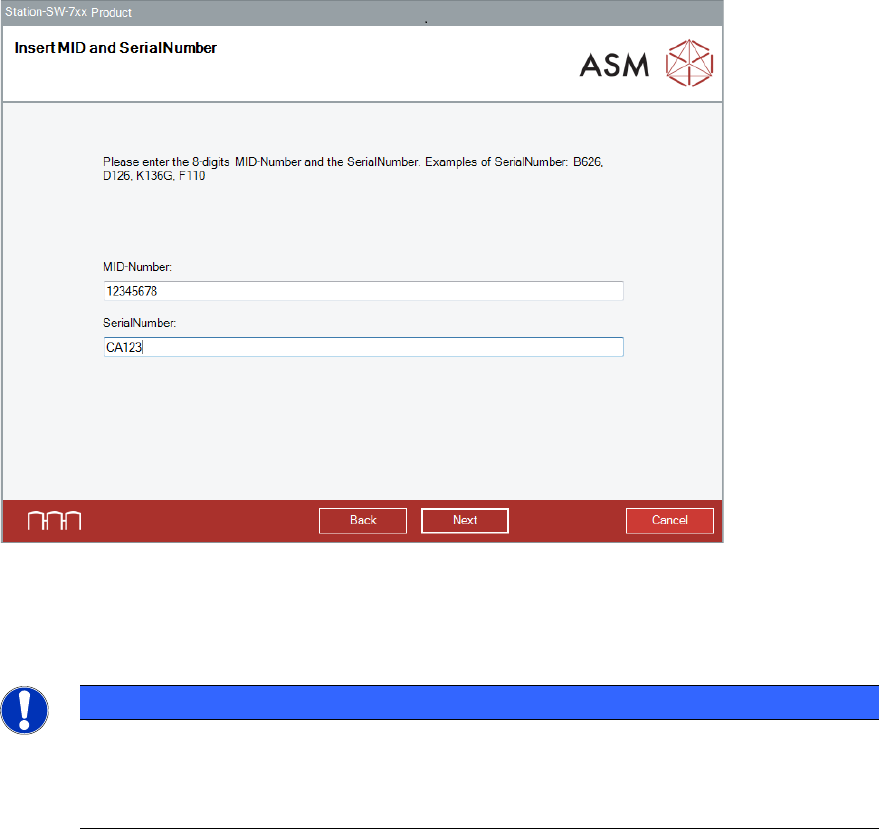
The Insert MID and SerialNumber dialog box is displayed.
Figure 5-11: Inserting Machine Identification Number (MID) and serial number
► Enter the 8-digit machine identification number in the MID-Number entry field.
► Enter the serial number in the SerialNumber entry field.
NOTICE
You will find the MID and the serial number on an adhesive label on the side of the
protective covers directly below the label for the number of the relevant location. The
number following the dash after the MID specifies the location and is not entered here
(e.g. 00000001-2 stands for location 2).
► Click the Next button.
Station Software Version 711.1 (R18-1) / Installation Manual 05/2018 Edition
30
The station software is now ready to be installed. The following dialog box is displayed.
Figure 5-12: Checking disk space
Before installing, you can check the available, required and recommended disk space (per drive) to
perform the installation.
NOTICE
For installation and optimal functionality of the machine later on, a free disk space of at
least 5 GB is recommended on the "C:" drive.
► Click the Disk Space button.
The Disk Space Requirements dialog box is displayed.
Figure 5-13: Disk space requirements
► Click the OK button.
Station Software Version 711.1 (R18-1) / Installation Manual 05/2018 Edition
31
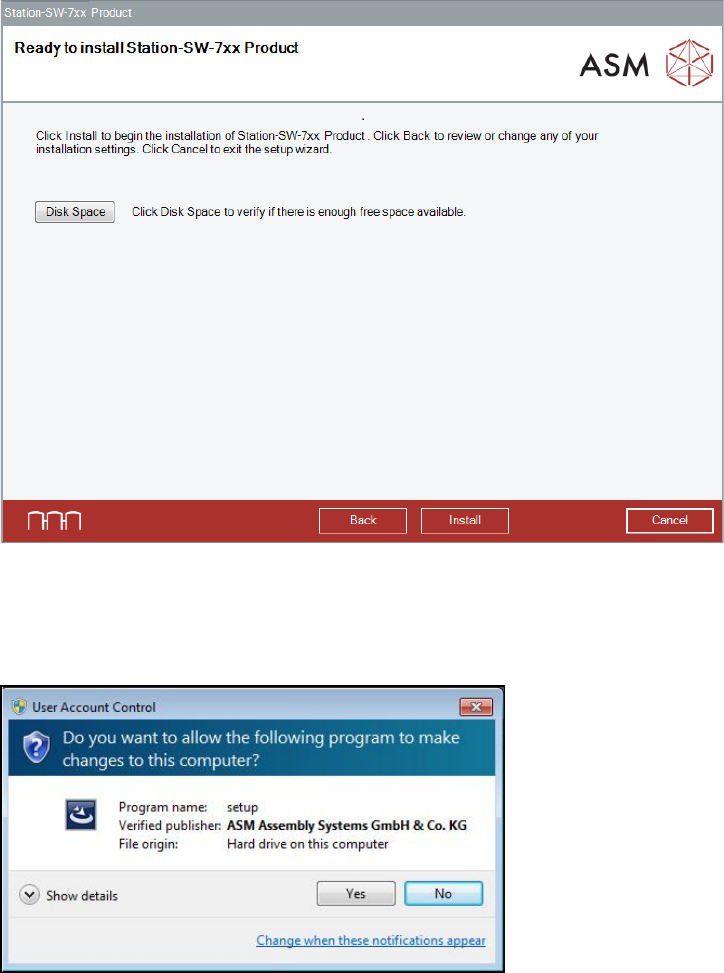
The Ready to install dialog box is displayed again.
Figure 5-14: Ready for installation
► Click the Install button to start the installation.
If User Account Control is enabled under Windows Embedded Standard 7, the following dialog
boxes are additionally displayed.
Figure 5-15: User Account Control
► Click the Yes button to allow the ASM Software installation.