Printer 710_810 v8 Transport Rails Module.pdf - 第11页
TRANSPORT RA ILS MODULE ADJUS TMENT S AND SETT INGS Chapter Issue 6 Oct 06 Technical Reference Manual 16.11 14. Using a 4mm Allen key , through the access holes in the board edge gui de, slacken the fo ur rail securi ng …
TRANSPORT RAILS MODULE
ADJUSTMENTS AND SETTINGS
16.10 Technical Reference Manual Chapter Issue 6 Oct 06
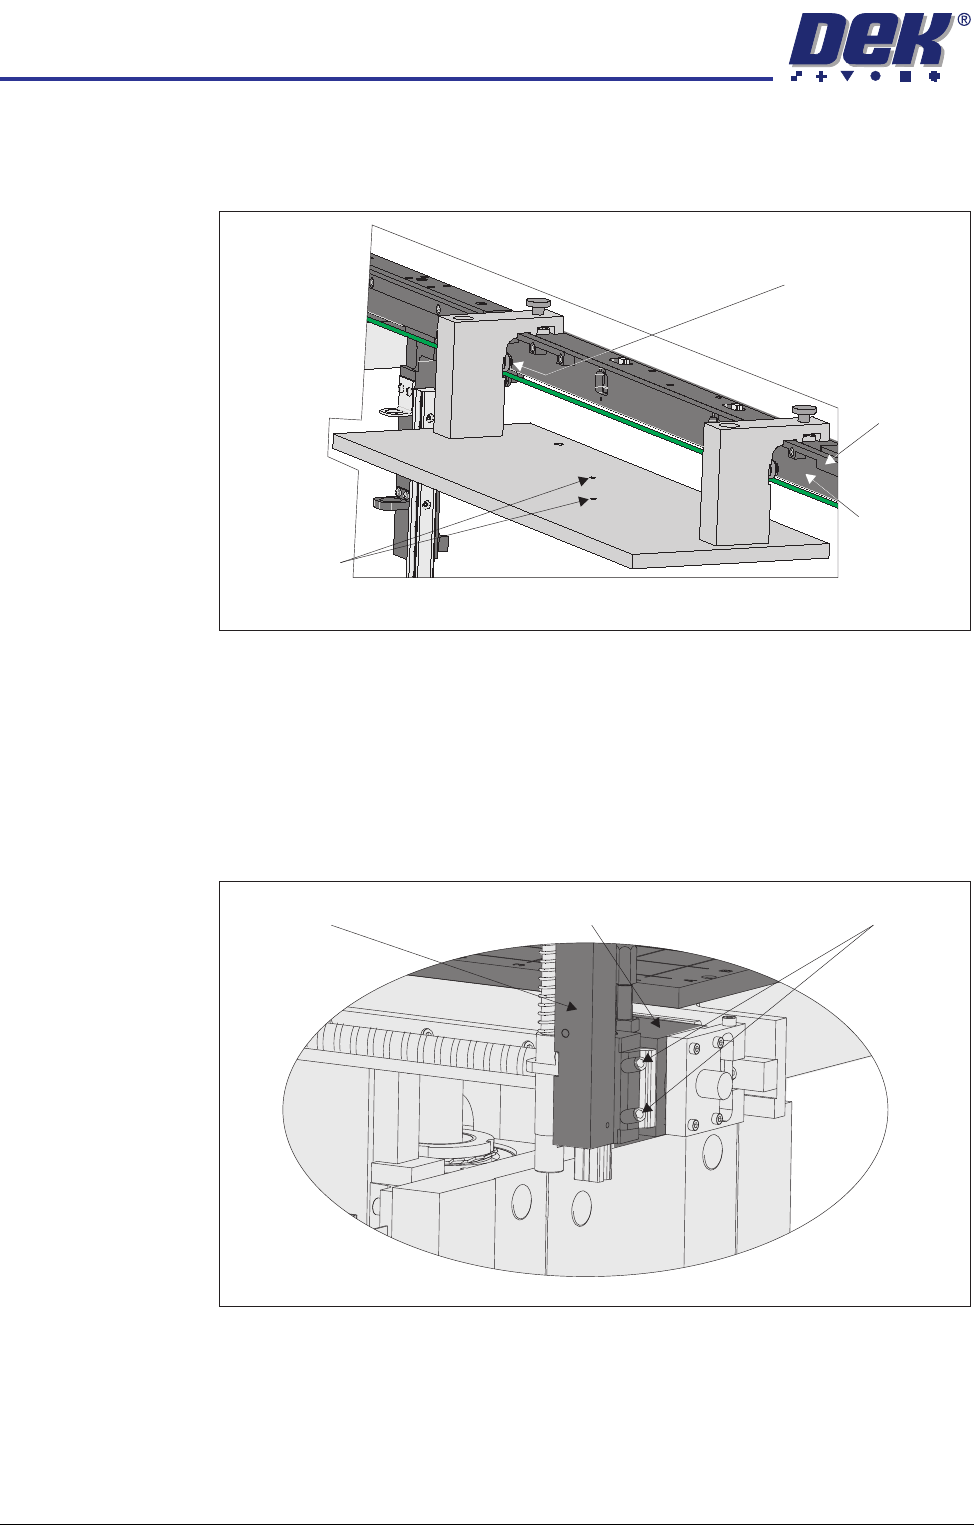
8. Place the rail location jig onto the rising table, so that the alignment pads
abut the rear of the front rail and the two 6mm locating pins fit into the
corresponding holes on the rising table.
9. Secure the location jig to the front rail using the two thumbscrews on the
location jig.
10. Using a feeler gauge check that the gap between the alignment pads and
the front rail is less than 0.05mm.
11. If adjustment is not necessary continue with Step 23.
12. Using a 3mm Allen key slacken the four securing bolts attaching the left
hand transport leg to the carriage nut.
13. Repeat Step 12 on the right hand transport leg.
View on Rear of Front Rail
Locating Pins
Alignment Pad
(2 positions)
Main Rail
Belt Support
Plate
View on Front of Fixed Rail
Carriage Nut Securing BoltsTransport Leg
TRANSPORT RAILS MODULE
ADJUSTMENTS AND SETTINGS
Chapter Issue 6 Oct 06 Technical Reference Manual 16.11
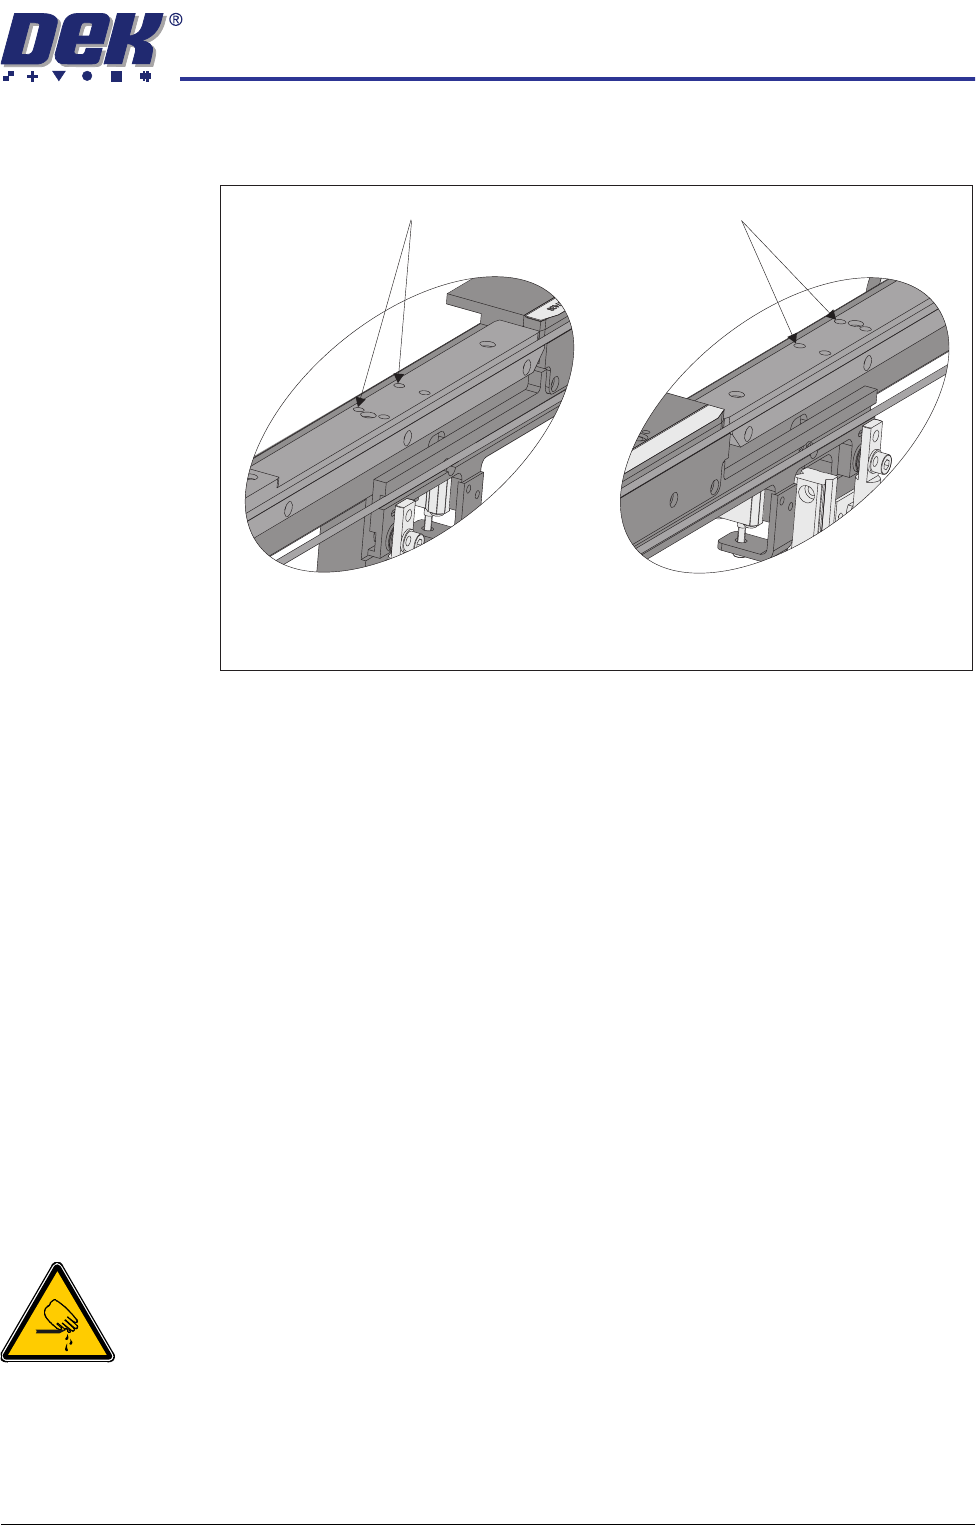
14. Using a 4mm Allen key, through the access holes in the board edge guide,
slacken the four rail securing bolts (two each side).
15. Loosen the two thumbscrews on the location jig.
16. Adjust the front rail position to achieve the settings in Step 10.
17. Tighten the two thumbscrews on the location jig, recheck the parallelism.
18. Tighten the bolts slackened in Steps 12 to 14, recheck the parallelism.
19. When the adjustment is complete, remove the board edge guides from each
end of the rail.
20. Remove each bolt disturbed (one at a time), apply a suitable locking
compound and fully tighten.
21. Refit the board edge guide to each end of the rail.
22. Carry out Camera X Axis Parallelism and Rear Rail Parallelism (Technical
Reference Manual, Camera System Module Chapter and this chapter
refers).
23. Remove all feeler gauges from the front rail.
24. Remove the location jig from the rising table.
25. Fit the board clamp to the front rail.
Rear Rail Parallelism
WARNING
BOARD CLAMPS. EXTREME CARE MUST BE EXERCISED WHEN WORKING IN
THE TOOLING AREA OF THE MACHINE TO AVOID INJURY. THE FOILS ON THE
FRONT AND REAR BOARD CLAMPS ARE VERY SHARP.
NOTE
Ensure Front Rail Parallelism has been carried out prior to commencing this
procedure. It is recommended this procedure is carried out by two persons.
1. Power down the machine and remove the left and right machine side panels.
Access Holes
View on Inside of Front Rail
Left Hand End
View on Inside of Front Rail
Right Hand End
Access Holes
TRANSPORT RAILS MODULE
ADJUSTMENTS AND SETTINGS
16.12 Technical Reference Manual Chapter Issue 6 Oct 06
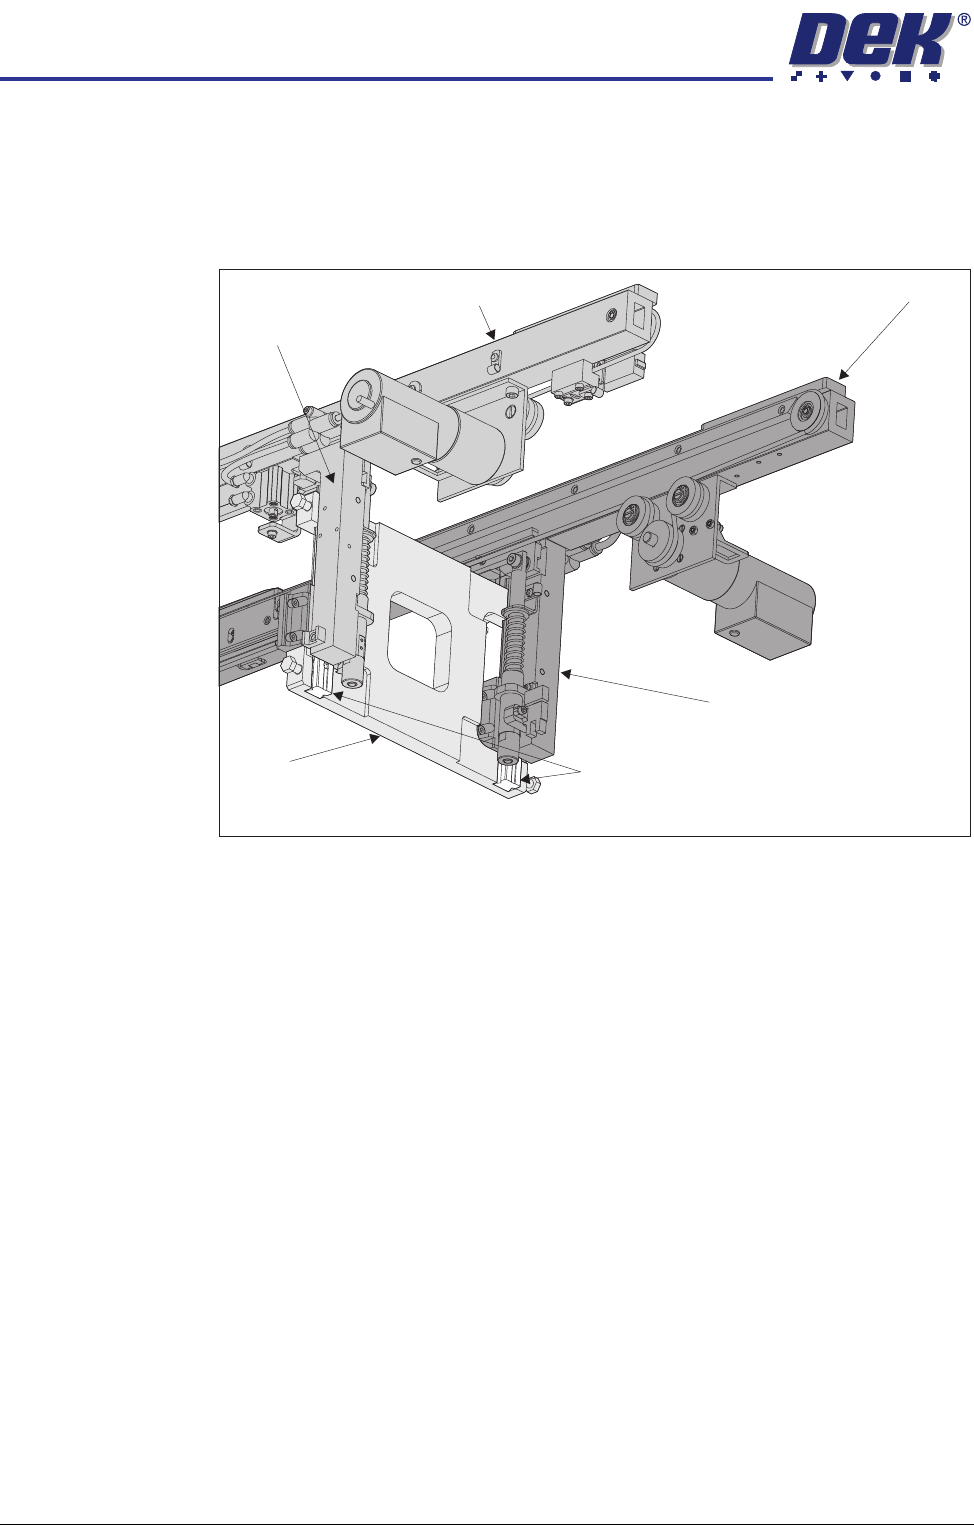
2. Using a pair of rail parallelism H jigs (DEK Pt No 158109) fit the jigs to the
front transport rail left and right leg linear guides. Ensure the linear guides
fit snugly in the jig slots.
3. Move the rear transport rail forwards, towards the front rail, until the rear leg
linear guides fit into the slots of the H jigs.
4. If both sets of linear guides fit snugly in the slots of the jigs, the rear transport
rail is parallel to the front rail, go to Step 11.
5. If either or both jigs do not fit, remove the H jigs and, carry out the Front Rail
Parallelism check as detailed earlier in this chapter.
6. Refit the H jigs.
7. If both sets of linear guides fit snugly in the slots of the jigs, the rear transport
rail is parallel to the front rail, go to Step 11.
8. If the linear guides still do not fit in the jig slots loosen the eight rail leg
bearing block securing screws.
9. Reposition the rear rail until the linear guides fit snugly in the jig slots.
10. Tighten the rail leg bearing block securing screws loosened in Step 8.
11. Remove the H jigs and refit the machine panels removed in Step 1.
Front Rail
Rear Rail
Linear Guide Rails
Rear Right Transport Rail Leg
H Jig
View on Front Right Hand Side
Front Right
Transport
Rail Leg