00197465-01_SM_CP20-A-M_EN.pdf - 第35页
3 Service Work Conveyor 3.10 Replacing and Setting the Jaws [03010313-xx] Service Manual SIPLACE C&P20, C&P20A, C&P20M 35 Dismantling the dead indexing plate 1. 2 segments without n ozzl es o r dead indexing …
3 Service Work Conveyor
3.10 Replacing and Setting the Jaws [03010313-xx]
34 Service Manual SIPLACE C&P20, C&P20A, C&P20M
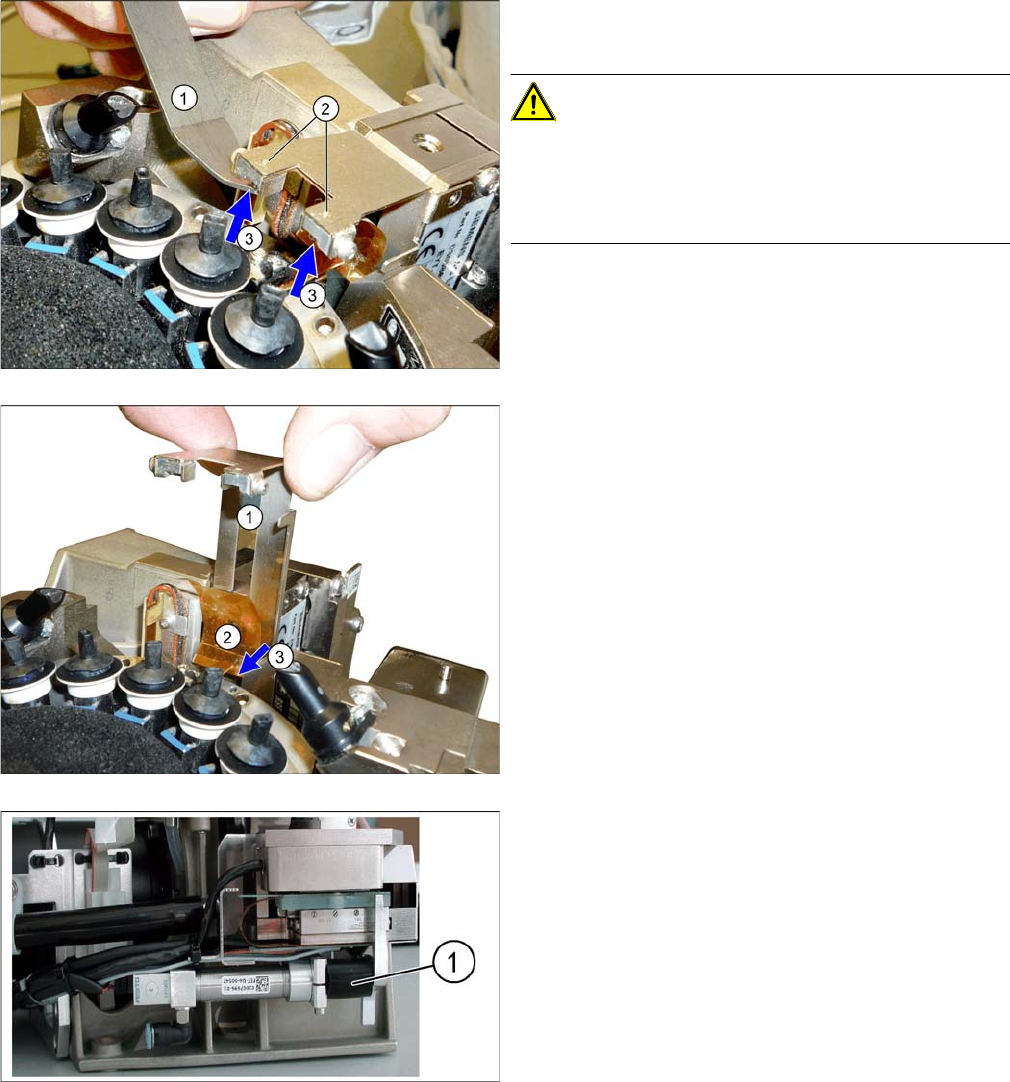
► Use the magnet removal plate (1) to remove the two
magnets (3).
CAUTION!
If the magnets are stuck in place, you can press these out
from above (2) with a pointed object. If you damage the
foil while removing the magnets, you will need to also re
-
place the foil.
► Pull out the plate (1).
► Loosen the screw (3) fastening the foil (2) and then
remove the foil.
Fitting the hose piece onto the return unit
► Clamp the black hose piece D12 20 mm (1) from the
service pack between the actuator and the housing of
the return unit.
This ensures that the Z axis can still be moved for lat
-
er adjustment and the return unit does not need to be
dismantled.
3 Service Work Conveyor
3.10 Replacing and Setting the Jaws [03010313-xx]
Service Manual SIPLACE C&P20, C&P20A, C&P20M 35
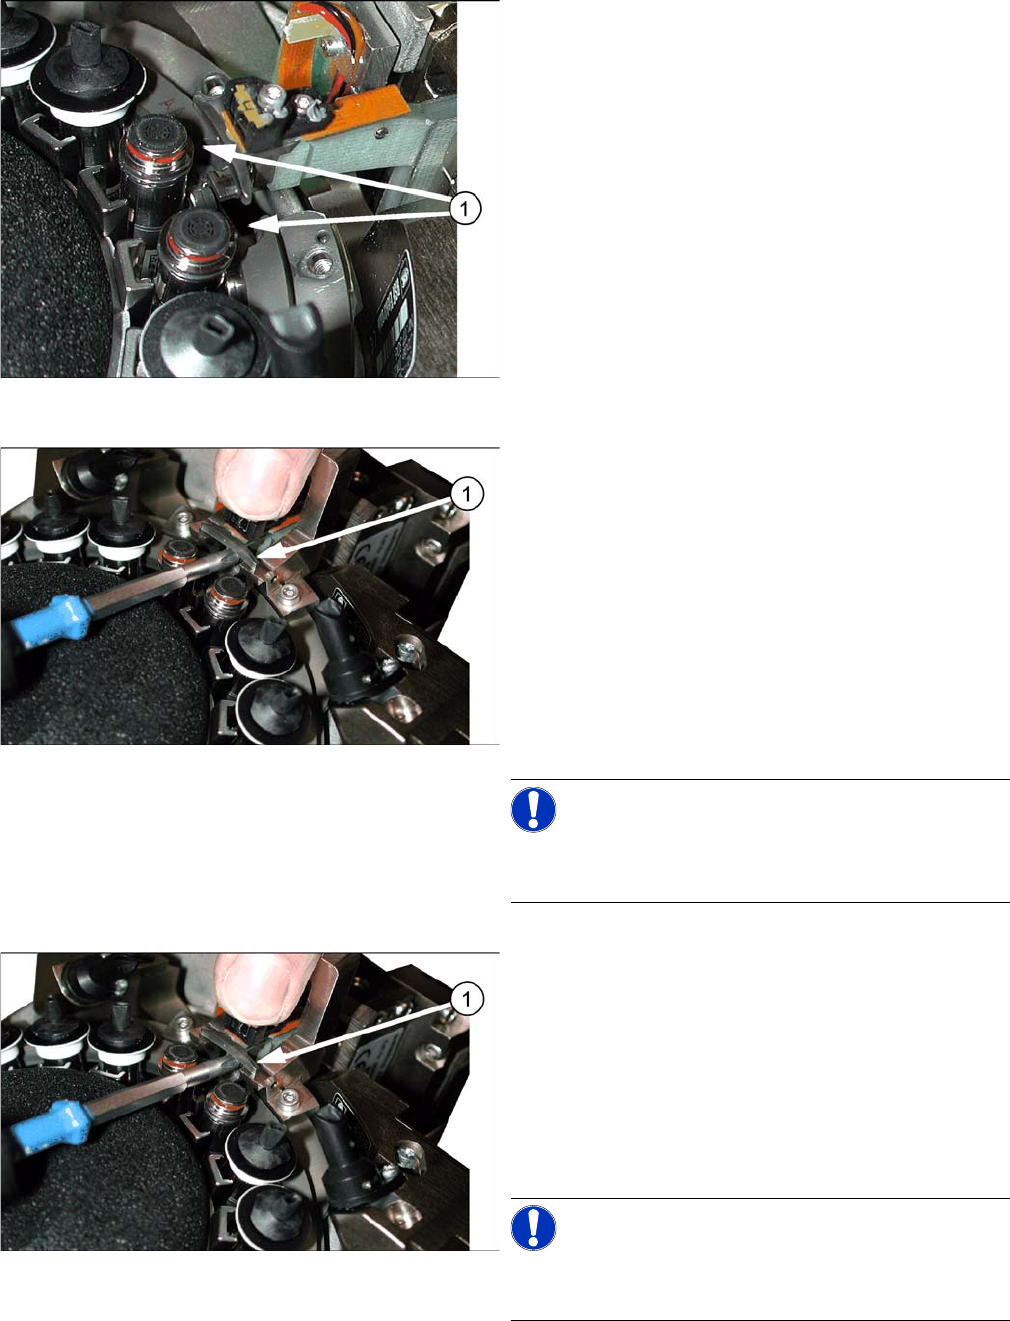
Dismantling the dead indexing plate
1. 2 segments without nozzles or dead indexing plate
► Remove the nozzles and dead indexing plates from
two neighboring segments.
Screw fastening the jaws
Perform the following steps if you want to replace the
jaws (and then set them).
► Loosen the screw (1) fastening the jaws and then pull
the jaws out of the head.
► Insert the new jaws. Carefully tighten the screw fas
-
tening the jaws, so that the jaws can still be moved on
the arm of the Z axis (can be moved to the left and
right).
Do not fit the gauge yet!
► Clean the raceway contact surface and the setting
gauge with a lint-free cloth.
NOTICE!
Always clean the contact surfaces before fitting the set
-
ting gauge!
Screw fastening the jaws
Perform the following steps if you want to set the jaws
without replacing them.
► Carefully loosen the screw (1) fastening the jaws, so
that the jaws can still be moved on the arm of the Z
axis (can be moved to the left and right).
Do not fit the gauge yet!
► Clean the raceway contact surface and the setting
gauge with a lint-free cloth.
NOTICE!
Always clean the contact surfaces before fitting the set
-
ting gauge!
3 Service Work Conveyor
3.10 Replacing and Setting the Jaws [03010313-xx]
36 Service Manual SIPLACE C&P20, C&P20A, C&P20M
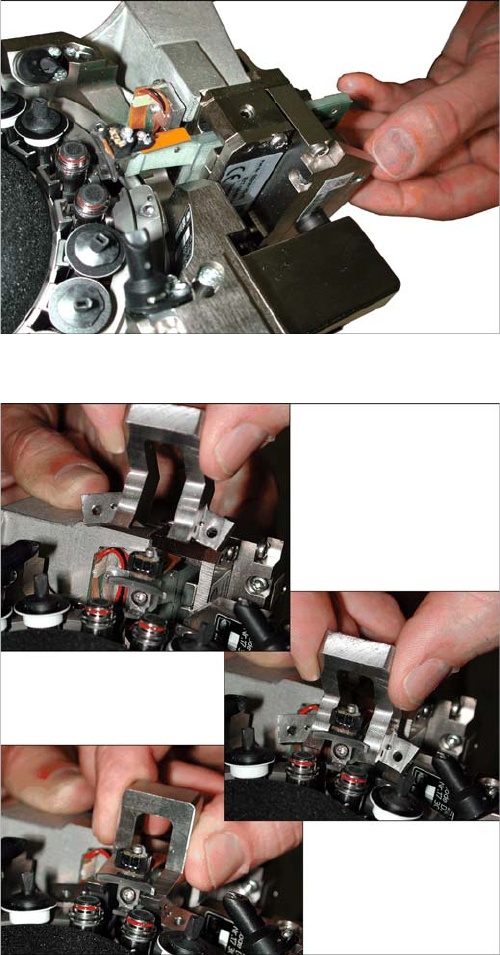
Setting the jaws
Fit the setting gauge as follows.
Moving the Z axis arms out
► Rotate the star so that the jaws/arms of the Z axis are
centered between the two segments, without dead in
-
dexing plates.
► Move the Z axis without segment out.
Fitting the jaw setting gauge
► Place the jaw setting gauge on the raceway, ensuring
that the jaws lie flat on the contact surfaces.
Press the jaw setting gauge against the holes drilled
in the raceway, so that the centering pins engage with
the relevant holes.