ASM贴片机CPP头半年保养.pdf - 第20页
6 6-monthly CPP Clean / lubricate the Z-axis linear guide 4 min 2 / 2 CAUTION!Refer to safety instructions in user manual before commencing Mainten- ance NOTICE! ESD guidelines are to be followed Tool: T12, T22, T23 Wea…
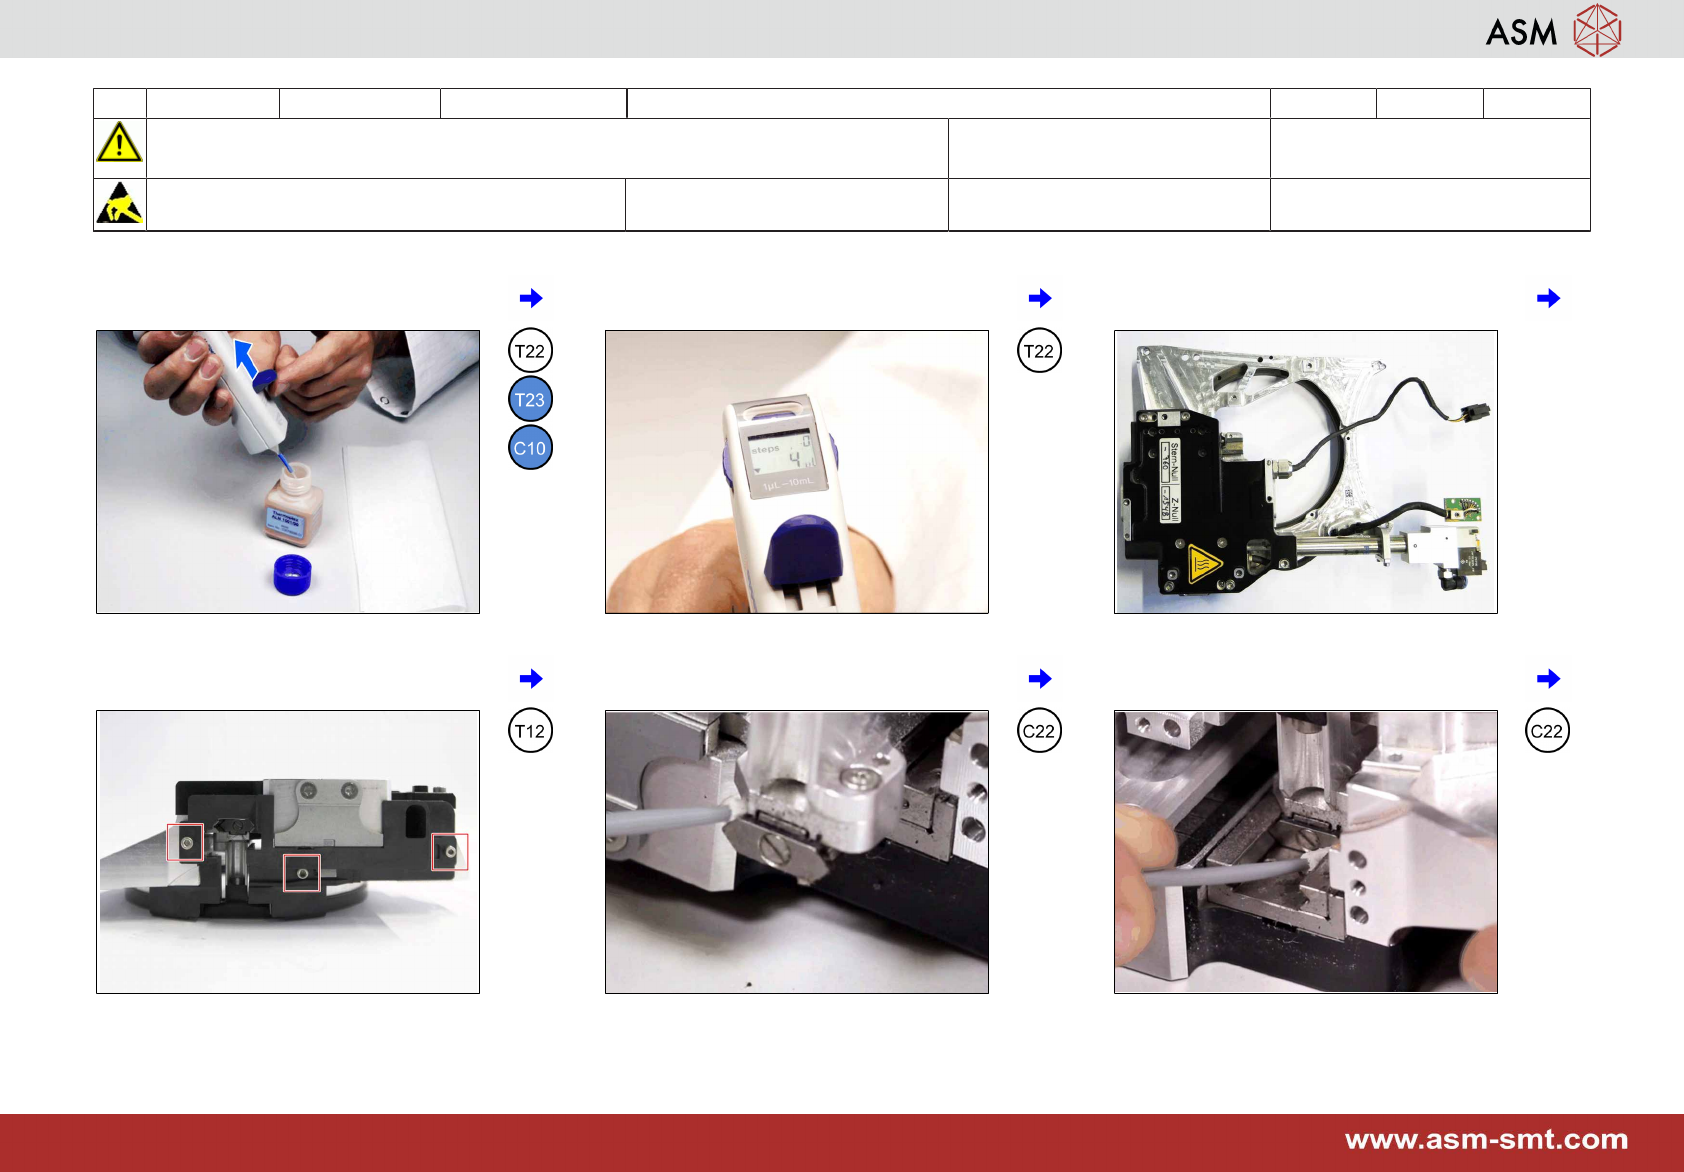
6 6-monthly CPP Clean / lubricate the Z-axis linear guide 4 min 1 / 2
CAUTION!Refer to safety instructions in user manual before commencing Mainten-
ance
NOTICE! ESD guidelines are to be followed Tool:
T12, T22, T23
Wear Part: Consumables:
C10 , C22
1 Prepare the multipette. See appendix
"Prepare the multipette.
2 Turn the wheel and adjust 4 µl. 3 Put the front plate flat on the table with the
race way pointing down.
4 Loosen the 3 screws and remove the
plastic cover from the Z-axis housing.
5 Move the Z-axis out and clean the mov-
able part on both sides at the bottom.
6 Move the Z-axis in and clean the fixed part
on both sides at the bottom.
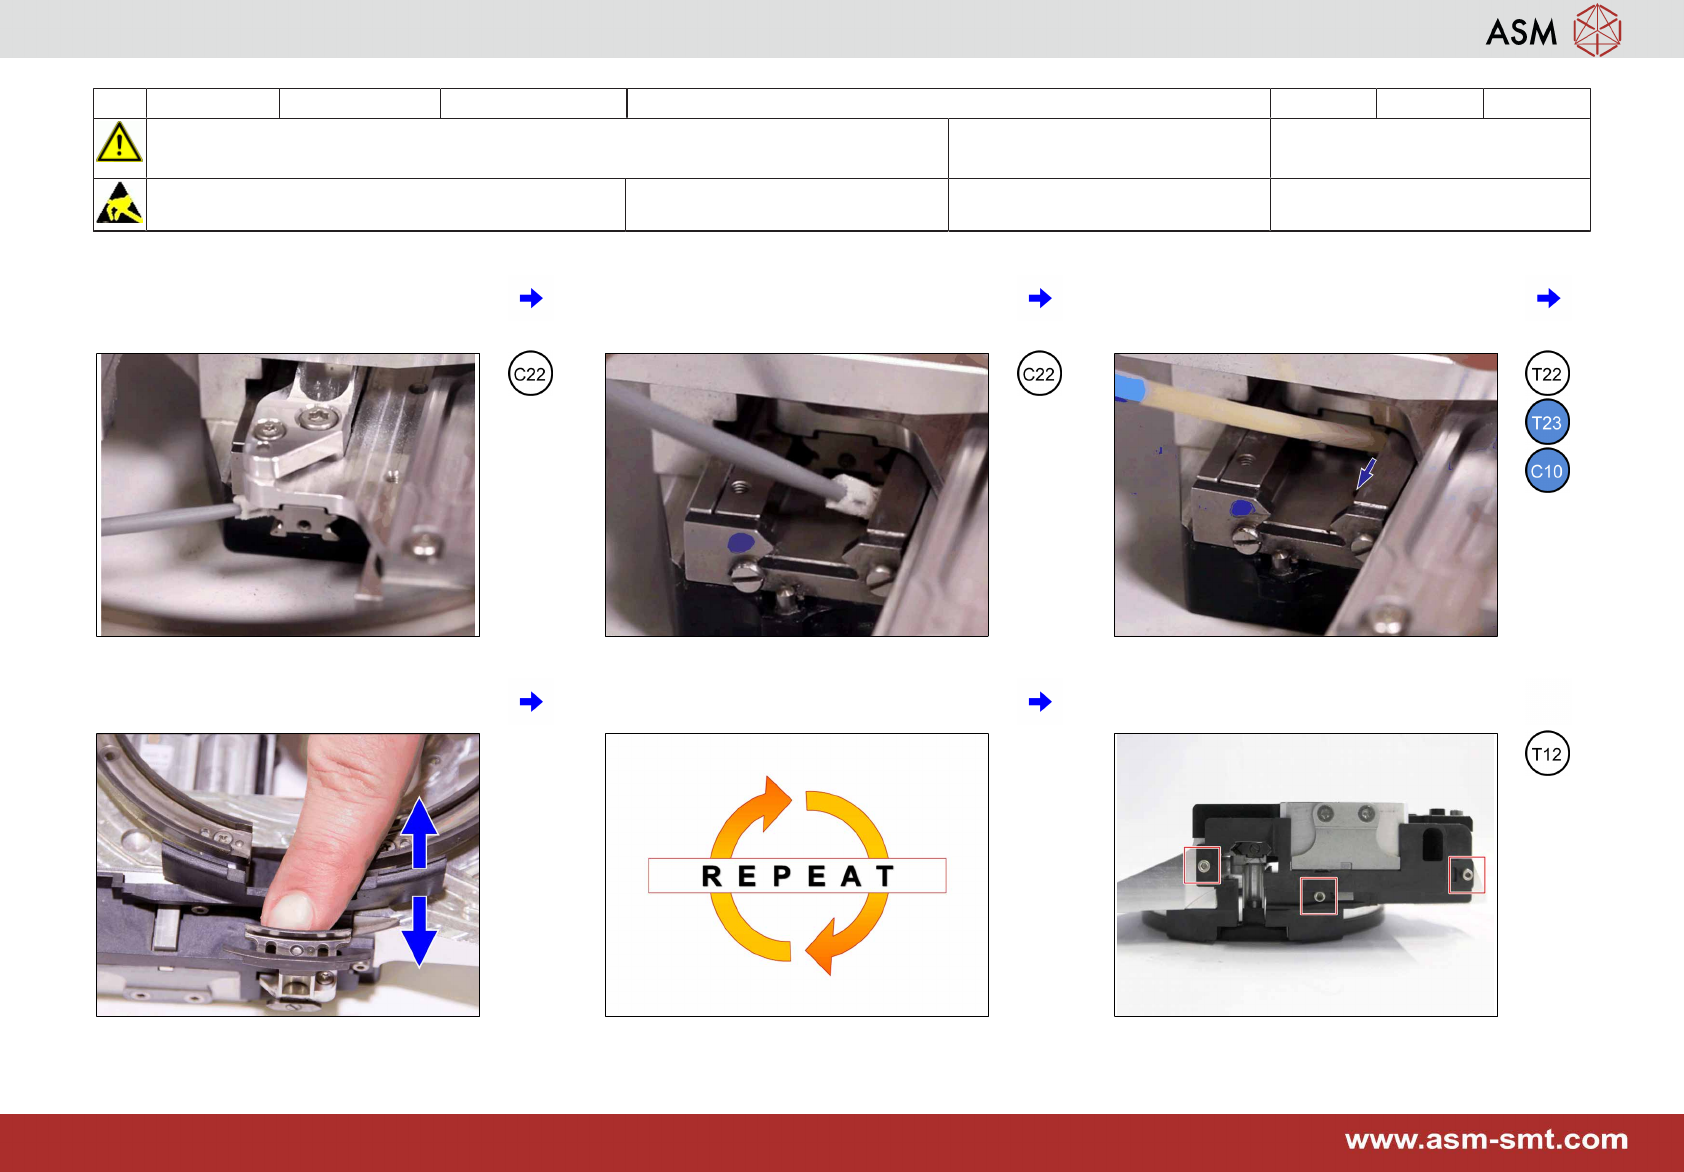
6 6-monthly CPP Clean / lubricate the Z-axis linear guide 4 min 2 / 2
CAUTION!Refer to safety instructions in user manual before commencing Mainten-
ance
NOTICE! ESD guidelines are to be followed Tool:
T12, T22, T23
Wear Part: Consumables:
C10 , C22
7 Keep the Z-axis in and clean the movable
part on both sides at the top.
8 Move the Z-axis out and clean the fixed
part on both sides at the top.
9 Keep the Z-axis out and apply 1 x 4 µl with
a slight motion to the left and right center
of the fixed part at the top.
10 Move the Z-axis 5 times up and down. 11 Repeat step 9 to 10 one more time. 12 Mount the plastic cover onto the Z-axis
housing.
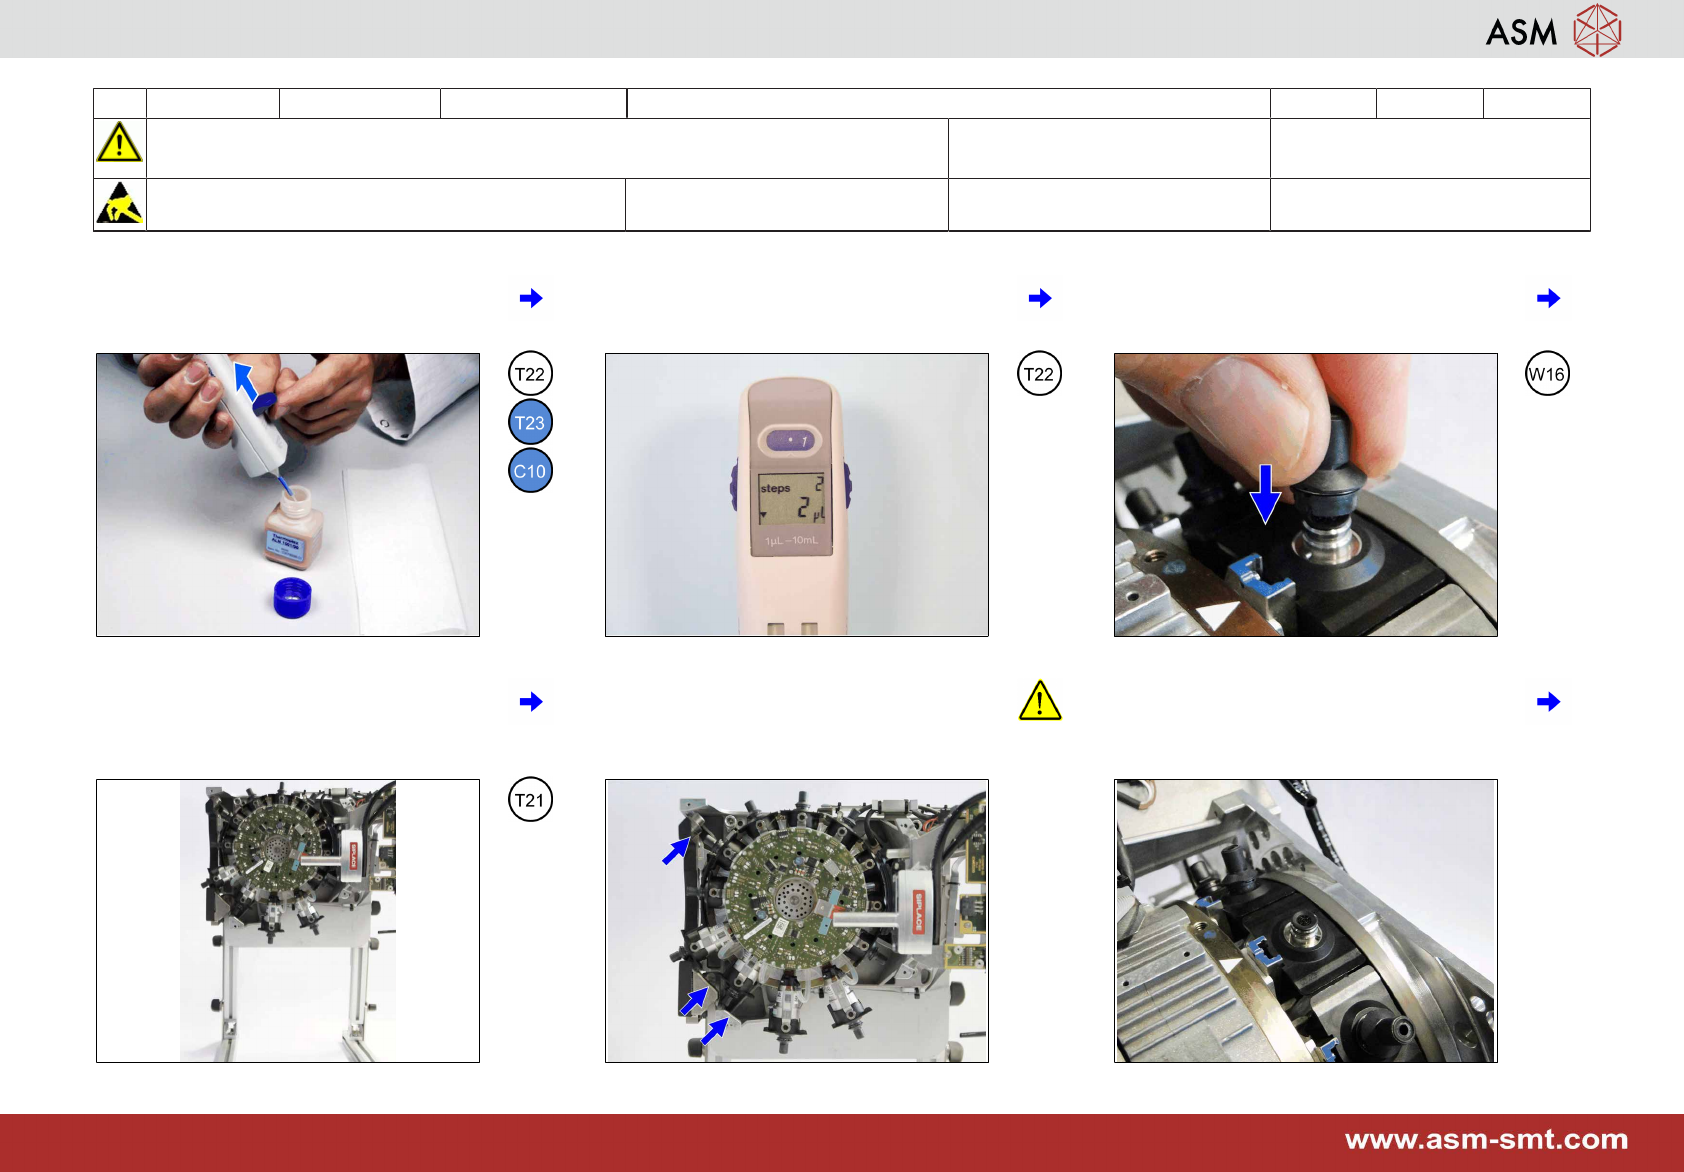
7 6-monthly CPP Clean / lubricate the DP segment guide 6 min 1 / 3
CAUTION!Refer to safety instructions in user manual before commencing Mainten-
ance
NOTICE! ESD guidelines are to be followed Tool:
T21, T22 , T23
Wear Part:
W16
Consumables:
C10 , C22
1 Prepare the multipette. See appendix
"Prepare the multipette.
2 Turn the wheel and adjust 2 µl. 3 Put a calibration nozzle 2057 onto all seg-
ments except segment 1 to indicate the
starting point.
4 Move the head 90° to the right and put the
head stand in the upright position.
5 To prevent damage to the segments en-
sure they are not hitting the head frame or
the component sensor when turning the
star.
6 Turn the star until segment 1 is at the top.