ASM贴片机CPP头半年保养.pdf - 第32页
10 6-monthly CPP Clean the DP light barrier 15 min 2 / 2 CAUTION!Refer to safety instructions in user manual before commencing Mainten- ance NOTICE! ESD guidelines are to be followed Tool: T3, T21 Wear Part: Consumables…
10 6-monthly CPP Clean the DP light barrier 15 min 1 / 2
CAUTION!Refer to safety instructions in user manual before commencing Mainten-
ance
NOTICE! ESD guidelines are to be followed Tool:
T3, T21
Wear Part: Consumables:
C5 , C22 , C28
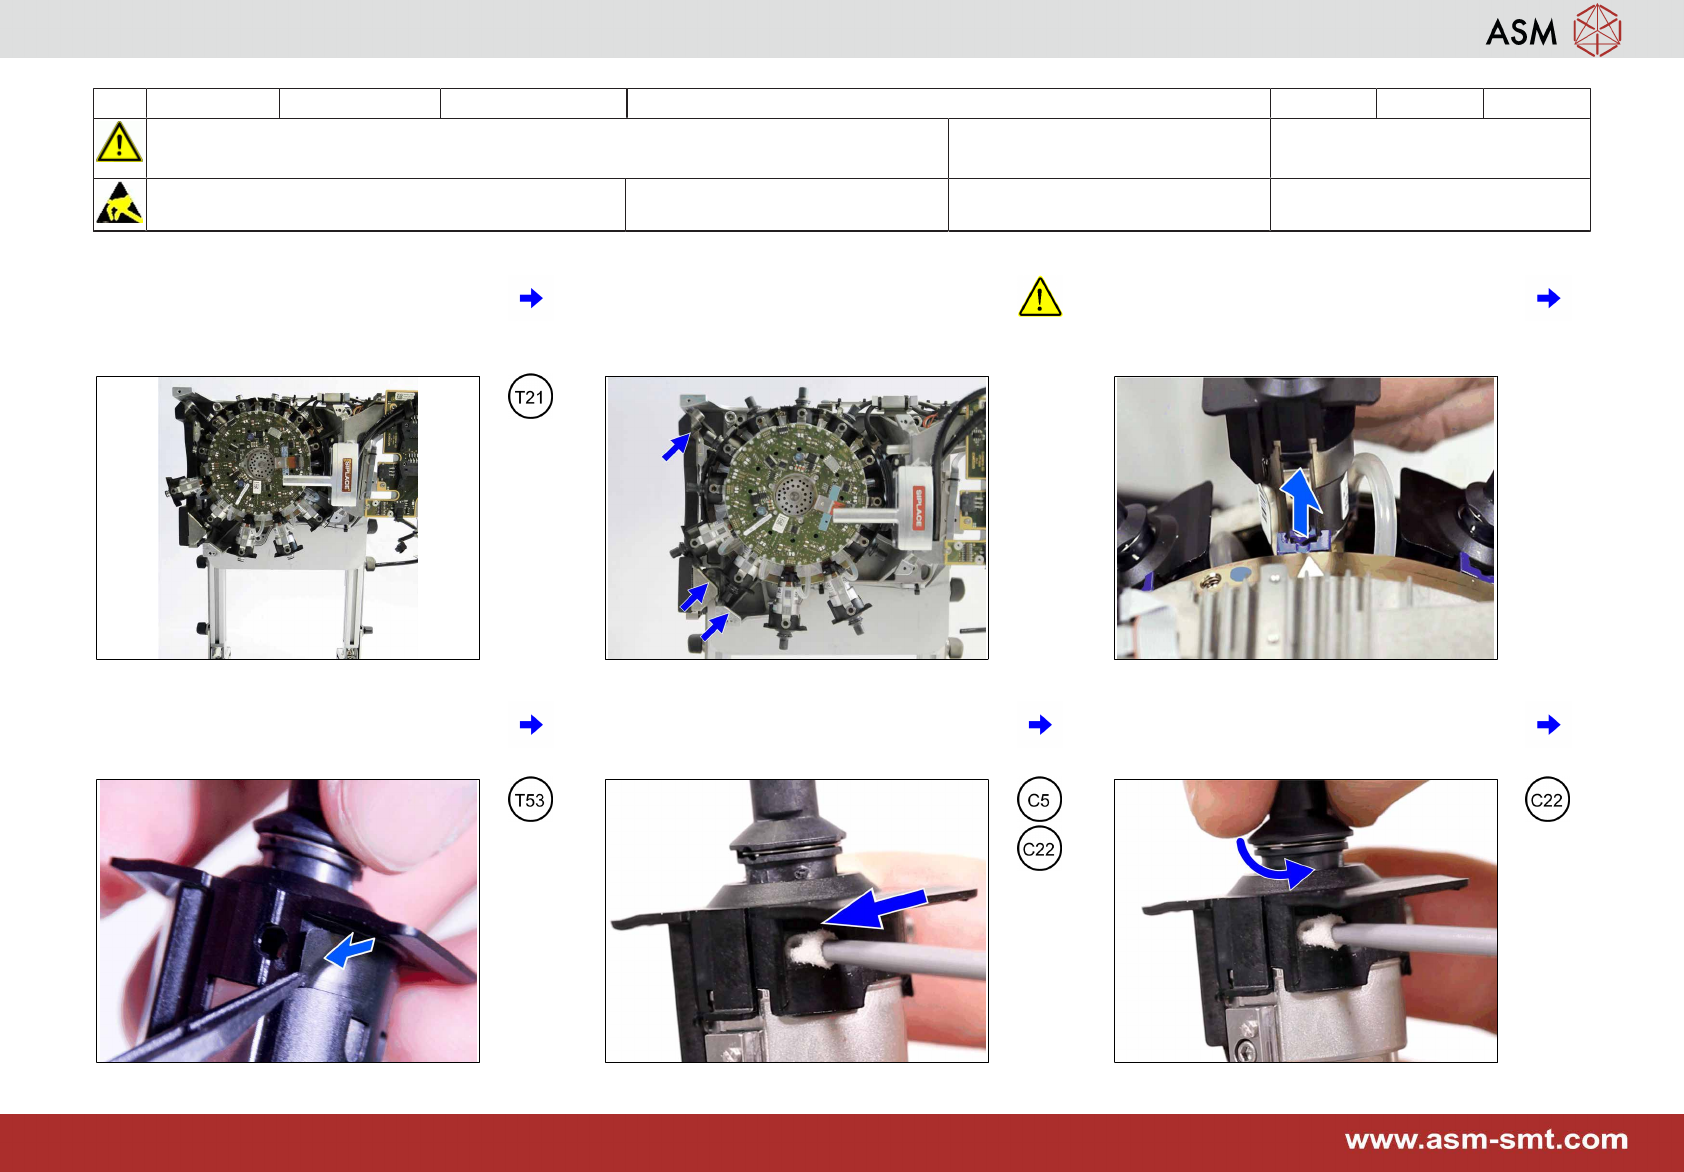
1 Move the head 90° to the right and put the
head stand in the upright position.
2 To prevent damage to the segments en-
sure they are not hitting the head frame or
the component sensor when turning the
star.
3 Move the segment out to maximum and
hold it there.
4 Remove the black protection label. 5 Move a new cleaning stick fully into the
service hole until you recognize a move-
ment at the nozzle.
6 Turn the DP station full 3 rotations using
the nozzle and remove the cleaning stick.
10 6-monthly CPP Clean the DP light barrier 15 min 2 / 2
CAUTION!Refer to safety instructions in user manual before commencing Mainten-
ance
NOTICE! ESD guidelines are to be followed Tool:
T3, T21
Wear Part: Consumables:
C5 , C22 , C28
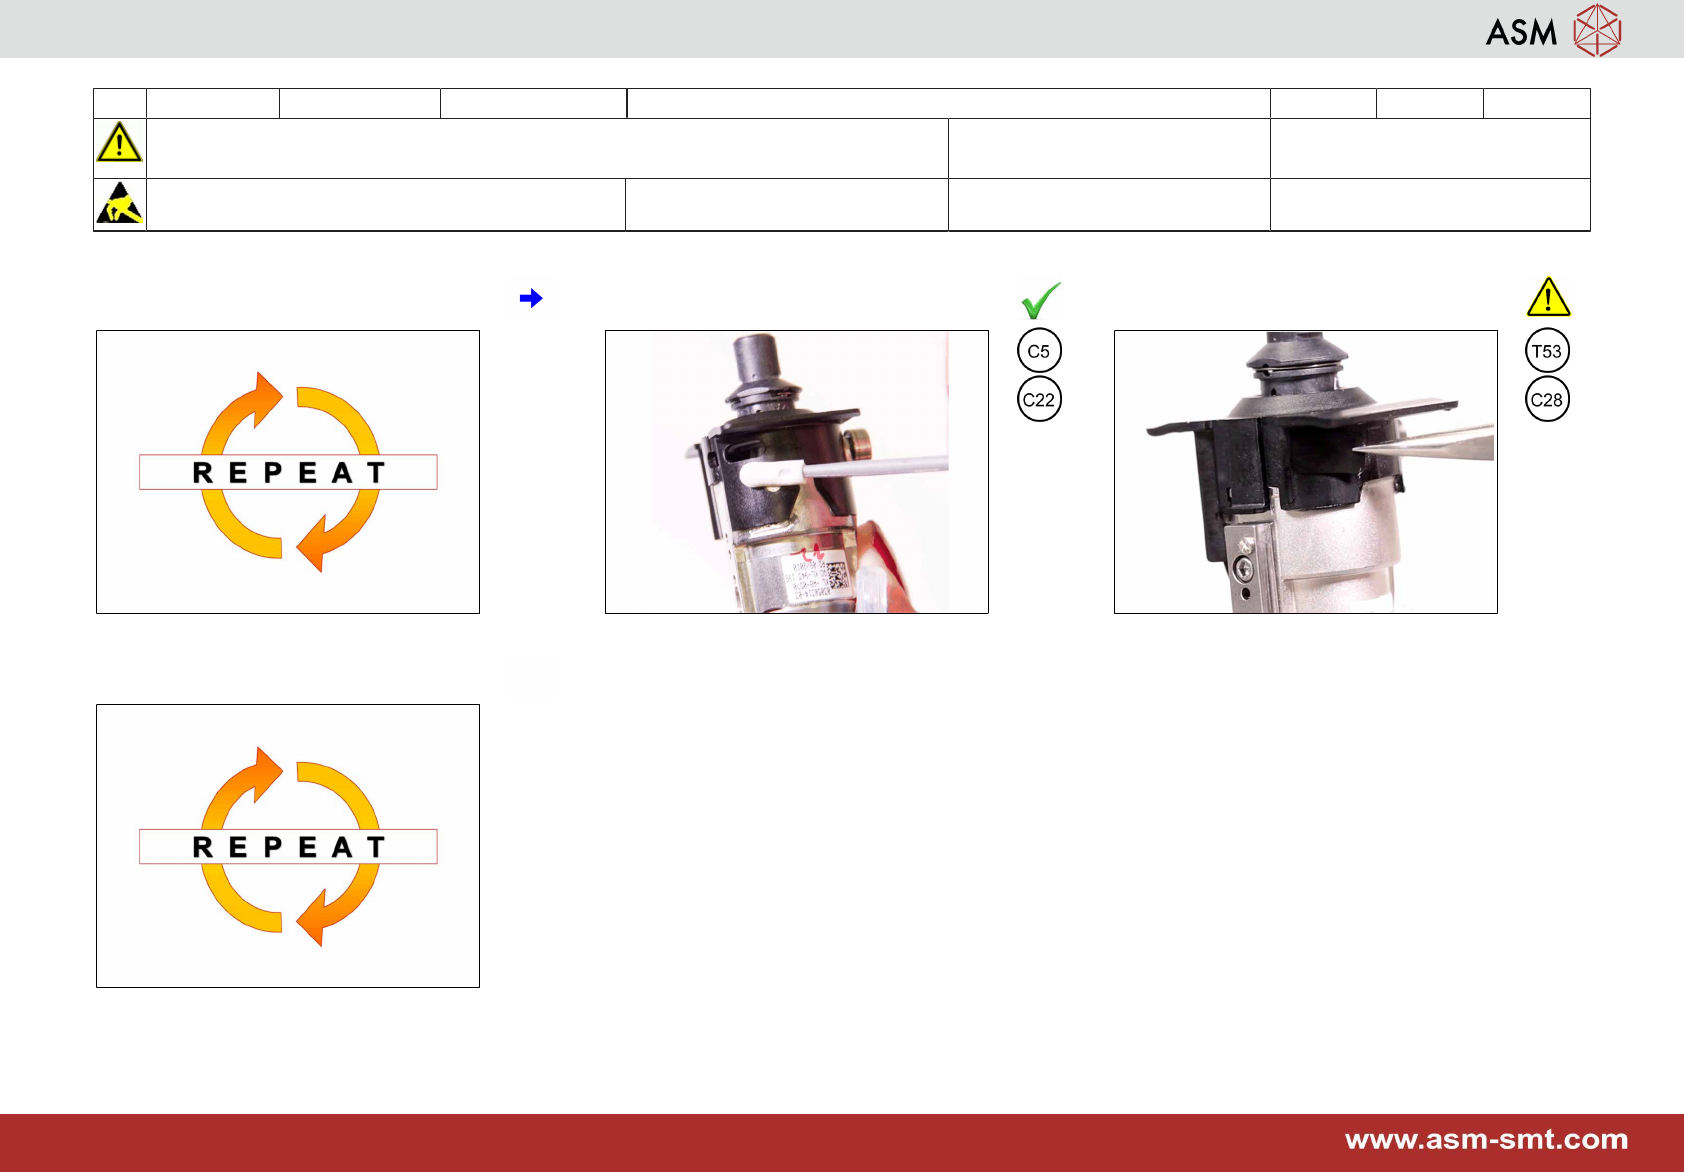
7 Repeat step 5 to 6 if the tip of the cleaning
stick is dirty.
8 If OK clean the area around the service
hole.
9 Attach a new black protection label. En-
sure the opening is fully covered.
10 Repeat step 3 to 9 for all other segments.
11 6-monthly CPP Mount the holding circuit 3 min 1 / 2
CAUTION!Refer to safety instructions in user manual before commencing Mainten-
ance
NOTICE! ESD guidelines are to be followed Tool:
T21, T44, T53, T76
Wear Part:
W29, W30
Consumables:
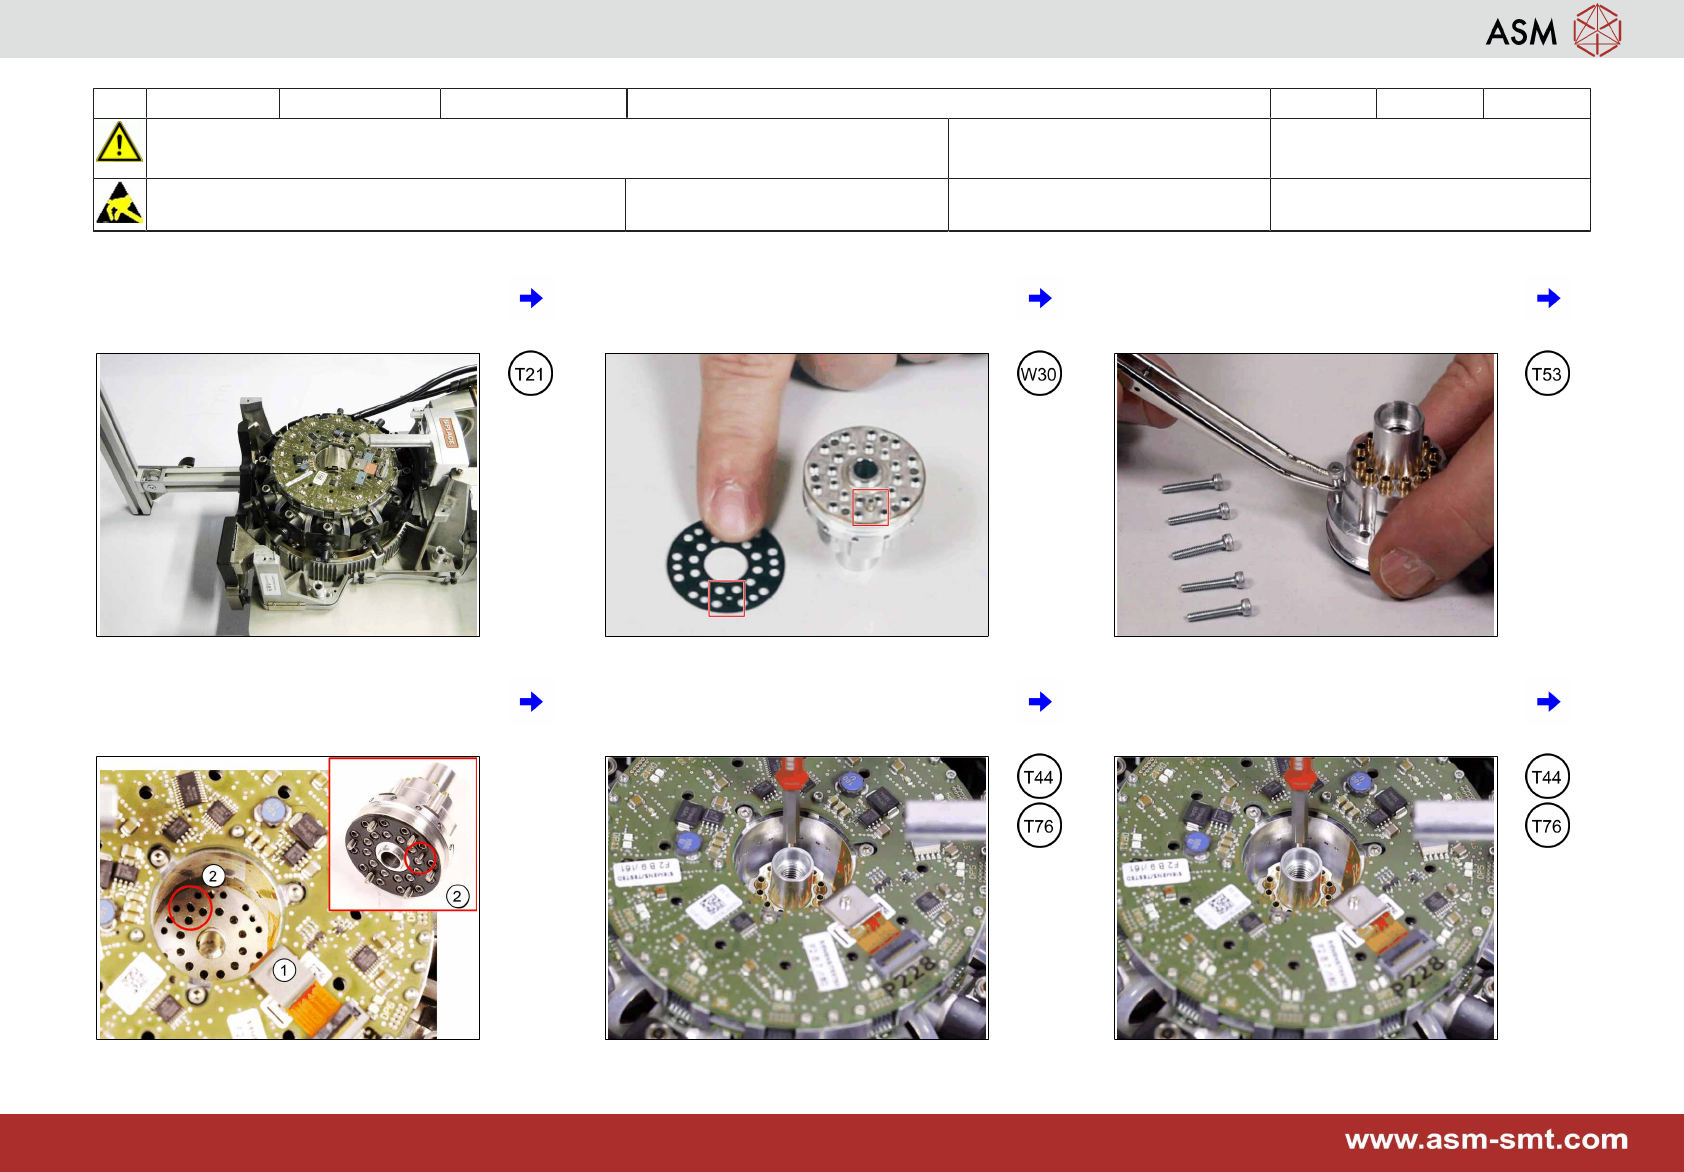
1 Turn the head upright and put the head
stand flat on the table.
2 Place the seal properly on a maintained
holding circuit. Take care of the correct fit-
ting pin position.
3 Insert the 6 mounting screws.
4 Carefully insert the holding circuit without
damaging the flexprint (1). Take care of
the correct fitting pin (2) position.
5 Tighten the 6 screws slightly. 6 Tighten the 6 screws crosswise with a
torque of 0,20 Nm.