ASM贴片机CPP头半年保养.pdf - 第36页
12 6-monthly CPP Clean the holding circuit housing and replace / mount the silencer 2 min 2 / 2 CAUTION!Refer to safety instructions in user manual before commencing Mainten- ance NOTICE! ESD guidelines are to be follow…
12 6-monthly CPP Clean the holding circuit housing and replace / mount the silencer 2 min 1 / 2
CAUTION!Refer to safety instructions in user manual before commencing Mainten-
ance
NOTICE! ESD guidelines are to be followed Tool:
T3, T21
Wear Part:
W15 , W29
Consumables:
C3, C5, C22
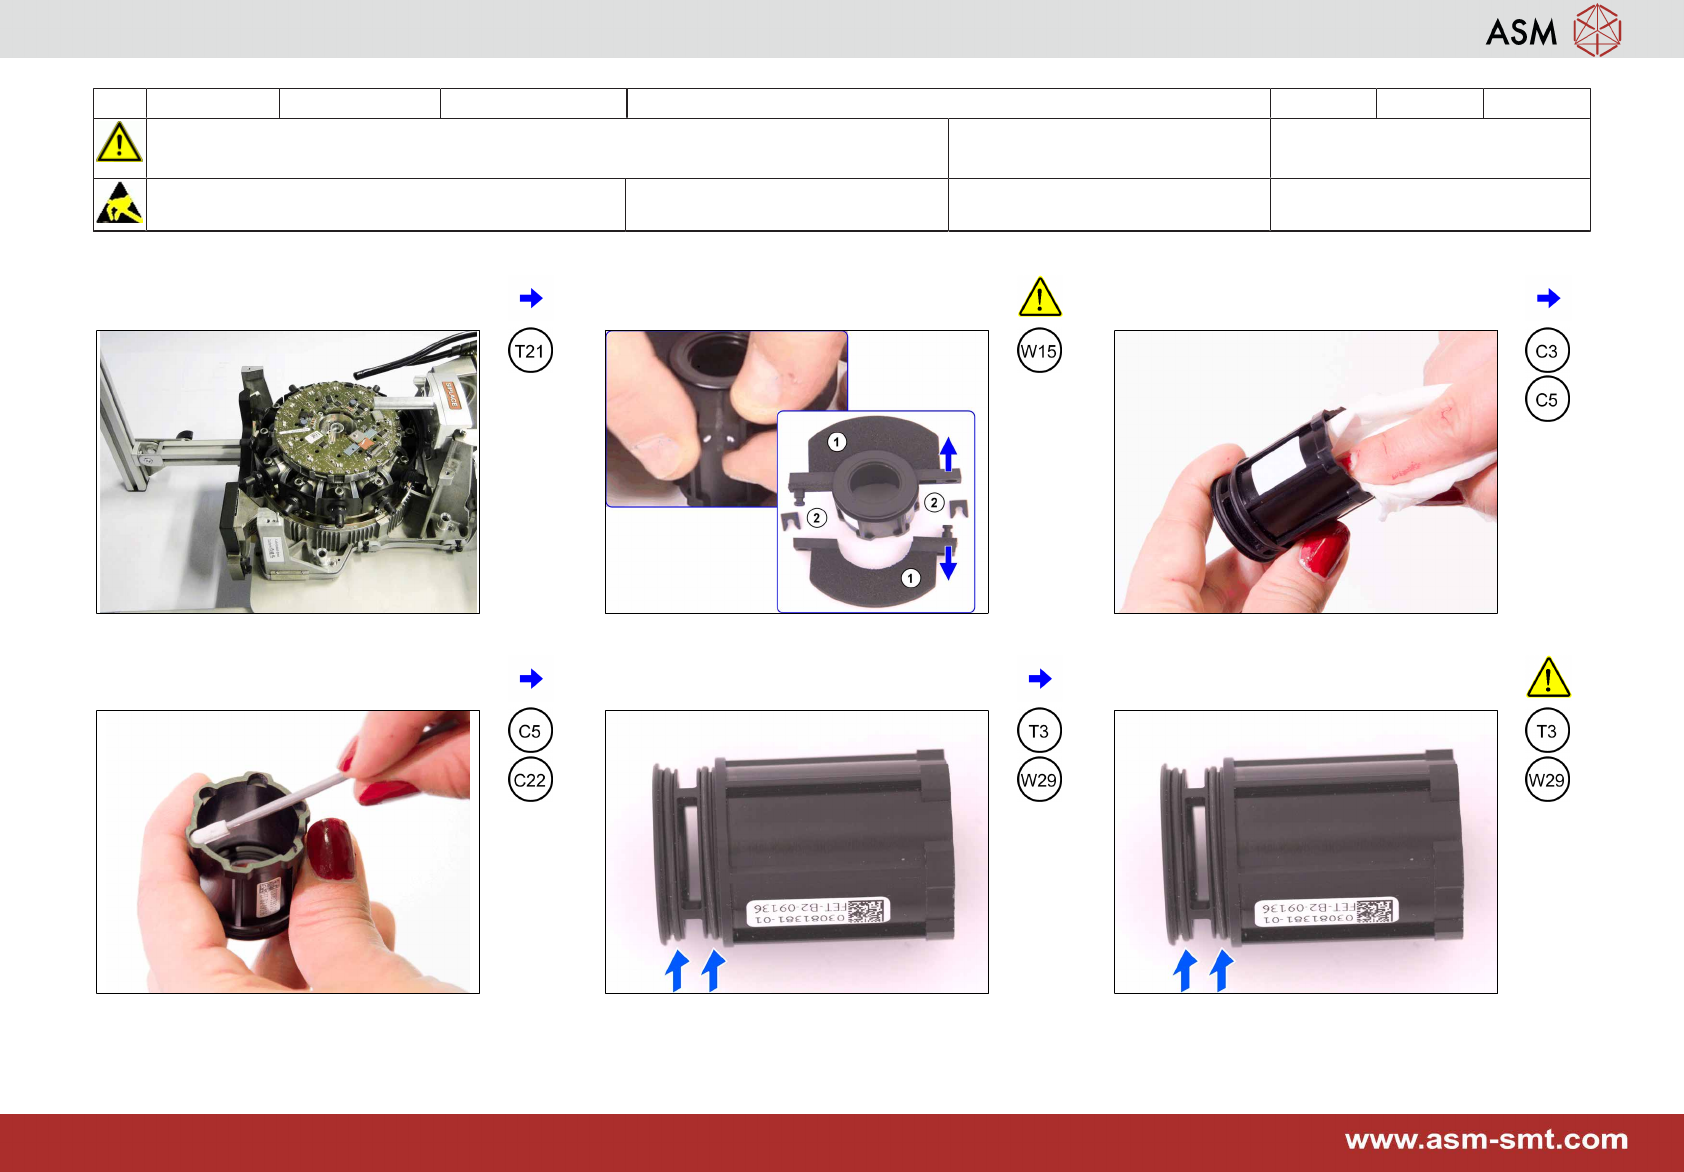
1 Proceed with the head stand flat on the
table.
2 Carefully loosen the retaining clips (2) of
the silencer (1) and remove it.
3 Clean the housing of the holding circuit.
4 Clean the housing including all grooves
and recesses.
5 Remove both O-Rings. 6 Mount the both O-rings. Note: Do not lub-
ricate the O-rings!

12 6-monthly CPP Clean the holding circuit housing and replace / mount the silencer 2 min 2 / 2
CAUTION!Refer to safety instructions in user manual before commencing Mainten-
ance
NOTICE! ESD guidelines are to be followed Tool:
T3, T21
Wear Part:
W15 , W29
Consumables:
C3, C5, C22
7 Check the silencer for dirt, damages and
for correct version.
8 If OK proceed with step 10. 9 If not OK replace it with a new one.
10 Mount the silencer. Take care to insert the
clips from the top.
11 While pressing the clips into place ensure
to support the pins firmly from below.
12 Insert the holding circuit housing and turn
it slightly until it visibly snaps into place.
13 6-monthly CPP Clean / mount the screwed joint 1 min 1 / 1
CAUTION!Refer to safety instructions in user manual before commencing Mainten-
ance
NOTICE! ESD guidelines are to be followed Tool:
T3, T13, T21
Wear Part:
W29
Consumables:
C3, C5
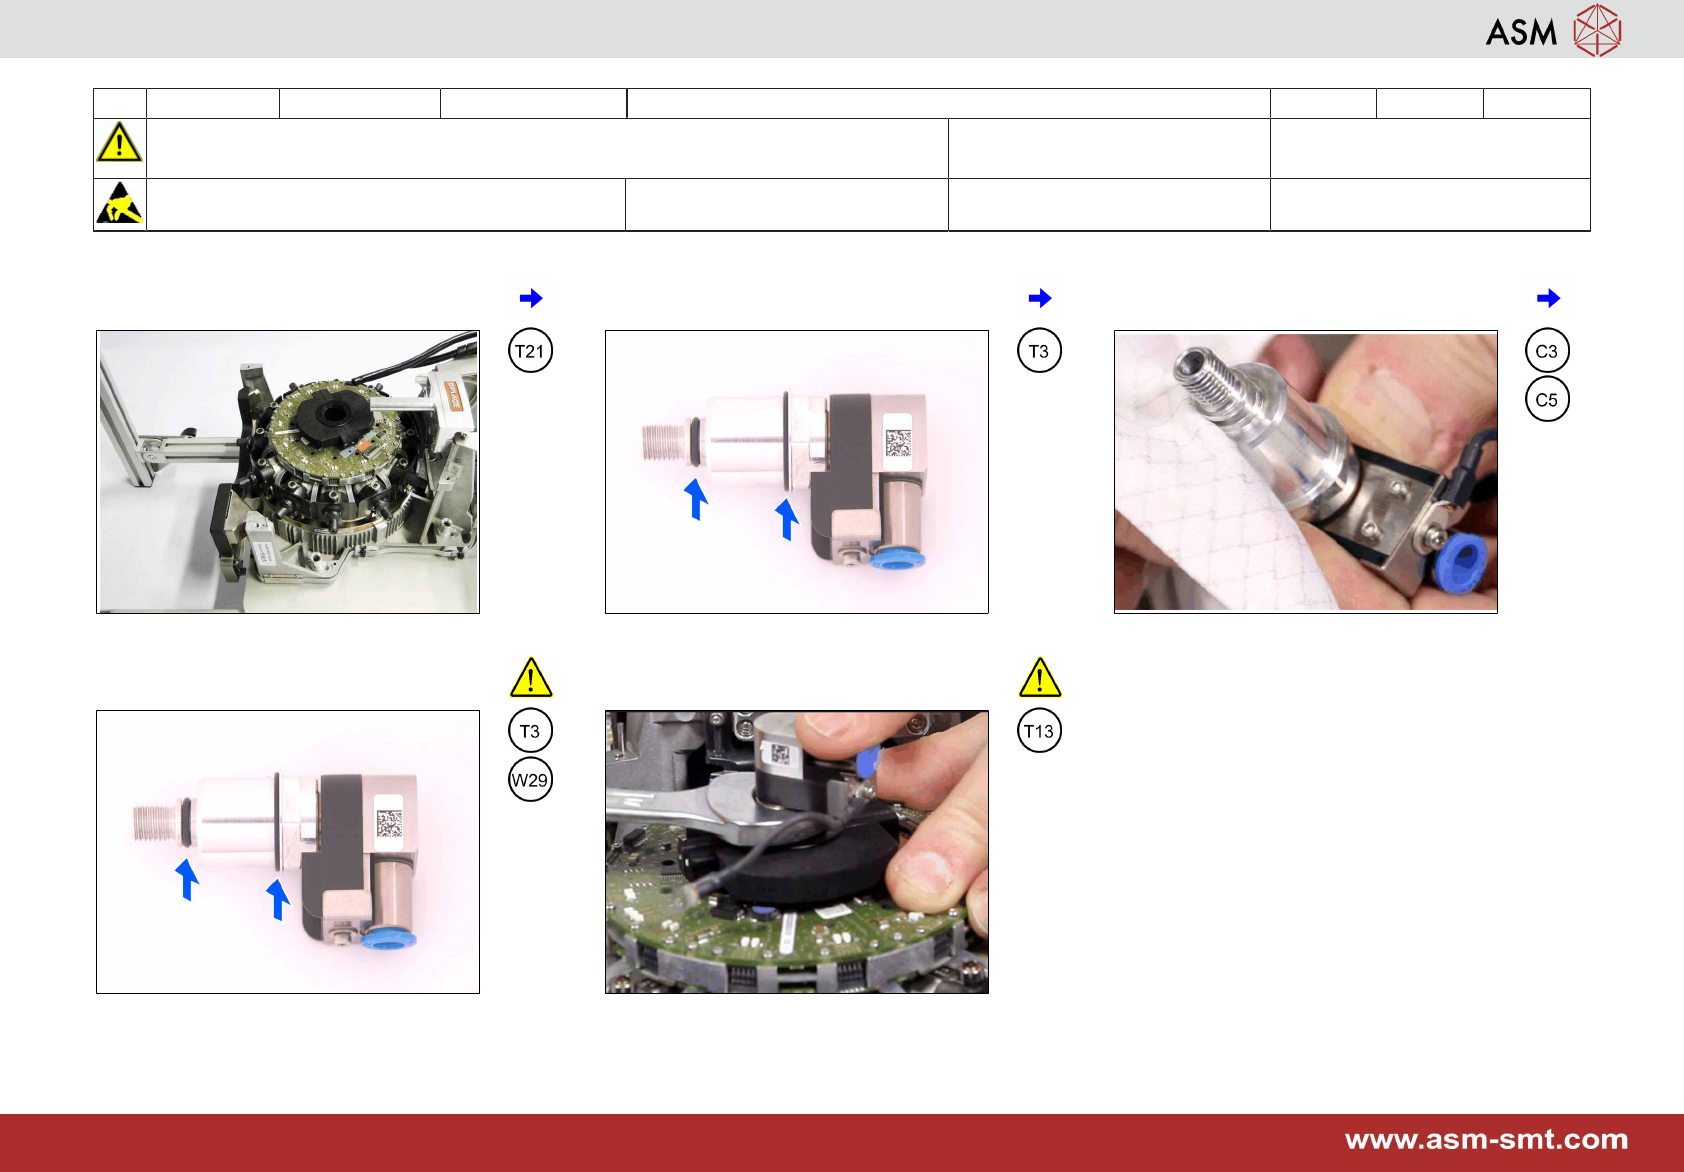
1 Proceed with the head stand flat on the
table.
2 Remove both O-rings. 3 Clean the screwed joint.
4 Mount two new O-rings without lubricating
them.
5 Place the screwed joint and tighten the fix-
ing nut very carefully.