00196845-02_AI_Vakuumpumpe_SXDX4_X-Serie-S_de_en.pdf - 第89页
Fitting the Vacuum Pump 3.2.4 Converting the Gantries Changeover Vacuum Pump Vakuumpumpe 89 3.2.4 3 . 2 . 4 C o n v e r t in g t h e G a n t r ie s Converting the Gantries For conversion of the gantr ies to vacuum operat…
Fitting the Vacuum Pump
Changeover 3.2.1 Switching off the Machine
88 Vacuum Pump Vakuumpumpe
3.2
3.2 Changeover
Changeover
DX4 machines are fitted with a manual table as a default. The component trolley is an option.
SX4 machines are fitted with component trolleys.
Before installing the pump, make sure that locations 1, 2 and 4 are accessible.
► Undock the component trolleys from the relevant locations of the SX4 machines.
Or
► Remove the manual tables from the relevant locations of the DX4 machines (see "3.2.2 Removing
the Manual Table (DX Machines Only)" [ ➙ 88]).
3.2.1
3.2.1 Switching off the Machine
Switching off the Machine
► Shut down the station computer and switch off the machine at the main switch.
► Disconnect the machine from the main power and the pneumatic supplies.
► Always secure the machine against unauthorized reactivation. See "1.2 Preparatory Work..." [➙72].
3.2.2
3.2.2 Removing the Manual Table (DX Machines Only)
Removing the Manual Table (DX Machines Only)
► Take out the tape container and the reject tray.
3.2.3
3.2.3 Dismantling the Waste Slide
Dismantling the Waste Slide
► Loosen the two knurled screws underneath the table
(1 and 2) and lift the table out of the machine.
► Remove the two brackets (3) for the tape container
from the manual table.
Waste slide (example of DX4 shown)
The following tasks must be performed at the manual ta-
ble and at the component trolley:
► Loosen the four screws (1) fastening the waste slide
from below to the assembly brackets (2), on the left
and right, and remove the waste slide.
Fitting the Vacuum Pump
3.2.4 Converting the Gantries Changeover
Vacuum Pump Vakuumpumpe 89
3.2.4
3.2.4 Converting the Gantries
Converting the Gantries
For conversion of the gantries to vacuum operation, you require the following for each gantry:
▪ 1x upgrade kit vacuum X4i rotated [03075306-xx] (gantry 2 and 4)
▪ 1x upgrade kit vacuum X series R10 [03075305-xx] (gantry 1 and 3)
The following section illustrates the conversion of a distributor for placement heads to vacuum pump op-
eration, using the example of gantry 1/3.
3.2.4.1
3.2.4.1 Connecting the Vacuum Hoses to the Distributor Placement Head Vacuum
Connecting the Vacuum Hoses to the Distributor Placement Head Vacuum
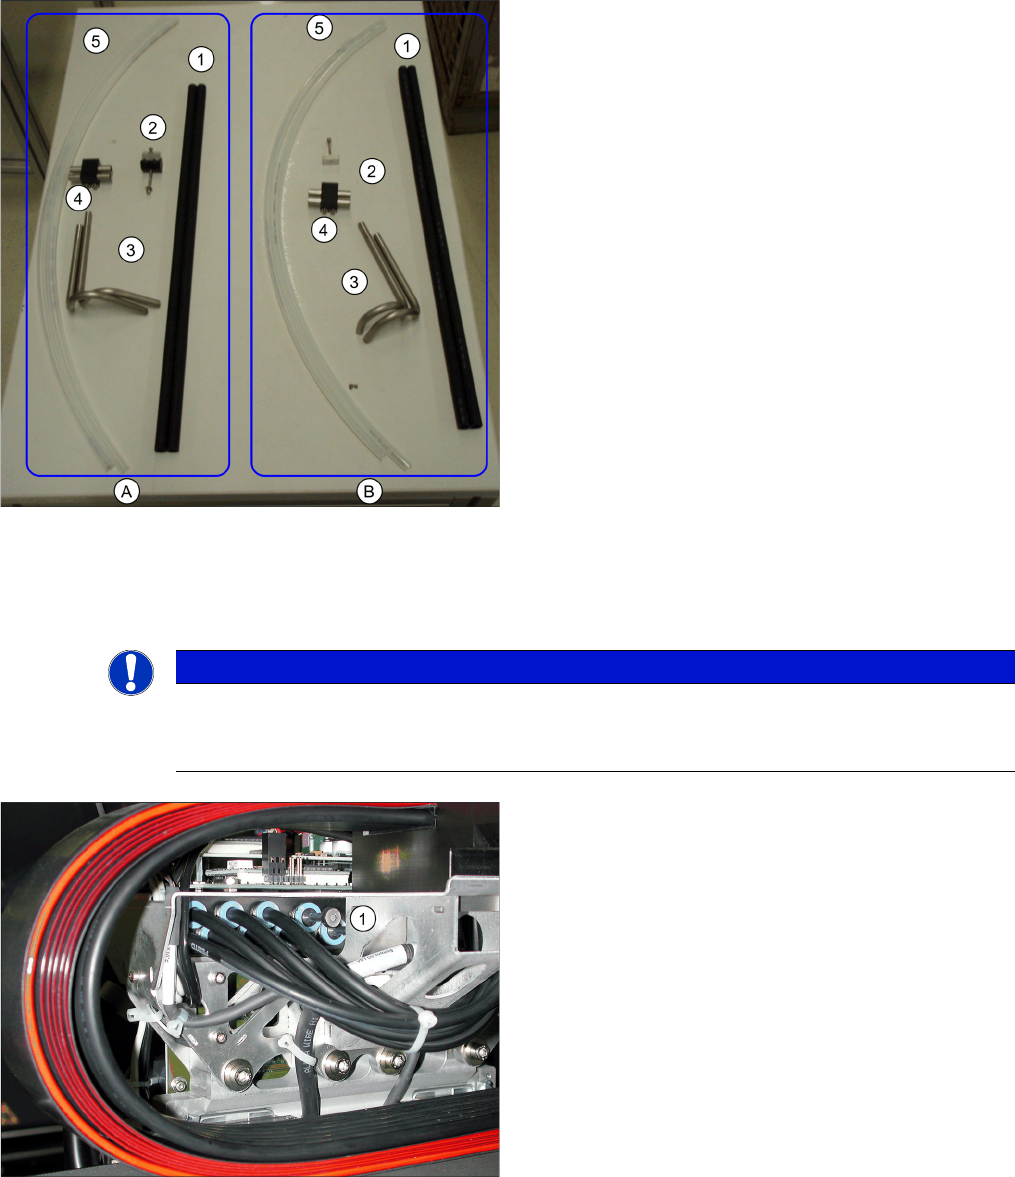
A = upgrade kit vacuum X4i rotated [03075306-xx] for
gantry 2 and 4
B = upgrade kit vacuum X series R10 [03075305-xx] for
gantry 1 and 3
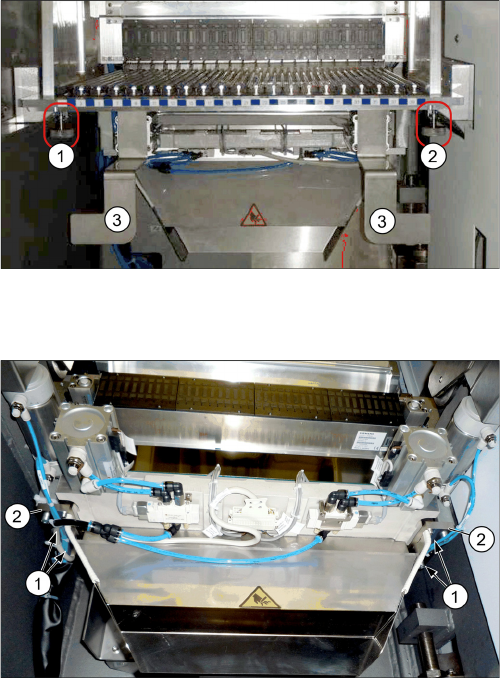
1. Vacuum hoses, color
2. clamp
3. Vacuum pipe for vacuum connection 1+2
4. Connection duo tube
5. Hoses, transparent
NOTICE
Images
The following section shows diagrams illustrating conversion of the X series machine, as an ex-
ample. Conversion of the SX4 and DX4 machines is identical.
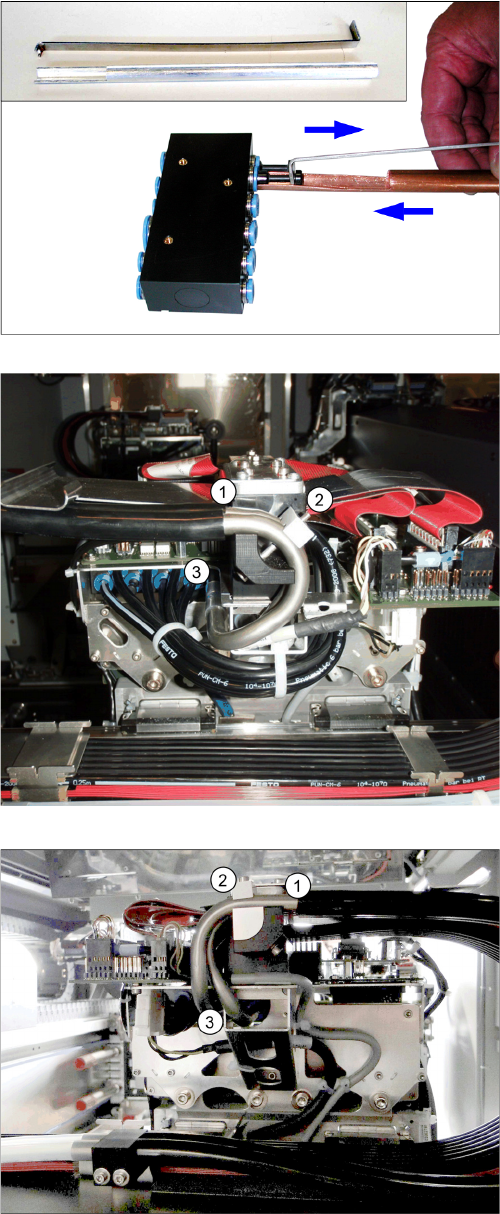
► Use the unlocking tool for Q8 to remove both blanking
plugs from the distributor placement head vacuum (1)
at all gantries to be converted.
Fitting the Vacuum Pump
Changeover 3.2.4 Converting the Gantries
90 Vacuum Pump Vakuumpumpe
Unlocking tool for connections which are difficult to ac-
cess
Gantry 1 and 3
Rotated gantry (X4i S)
► Attach the vacuum hoses to the two vacuum pipes for
vacuum connection 1 und 2 (1).
► Connect the two pipes to the distributor for the place-
ment head vacuum (3).
► Fasten the vacuum tube connection 1+2 using the
clamping piece (2), with the help of an M3x30 mm
screw and a washer.