SM482PLUS_Maintenance(Eng_Ver2.7).pdf - 第47页
SM482PLUS Maintenance Handbo ok 3-1 4 Chap ter 3 Daily Inspe ction Multi -Func tional Placer Checking and replacing the Mist Separator Filter Daily Inspection Step 5. Se para te the c ont aine r by tur ning it c oun terc…
SM482PLUS Maintenance Handbook
3-13
Chapter 3
Daily Inspection
Multi-Functional Placer
Checking and replacing the Mist Separator Filter
Clean the dust from the air to prevent machine failure due to foreign materials when
using pneumatic air.
Measures
Step 1.
Press the 'STOP' and 'RESET' buttons in order after
pressing the 'EMG' button on the OP panel to stop
operation.
For more details, refer to “How to perform emergency stop” on page
1-2.
Step 2.
Shut the main pneumatic pressure supplied to the
machine.
Step 3.
Mist Separator Filter is discolored.
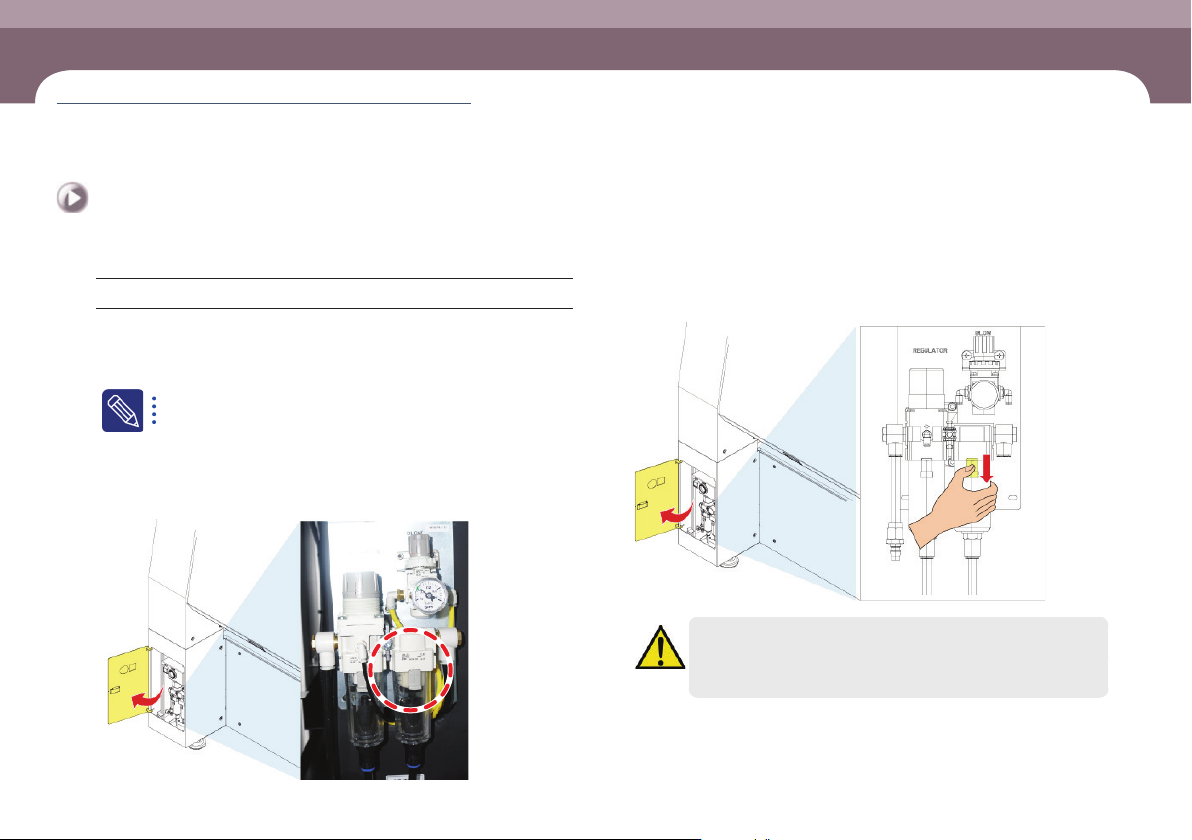
Step 4.
Open the door at the front left bottom of the machine
and lower the lock button of the mist filter container.
Caution
Failure to shut off pneumatic pressure when replacing the air filter
or mist separator filter may result in personal injury. Shut off the
pneumatic line before replacing any of these parts.
Checking and replacing the Mist Separator Filter
(Time required: 30min / No. D-6)
SM482PLUS Maintenance Handbook
3-14
Chapter 3
Daily Inspection
Multi-Functional Placer
Checking and replacing the Mist Separator Filter
Daily Inspection
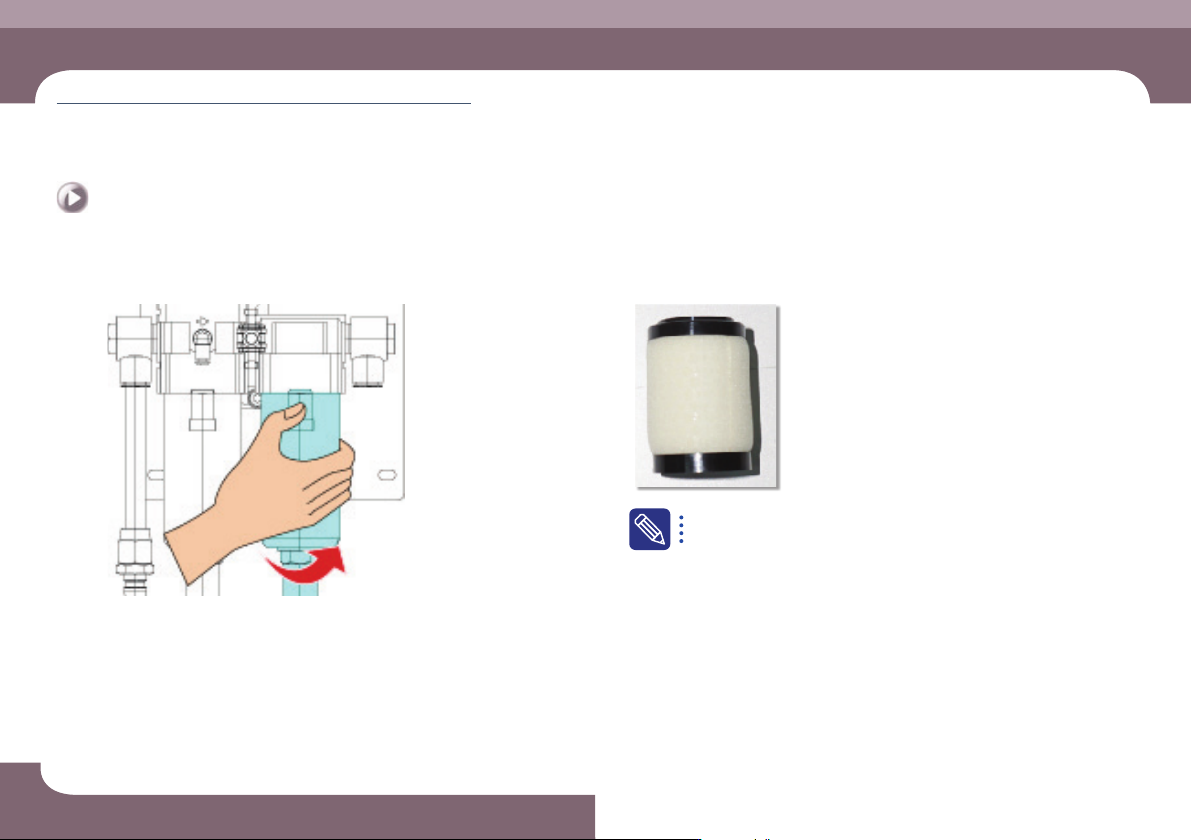
Step 5.
Separate the container by turning it counterclockwise
Step 6.
Turn the filter clockwise to separate it.
Dispose of contaminated filters removed from the equipment
immediately as they cannot be reused and improper use may cause
problems with product performance.
Step 7.
Release the emergency stop as described in “Releasing
‘Emergency Stop’ mode” on page 1-6 and perform the
operation again.
Weekly Inspection
Chapter 4
Multi-Functional Placer
SM482PLUS Maintenance Handbook
4-1
Cleaning the Head Fly Camera Lens
Tool for Maintenance
Air spray, Ethyl alcohol, Cotton swab
Measures
Step 1.
Move the X Frame to front by referring to “Forward
movement of the X-frame” on page 1-3.
Step 2.
Press the 'STOP' and 'RESET' buttons in order after
pressing the 'EMG' button on the OP panel to stop
operation.
For more details, refer to “How to perform emergency stop” on page
1-2.
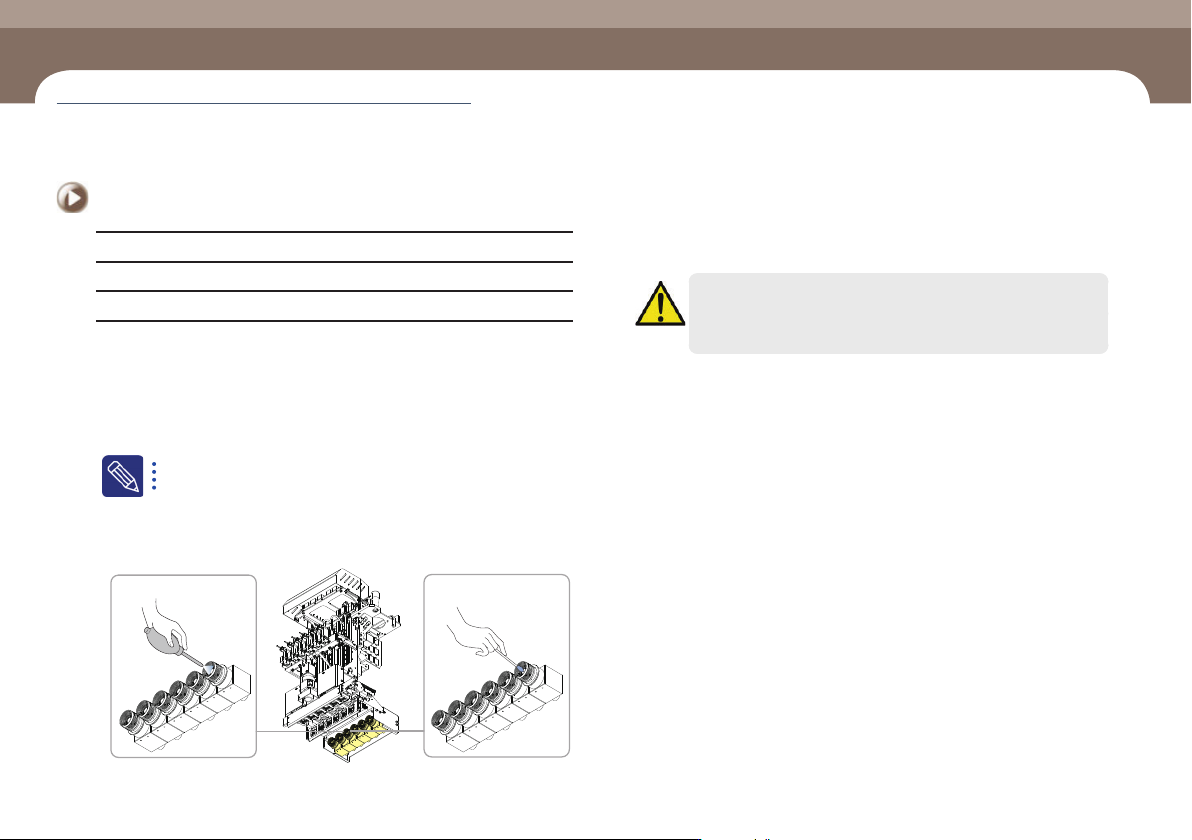
Step 3.
Remove any dust on the lens using an air spray. If
foreign materials are not removed completely, clean the
lens with a cotton swab slightly wetted with alcohol.
Caution
Cleaning the lens by exerting force may damage the surface of the
lens.
Step 4.
Release the emergency stop as described in “Releasing
‘Emergency Stop’ mode” on page 1-6 and perform the
operation again.
Cleaning the Head Fly Camera Lens
Chapter 4
Weekly Inspection
(Time required: 5min / No. W-1)