SM482PLUS_Maintenance(Eng_Ver2.7).pdf - 第62页
Mon thly Inspe ction Chap ter 5 Multi -Func tional Placer SM482PLUS Maintenance Handbo ok 5-9 Cleaning and Lubricating the Y Frame LM Guide T ool for M aintenanc e Ultra-fine fiber cloth, Lubricator: MG70, GREASE: AFE-CA…
Monthly Inspection
Chapter 5
Multi-Functional Placer
SM482PLUS Maintenance Handbook
5-8
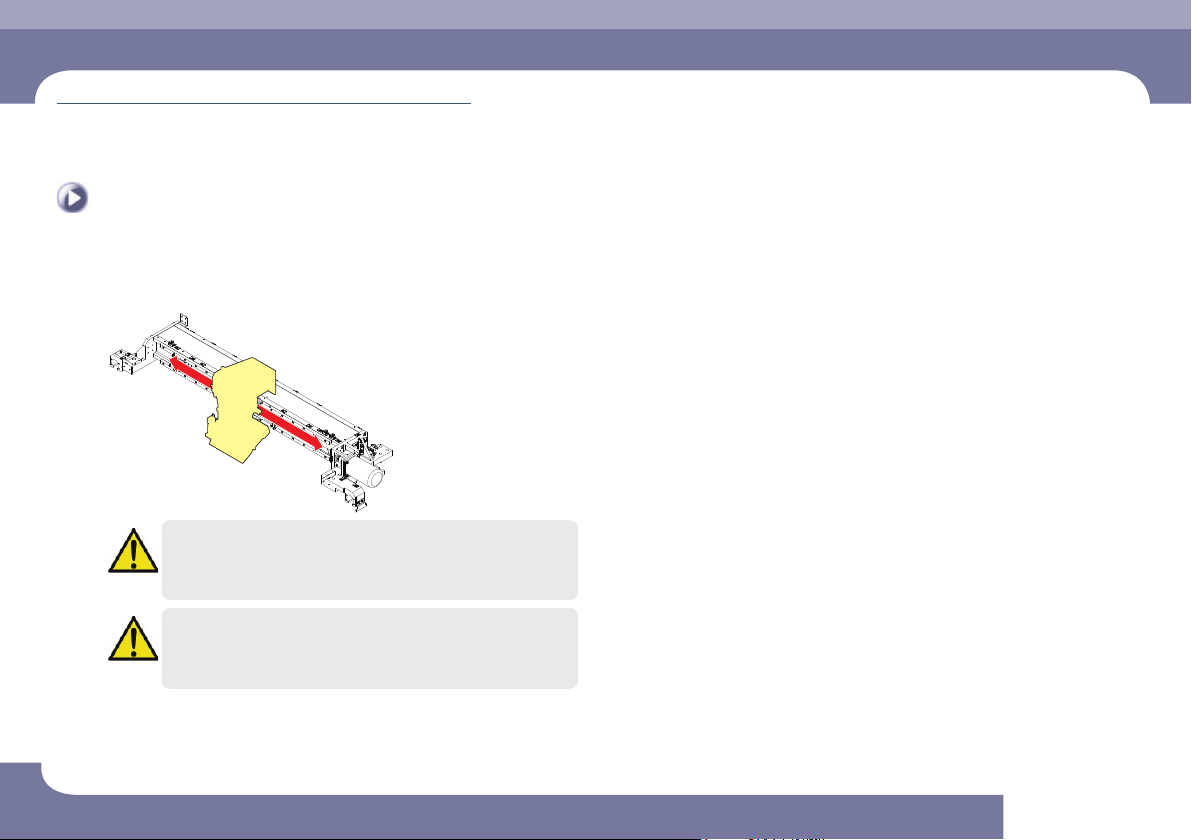
Cleaning and Lubricating the X Frame LM Guide, Ball Screw
Monthly Inspection
Step 5.
Move the head assembly to the left and right three
times using a head assembly handle.
Caution
If the machine's operating environment is harsh, check its lubrication
status frequently.
Caution
The designated grease must be applied using the designated
lubricator in the designated manner. Other lubricating methods are
unacceptable.
Step 6.
Release the emergency stop as described in “Releasing
‘Emergency Stop’ mode” on page 1-6 and perform the
operation again.

Monthly Inspection
Chapter 5
Multi-Functional Placer
SM482PLUS Maintenance Handbook
5-9
Cleaning and Lubricating the Y Frame LM Guide
Tool for Maintenance
Ultra-fine fiber cloth, Lubricator: MG70, GREASE: AFE-CA
Measures
Step 1.
Move the X Frame to front by referring to “Forward
movement of the X-frame” on page 1-3.
Step 2.
Press the 'STOP' and 'RESET' buttons in order after
pressing the 'EMG' button on the OP panel to stop
operation.
For more details, refer to “How to perform emergency stop” on page
1-2.
Step 3.
Clean the LM guide rail and ball screw using an ultra fine
fiber cloth.
Cleaning and Lubricating the Y Frame LM Guide
(Time required: 60min / No. M-7)
Monthly Inspection
Chapter 5
Multi-Functional Placer
SM482PLUS Maintenance Handbook
5-10
Cleaning and Lubricating the Y Frame LM Guide
Monthly Inspection
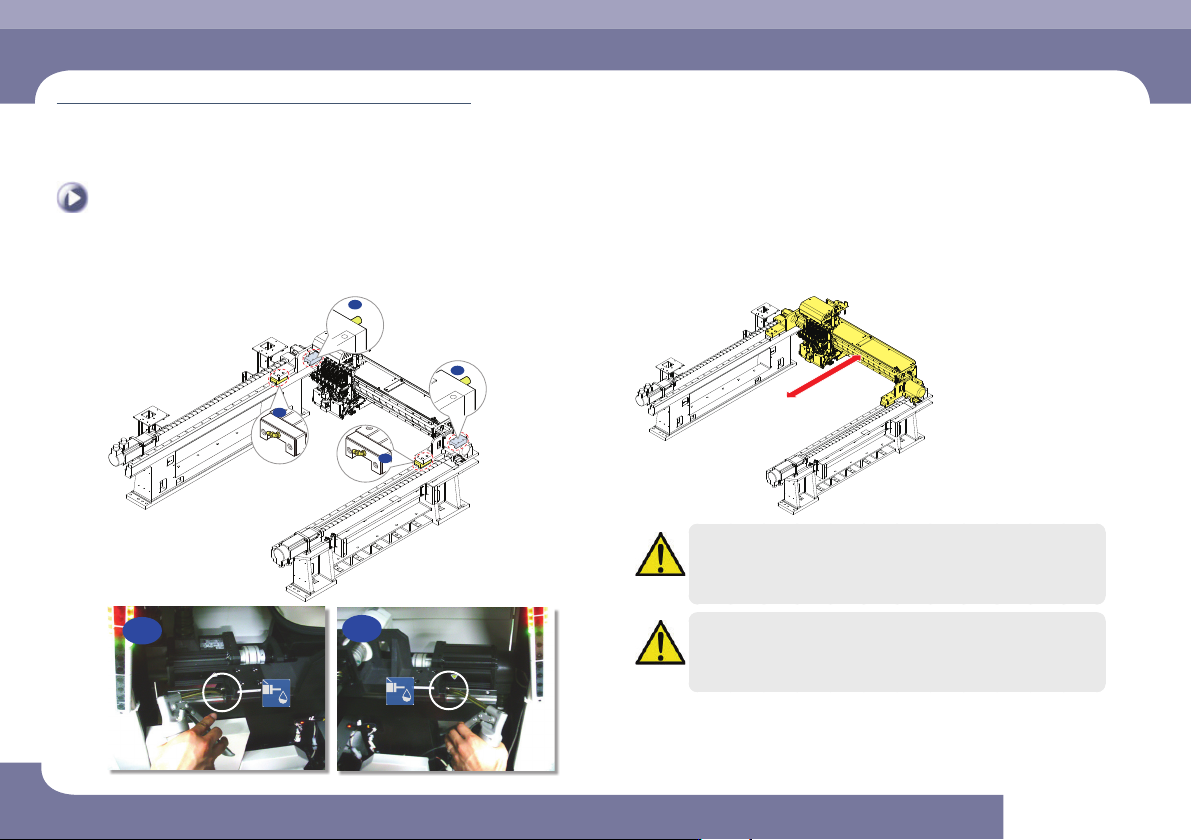
Step 4.
Inject the grease using a lubricator.
A
A
B
B
A
B
Step 5.
Move the X frames back and forth three times.
Caution
The designated grease must be applied using the designated
lubricator in the designated manner. Other lubricating methods are
unacceptable.
Caution
If the machine's operating environment is harsh, check its lubrication
status frequently.
Step 6.
Release the emergency stop as described in “Releasing
‘Emergency Stop’ mode” on page 1-6 and perform the
operation again.