00195425-01.pdf - 第112页
Anne x Inst al la tion a n d Co nf ig ura tio n Gui de SIP LAC E Ex pl ore r Bu nd led We b S erv er In st all at ion Ed iti on 05 /2 00 7 EN 112 → Click the To m c a t option Ser vice . Click on Next to continue . T he …
Installation and Configuration Guide SIPLACE Explorer Annex
Edition 05/2007 EN Bundled Web Server Installation
111
→ Read the license agreement. If you agree click I Agree, otherwise click Cancel. Clicking on
Cancel terminates the installation.
5
Fig. 5 - 17 Apache Tomcat setup - license agreement
→ The Choose Components dialog box will open.
→ Now select the features you wish to install.
5
Fig. 5 - 18 Apache Tomcat setup - selecting features
→ Select the installation variant Custom.
Annex Installation and Configuration Guide SIPLACE Explorer
Bundled Web Server Installation Edition 05/2007 EN
112
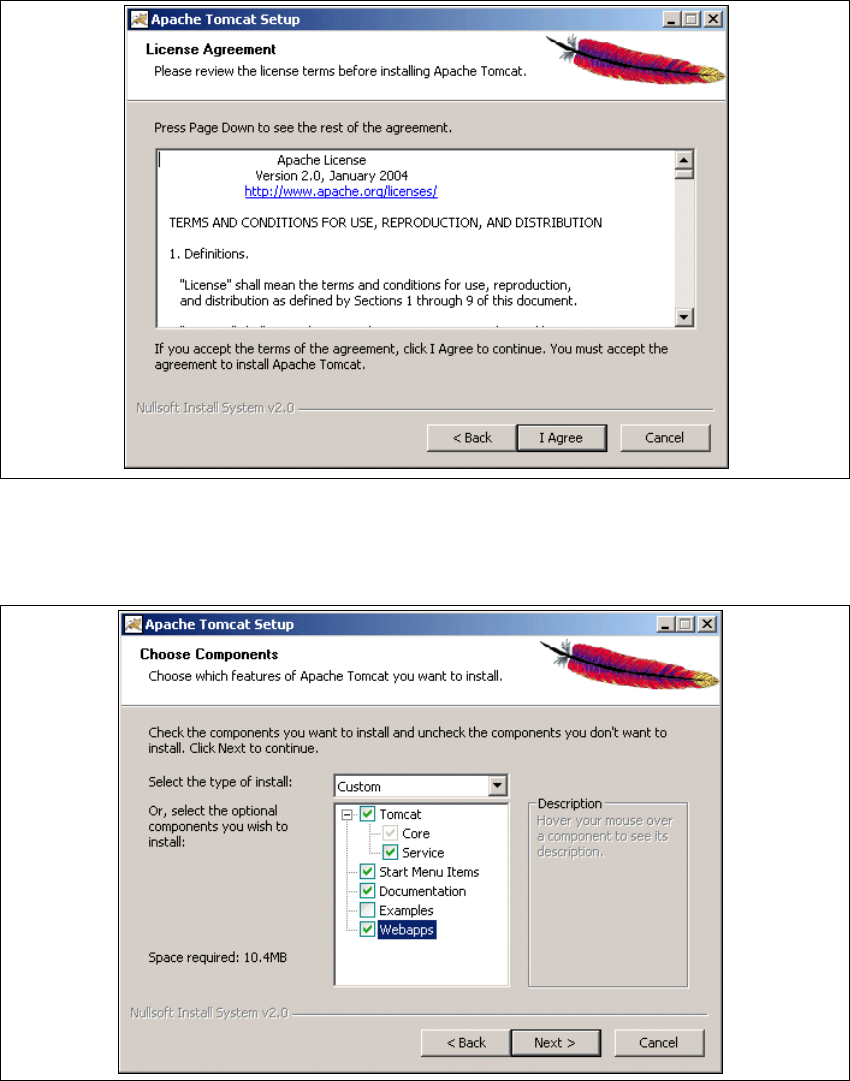
→ Click the Tomcat option Service. Click on Next to continue. The Choose Install Location
dialog box will open.
→ Now specify the folder in which you wish to install the application.
5
Fig. 5 - 19 Apache Tomcat setup - select installation destination folder
→ You can alter the default installation folder by using the Browse button.
→ Click on Next to continue. The Configuration dialog box will open.
→ Now enter the port number and the administrator access data for Tomcat.
5
Fig. 5 - 20 Apache Tomcat setup - configuration
Installation and Configuration Guide SIPLACE Explorer Annex
Edition 05/2007 EN Bundled Web Server Installation
113
→ Enter the port number for Tomcat in the HTTP/1.1 Connector Port field. By default, Tomcat is
installed on port 8080. This means that your users will access your website as follows: http://
yourServerName:8080/yourWebsite/index.jsp.
→ Now enter the Tomcat administrator access data in the User Name and Password fields.
This login will automatically be used as default login for Line Configuration - Step 7 "Website
Generation". If you leave the Password field empty for Tomcat configuration, this setting can
then be used as the default login for line configuration. 5
However, if you specify a password here, you must use the same password at Line
Configuration - Step 7 "Website Generation". 5
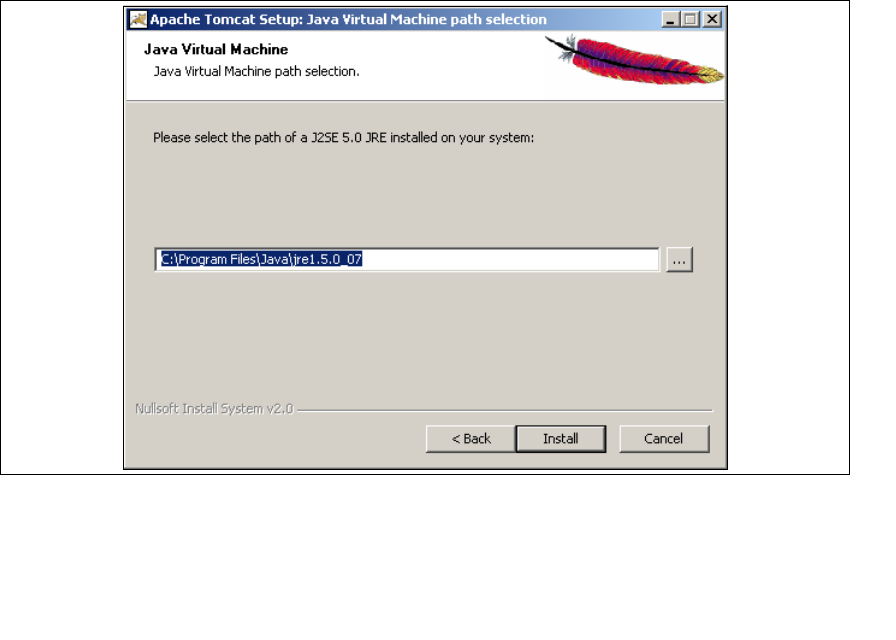
→ Click on Next to continue. The Java Virtual Machine dialog box will open.
→ Specify the path for Java 2SE 5.0.
5
Fig. 5 - 21 Apache Tomcat Setup - Java Virtual Machine
→ The default path during Tomcat installation is C:\Program Files\Java\jre1.5.0_07. You can
alter the default installation folder by using the <... button. If you leave the incorrect path,
SIPLACE Explorer websites will not be displayed.
→ Click on Install to continue.