00195425-01.pdf - 第61页
Ins tall ati on and Confi gurat ion G uid e SIPL ACE E xplo rer 4 Co nfig urati on Edi tion 05 /200 7 EN 4.1 St an dar d Mo ni to rin g A pp lica tio n (SM A) 61 4. 1. 1.6 St ep 5 - Conf igu re Syst em Dat aba se → Now y…
4 Configuration Installation and Configuration Guide SIPLACE Explorer
4.1 Standard Monitoring Application (SMA) Edition 05/2007 EN
60
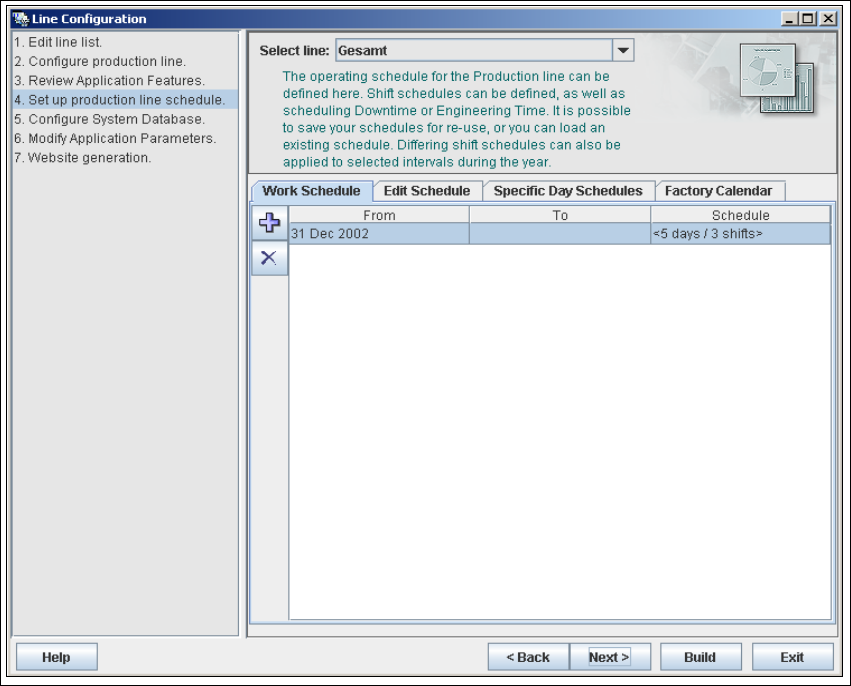
4.1.1.5 Step 4 - Set Up Production Line Schedule
The SIPLACE Explorer Calendar allows you to specify a production line schedule: 4
– Define a weekly shift schedule,
– Plan engineering and scheduled downtime for machines in the line and
– Apply the schedule to a time interval.
4
Fig. 4 - 8 Step 4: set up production line schedule
→ When the schedule for the production line as been defined, click on Next to continue with the
next step.

Installation and Configuration Guide SIPLACE Explorer 4 Configuration
Edition 05/2007 EN 4.1 Standard Monitoring Application (SMA)
61
4.1.1.6 Step 5 - Configure System Database
→ Now you can configure the SIPLACE Explorer System database settings:
– Database type;
– Driver name;
–Host;
–Port;
– Database name;
– Login (click on the corresponding cell button to call up a dialog box in which you can specify
login information, i.e. user name and password).
→ For MS SQL Server database the default port '1433' will be offered, which does not usually
need to changed.
NOTE
If you have installed MSDE 2000, you must now enter the port number shown during the
installation procedure. 4

4 Configuration Installation and Configuration Guide SIPLACE Explorer
4.1 Standard Monitoring Application (SMA) Edition 05/2007 EN
62
4
Fig. 4 - 9 Step 5: configure system database
→ After entering the database access parameters, we strongly recommend that you check the
connection to the database. Click Test to check whether the connection to the database can
be established.
→ If the connection does not function properly, you will see the following information box:
4
Fig. 4 - 10 DB error
→ Click on the Setup DB Connection button to start the DB Connection Wizard setup
sequence and configure the SIPLACE Explorer system database. Follow the instructions at
“Database Connection Wizard” on page 93.