00195425-01.pdf - 第75页
Ins tall ati on and Confi gurat ion G uid e SIPL ACE E xplo rer 4 Co nfig urati on Edi tion 05 /2007 E N 4.2 Conf igu rin g the F acto ry Con fig urat ion Uti lity 75 4.2 Conf igu ring the Factory Confi gurat ion Ut ilit…

4 Configuration Installation and Configuration Guide SIPLACE Explorer
4.1 Standard Monitoring Application (SMA) Edition 05/2007 EN
74
4.1.2.4 Step 3 - Application Features Loading
→ The selected target application will be loaded with all features.
4
Fig. 4 - 27 Step 3: application features loading
→ Click on Next to continue with Step 4 - Configuring the production line. From this step
onwards, application creation with the Application Wizard follows the same procedure as that
for application creation with the help of the Line Configuration feature in the Runtime
Environment. Follow the instructions at “Step 2 - Configure Production Line” on page 57.
Installation and Configuration Guide SIPLACE Explorer 4 Configuration
Edition 05/2007 EN 4.2 Configuring the Factory Configuration Utility
75
4.2 Configuring the Factory Configuration Utility
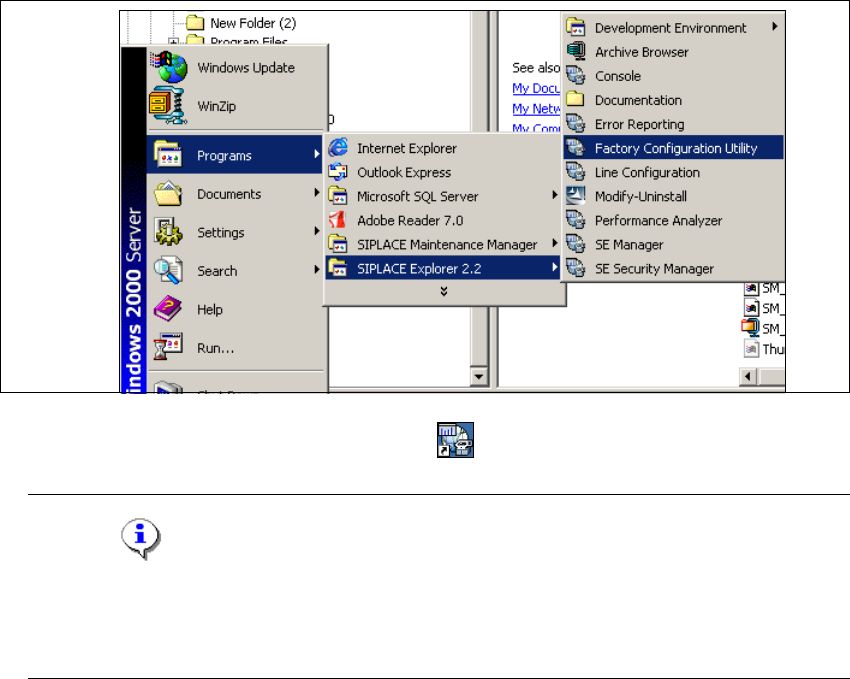
4.2.1 Starting the SIPLACE Factory Configuration Utility
→ Start the SIPLACE Factory Configuration Utility via the Programs → SIPLACE Explorer
2.2 → Factory Configuration Utility menu in Windows.
4
Fig. 4 - 28 RTE Windows Start menu
→ Or click on the Factory Configuration Utility icon on your desktop.
NOTE
Access to the Runtime Environment tools is restricted or permitted as required, by using the
SE Security Manager. For details of the relevant settings in the SE Security Manager, refer
to the Getting Started for SIPLACE Explorer 2.2. 4
4 Configuration Installation and Configuration Guide SIPLACE Explorer
4.2 Configuring the Factory Configuration Utility Edition 05/2007 EN
76
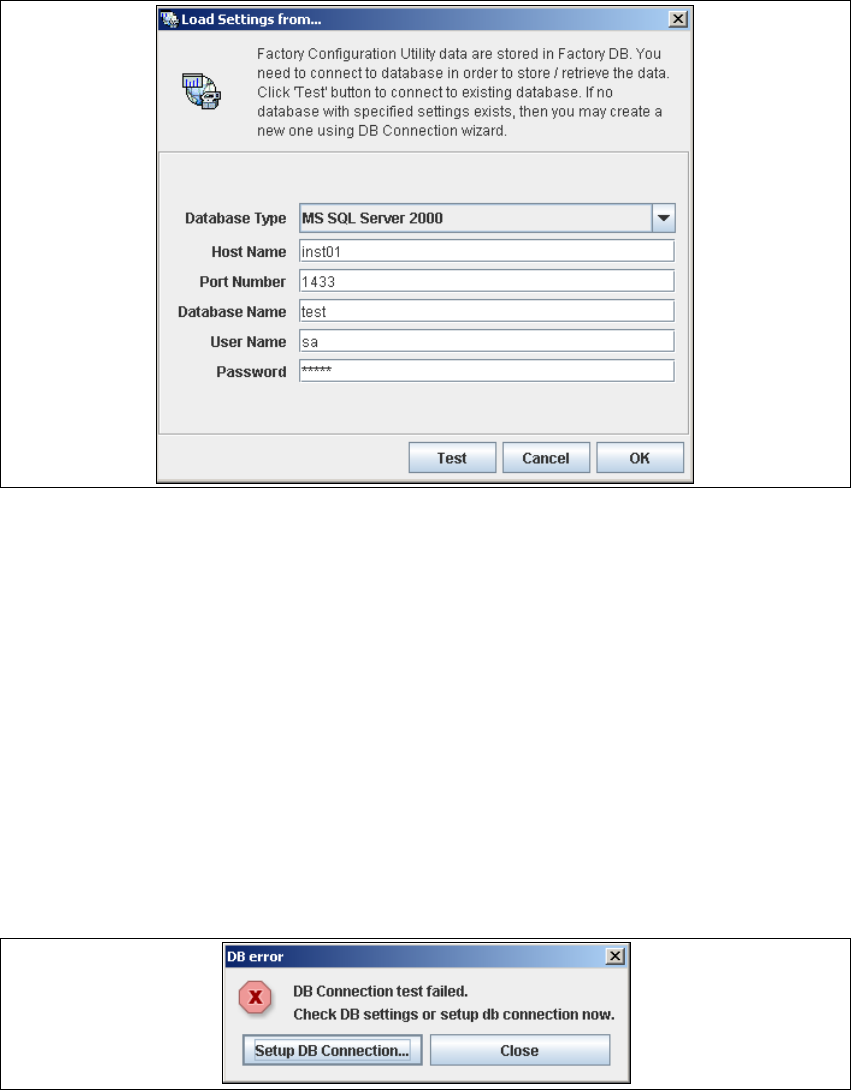
→ The Load settings from... dialog box will open. You need to establish a connection to the
factory database, before data can be called up.
4
Fig. 4 - 29 Factory - load settings
→ Please specify the following information:
–Host name
– Port number
– Database name
– User name
– Database password
→ After entering the database access parameters, we strongly recommend that you check the
connection to the database. Click Test to check whether the connection to the database can
be established.
→ If the connection does not function properly, you will see the following information box:
4
Fig. 4 - 30 DB error