00195425-01.pdf - 第76页
4 Co nfi gurat ion Ins tall ation and Con figu rat ion Guid e SI PLA CE Exp lorer 4. 2 C on figur ing th e Fa cto ry Co nfi gu rat ion U t il ity Editi on 05 /2 007 EN 76 → The Loa d set tin gs from .. . dialog b ox wil …
Installation and Configuration Guide SIPLACE Explorer 4 Configuration
Edition 05/2007 EN 4.2 Configuring the Factory Configuration Utility
75
4.2 Configuring the Factory Configuration Utility
4.2.1 Starting the SIPLACE Factory Configuration Utility
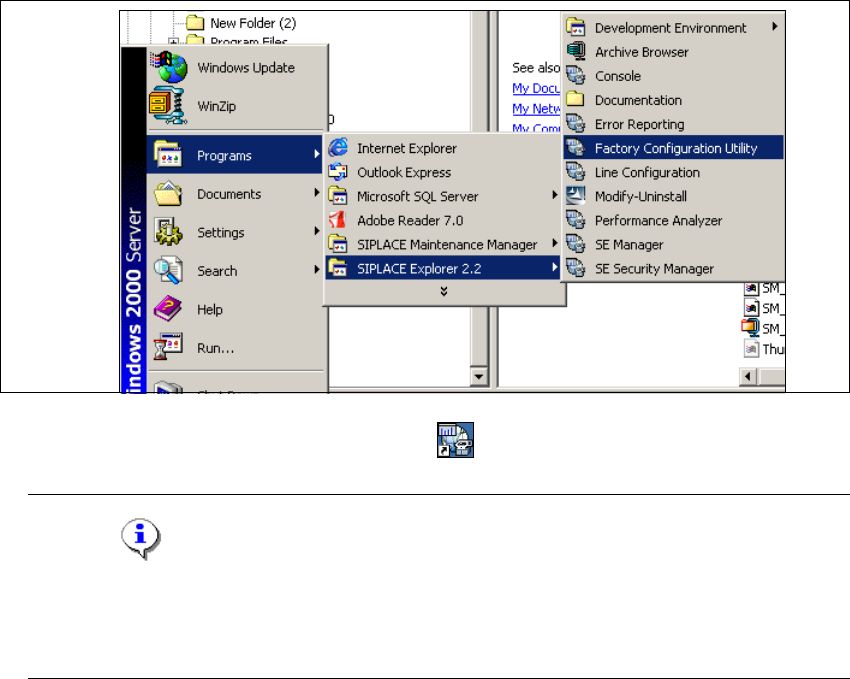
→ Start the SIPLACE Factory Configuration Utility via the Programs → SIPLACE Explorer
2.2 → Factory Configuration Utility menu in Windows.
4
Fig. 4 - 28 RTE Windows Start menu
→ Or click on the Factory Configuration Utility icon on your desktop.
NOTE
Access to the Runtime Environment tools is restricted or permitted as required, by using the
SE Security Manager. For details of the relevant settings in the SE Security Manager, refer
to the Getting Started for SIPLACE Explorer 2.2. 4
4 Configuration Installation and Configuration Guide SIPLACE Explorer
4.2 Configuring the Factory Configuration Utility Edition 05/2007 EN
76
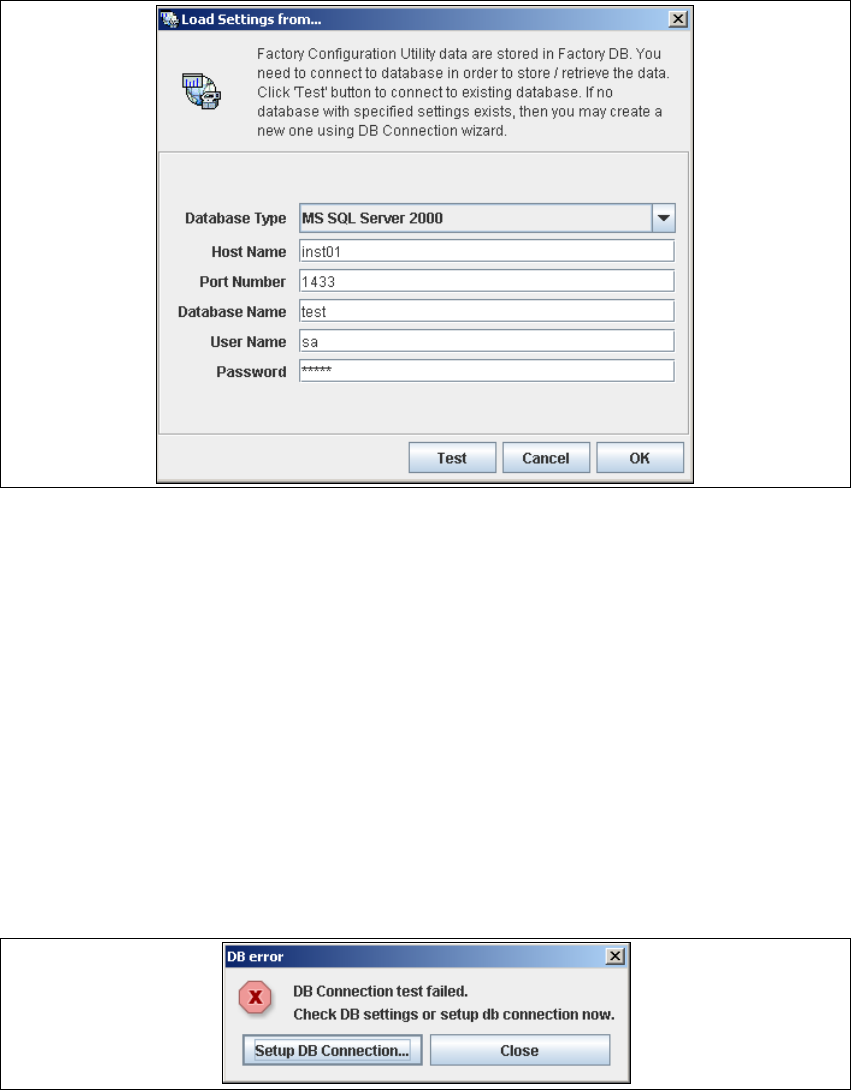
→ The Load settings from... dialog box will open. You need to establish a connection to the
factory database, before data can be called up.
4
Fig. 4 - 29 Factory - load settings
→ Please specify the following information:
–Host name
– Port number
– Database name
– User name
– Database password
→ After entering the database access parameters, we strongly recommend that you check the
connection to the database. Click Test to check whether the connection to the database can
be established.
→ If the connection does not function properly, you will see the following information box:
4
Fig. 4 - 30 DB error

Installation and Configuration Guide SIPLACE Explorer 4 Configuration
Edition 05/2007 EN 4.2 Configuring the Factory Configuration Utility
77
→ Click on the Setup DB Connection button to start the DB Connection Wizard setup
sequence and configure the SIPLACE Explorer factory database. Follow the instructions at
“Database Connection Wizard” on page 93.
→ If the connection functions properly, you will see the following information box:
4
Fig. 4 - 31 Success
→ Click OK. The system will check the database data. If the database has data from SIPLACE
Explorer V2.1, V2.0 SP1, V2.0 or V1.2, you will need to convert the database for SIPLACE
V2.2, due to the changed data structure in the SIPLACE Explorer V2.2 database. In this
case, the Convert Database dialog box will open.
NOTE
Consider the following when converting the database
- You require database administrator privileges.
- Once you have started the conversion, this process can not be stopped.
- The conversion time depends on the size of the database. It may take up to one hour. 4
4
Fig. 4 - 32 Convert database
→ Specify the access data for the database administrator and enable the Backup database
option.