TR7600 SIII_Series_Maintenance_en_v_2_0_3.pdf - 第53页
Test Research, Inc. TR7600 SII I Series User G uide – Maintenance 43 8 H A LF -Y E A R LY M A I NTEN A NCE Warning: Except for the parts specifically mentioned, the power MUST b e t urned off during maintenance. Failure …
Test Research, Inc.
42 TR7600 SIII Series User Guide – Maintenance
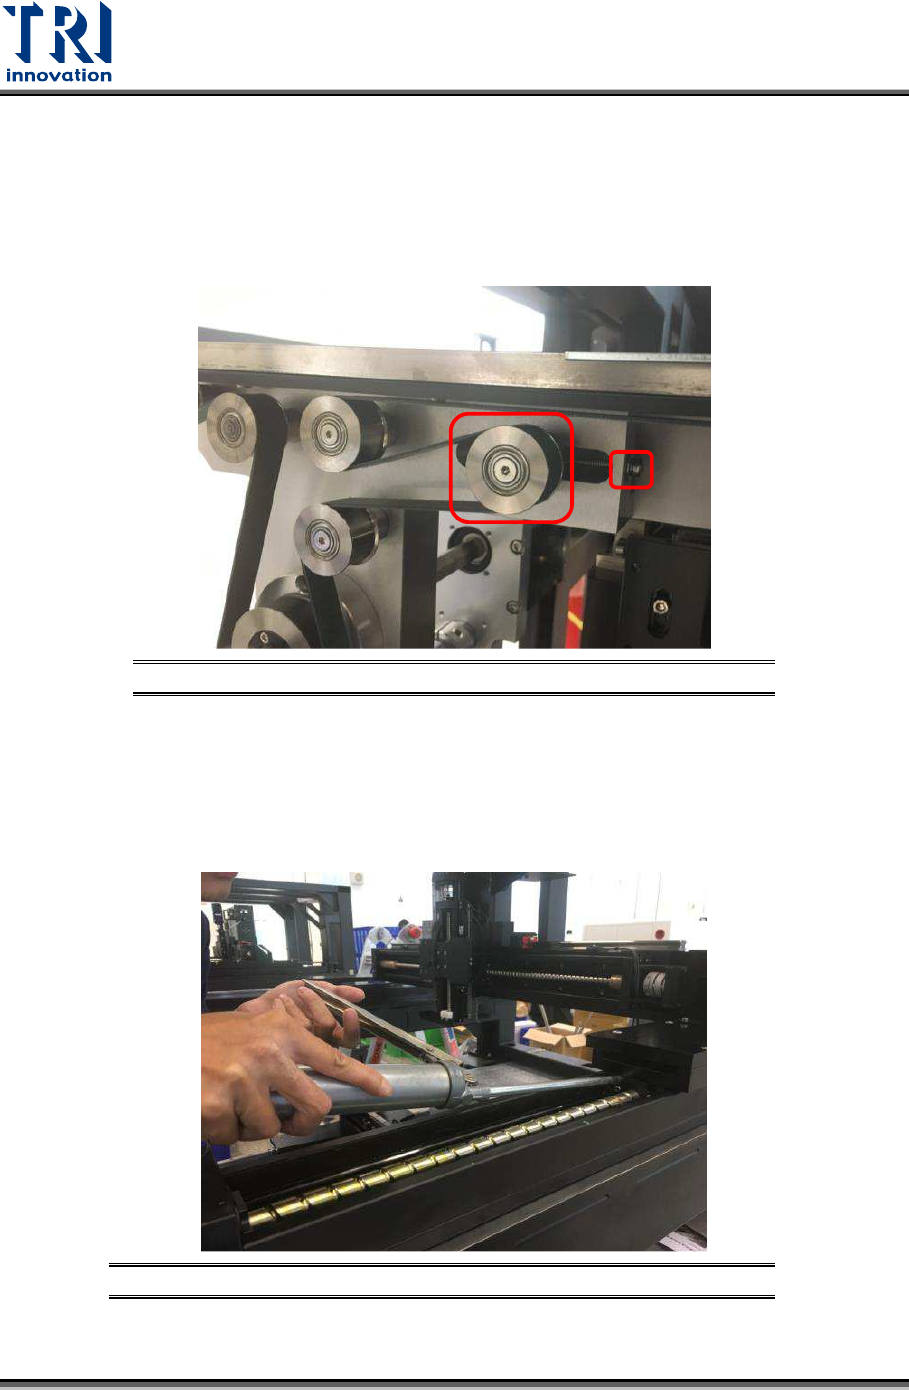
3) Elasticity value will be display on the Sonic Tension Meter screen.
4) Compare the measured elasticity value with the specification. If elasticity is out of
specification, adjust the conveyor wheel and screw to tighten or loosen the belt.
5) Re-measure the tension. Repeat the above steps until the elasticity is within the
specification.
Figure 72: Adjust Conveyor Wheel and Screw
7.3 Check Conveyor Spring and Lubricate
Check the conveyor spring. Apply grease on conveyor ball screws and then, let conveyor to
run so that the grease will coat on the spring.
Figure 73: Apply Grease on Conveyor Spring

Test Research, Inc.
TR7600 SIII Series User Guide – Maintenance 43
8 H
ALF
-Y
EARLY
M
AINTENANCE
Warning: Except for the parts specifically mentioned, the power
MUST be turned off during maintenance. Failure to do so may cause
mechanical or electrical damage.
Besides the daily, weekly, monthly and quarterly maintenance activities, users also need to
perform maintenance activities discussed below during half-yearly maintenance.
8.1 Clean Fans inside Main PC
Clean the dust on the Main PC fans with a compressed air gun.
8.2 Lubricate Clipping Pneumatic Cylinder
Apply grease on the rear and front clipping pneumatic cylinder to lubricate it.
8.3 Change Conveyor Belt
Conveyor belt need to be change during half-yearly maintenance. Steps to change the
conveyor belt are listed below.
1) Remove the board clamp by loosen the screws on the clamp.
Figure 74: Loosen the Screws on Board Clamp
Test Research, Inc.
44 TR7600 SIII Series User Guide – Maintenance
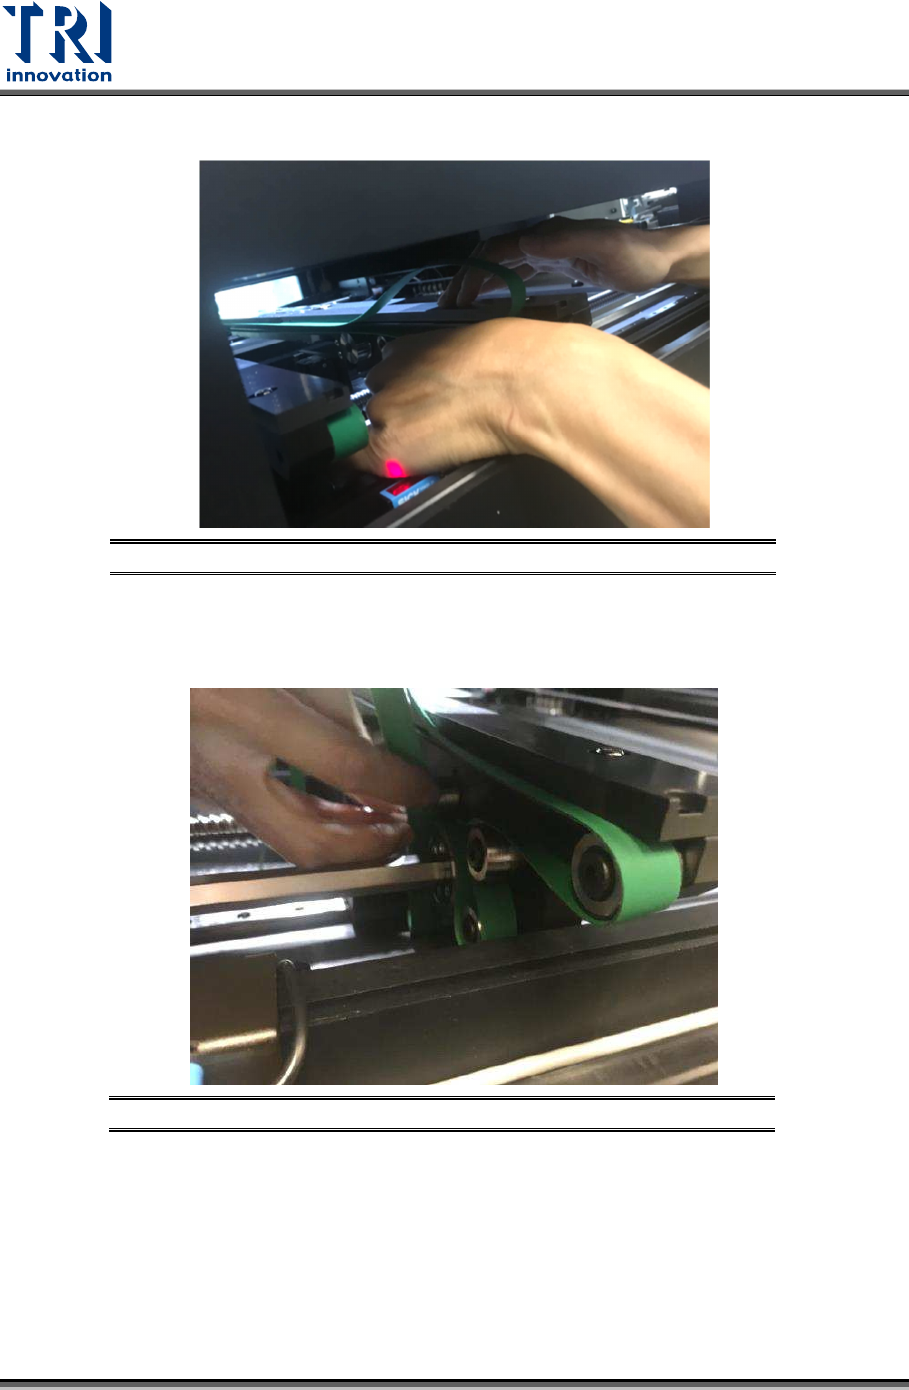
2) Remove the conveyor belt from its wheels and lining.
Figure 75: Remove Conveyor Belt
3) Replace a new conveyor belt. Ensure that the belt routing is correct. Besides, the
belt’s rough side need to be facing the wheels and the smooth side is the side that
PCBA sit on.
Figure 76: Replace Conveyor Belt – Route around the Wheels