7OM-1603-006_w.pdf - 第63页
7OM-1603 1-22 Chapter 1 : 3. Name of Each Section and Handling 3.5 Pallets • JEDEC Size Multi-Layer Feeder (GS-FP100) Area where no tray should be put • FULL Size Multi-Layer T ray Feeder (GS-FP200) Area where no tray sh…
7OM-1603
Chapter 1 : 3. Name of Each Section and Handling
1-21
•
Detachment Procedure of Magazine
Procedure
(1) Move the magazine to be replaced to the magazine change position by means
of the operation monitor.
Note
While the magazine is moving, the LED of the Ready switch ickers in
green.
When the magazine reaches the magazine change position, the LED of the
Ready switch extinguishes.
(2) Conrm that the LED of the Ready switch is "OFF" and pull the door handle
forward to open the door.
Make sure that there is no gap between the tray and pallet.
(3) While pulling out the magazine stopper knob forward, turn it clockwise by
approximately 90° .
(4) Hold the handle in the magazine base and slowly pull it out until it stops.
Notice
Be sure to pull out the magazine base slowly. Otherwise, the
magazine will drop forward by itself.
(5) Shift the magazine a little forward and take it out.
1007-002
7OM-1603
1-22
Chapter 1 : 3. Name of Each Section and Handling
3.5 Pallets
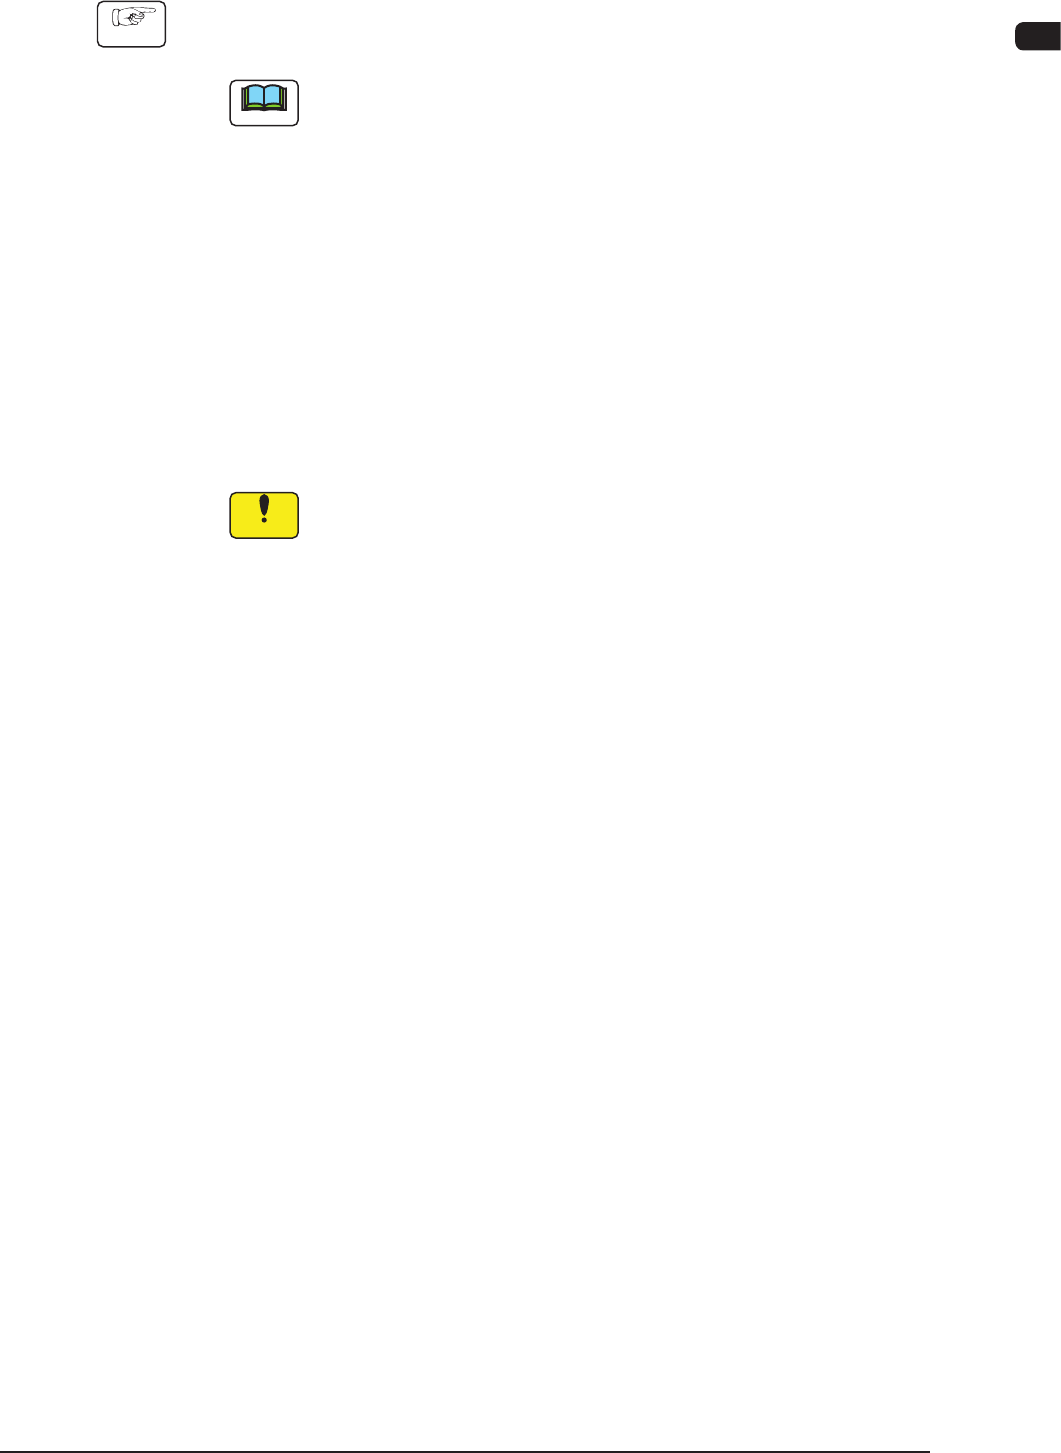
•
JEDEC Size Multi-Layer Feeder (GS-FP100)
Area where no tray should be put
•
FULL Size Multi-Layer Tray Feeder (GS-FP200)
Area where no tray should be put
Pallet Origin
Pallets F7A9
Note
No tray should be put in the shadowed area.
NOTICE
Handle the pallets carefully.
Otherwise, the pallets may be deformed.
•
Do not drop the pallet onto the oor, etc.
•
Do not apply any force partially to any area of the pallet.
•
Do not store the pallets in a pile.
When a deformed pallet is used, a component pickup error
may occur.
When a component pickup error occurs frequently, replace
the pallet with a new one.
1109-003
7OM-1603
Chapter 1 : 3. Name of Each Section and Handling
1-23
•
Attachment Procedure of Tray
Procedure
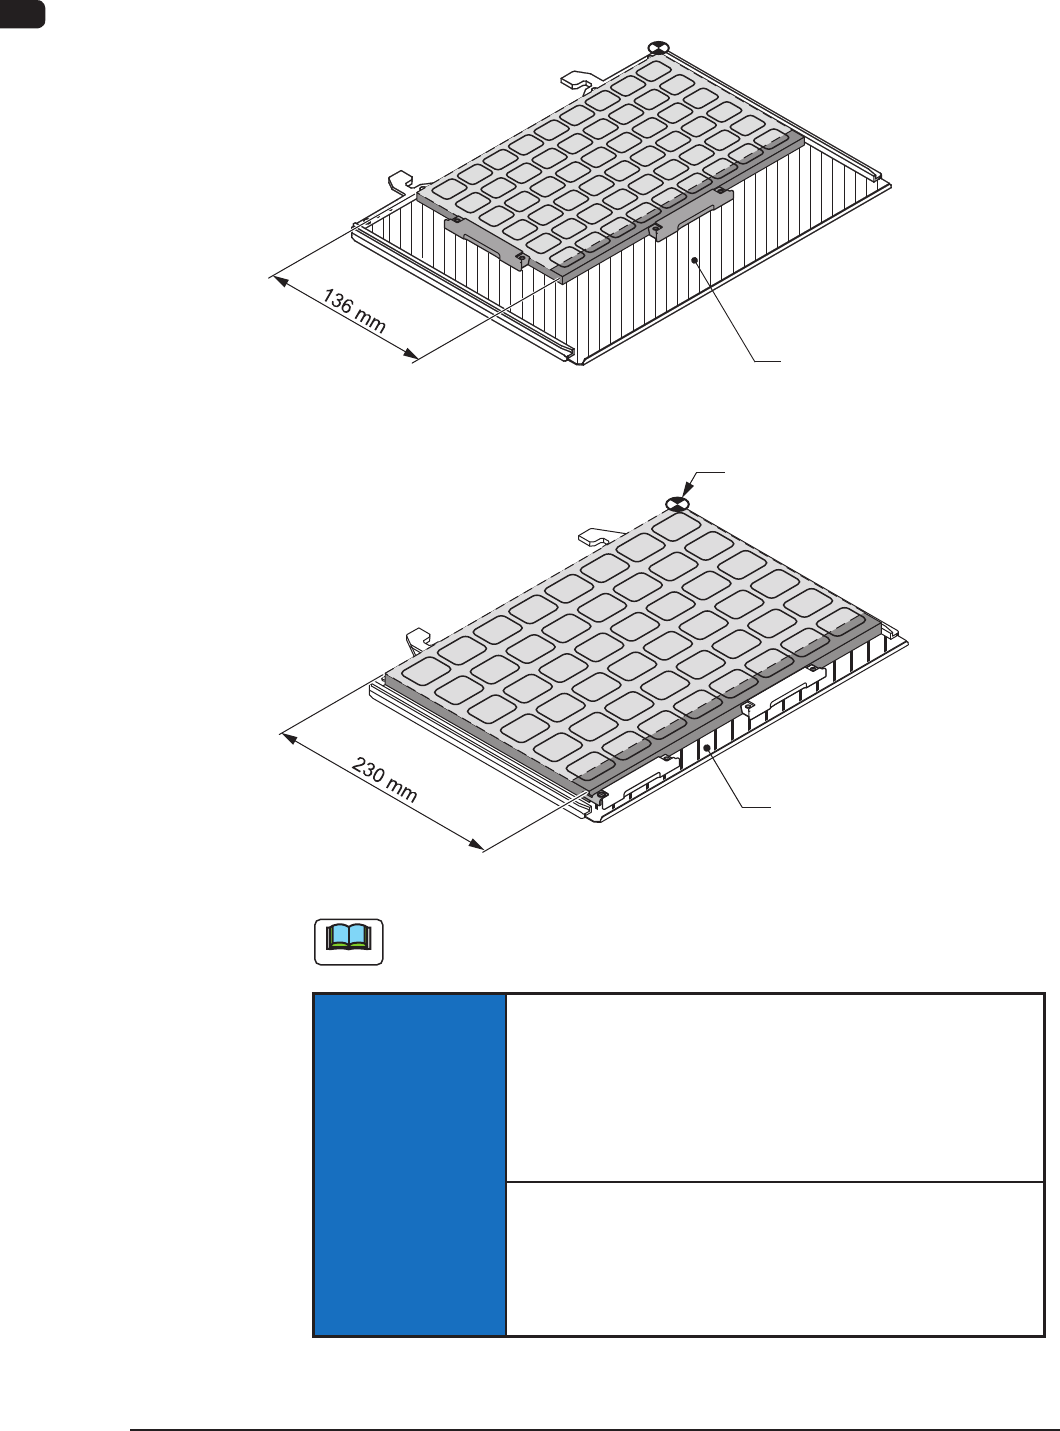
(1) Put a at and rigid object (thickness: 2 mm or more) under the pallet as
shown in the gure below.
Flat and Rigid Object
(Thickness: 2 mm or more)
Pallet
F7A10
Note
Make sure that the pallet is inserted correctly with its top side facing
upward.
(2) Put the tray on the rear right side of the xing.
(Make sure that there is no gap between the tray and pallet.)
(3) Hold the tray securely with the tray xing magnets.
Note
(a) Note that the tray xing magnets must be attached differently,
depending on the type or the shape of a tray.
(b) When the total mass (tray + components) exceeds "500 g", add the
tray xing magnets in the draw out direction of the pallet according to
the total mass.
(One tray xing magnet has the capability to hold the weight of
approximately 500 g.)
(c) It is recommended that up to 4 trays should be mounted when
more than one tray must be used although it is described in the
specications that up to 9 types of trays can be mounted.
(4) Check how the trays are mounted.
(Check for any positional deviation of a component, missing components,
incorrectly seated trays (trays seated aoat), and incorrect location of the tray
xing magnets.)
•
Detachment Procedure of Tray
Procedure
(1) Detach the tray xing magnets.
(2) Detach the tray from the pallet.
1007-003