Portal_Manual_1.2.1_Rev_H-1.pdf - 第30页
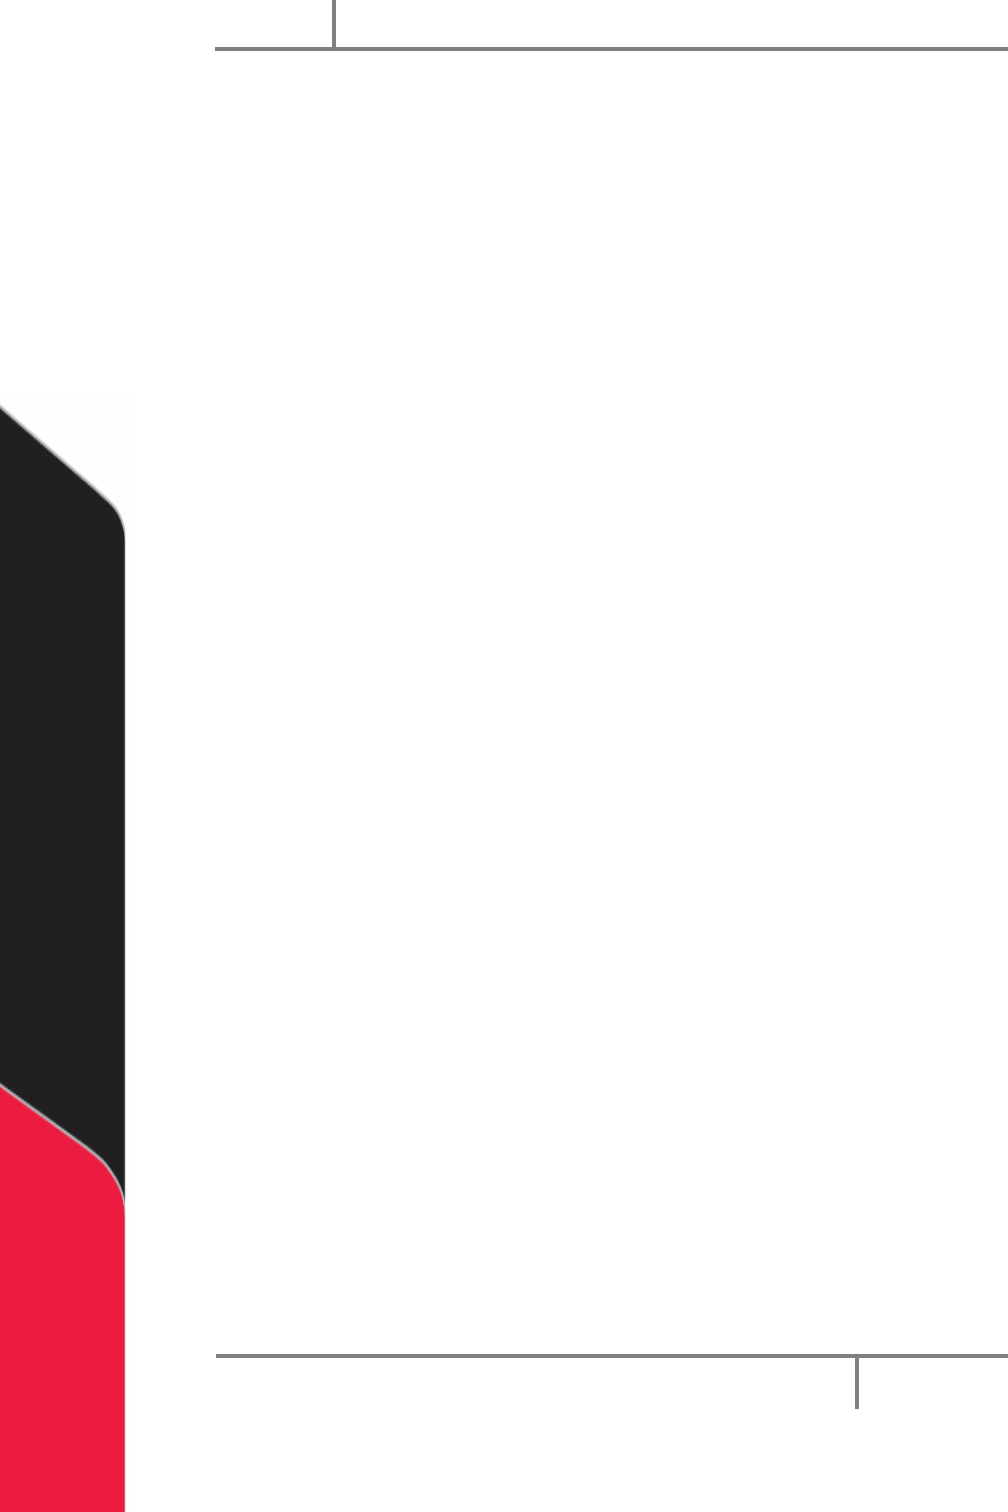
Portal PVA Revisio n H ( 2018 ) 30 of 93 6.7.2 FIS Client Mess age Screen 9. To see th e FIS Clien t messa ge screen, sel ect the FI S tab f rom the sys tems tab. Fig ure 18 : Message T erminal 10. To access the l arge p…
Portal
PVA
Revision H (2018)
29 of 93
5. If Custom Message is selected from the Message menu, you can edit the
message window. Use the keyboard to type the message exactly as it should be
received by the server.
6. Select “Clear” to clear the custom message. This button is only available for
custom messages.
7. After you have selected or typed the message, select the “Send” button to send
the message.
8. Select “Refresh” to refresh any dynamic data in the message, such as a Galil
variable. The “Refresh” button is not shown for custom messages.
Portal
PVA
Revision H (2018)
30 of 93
6.7.2 FIS Client Message Screen
9. To see the FIS Client message screen, select the FIS tab from the systems tab.
Figure 18: Message Terminal
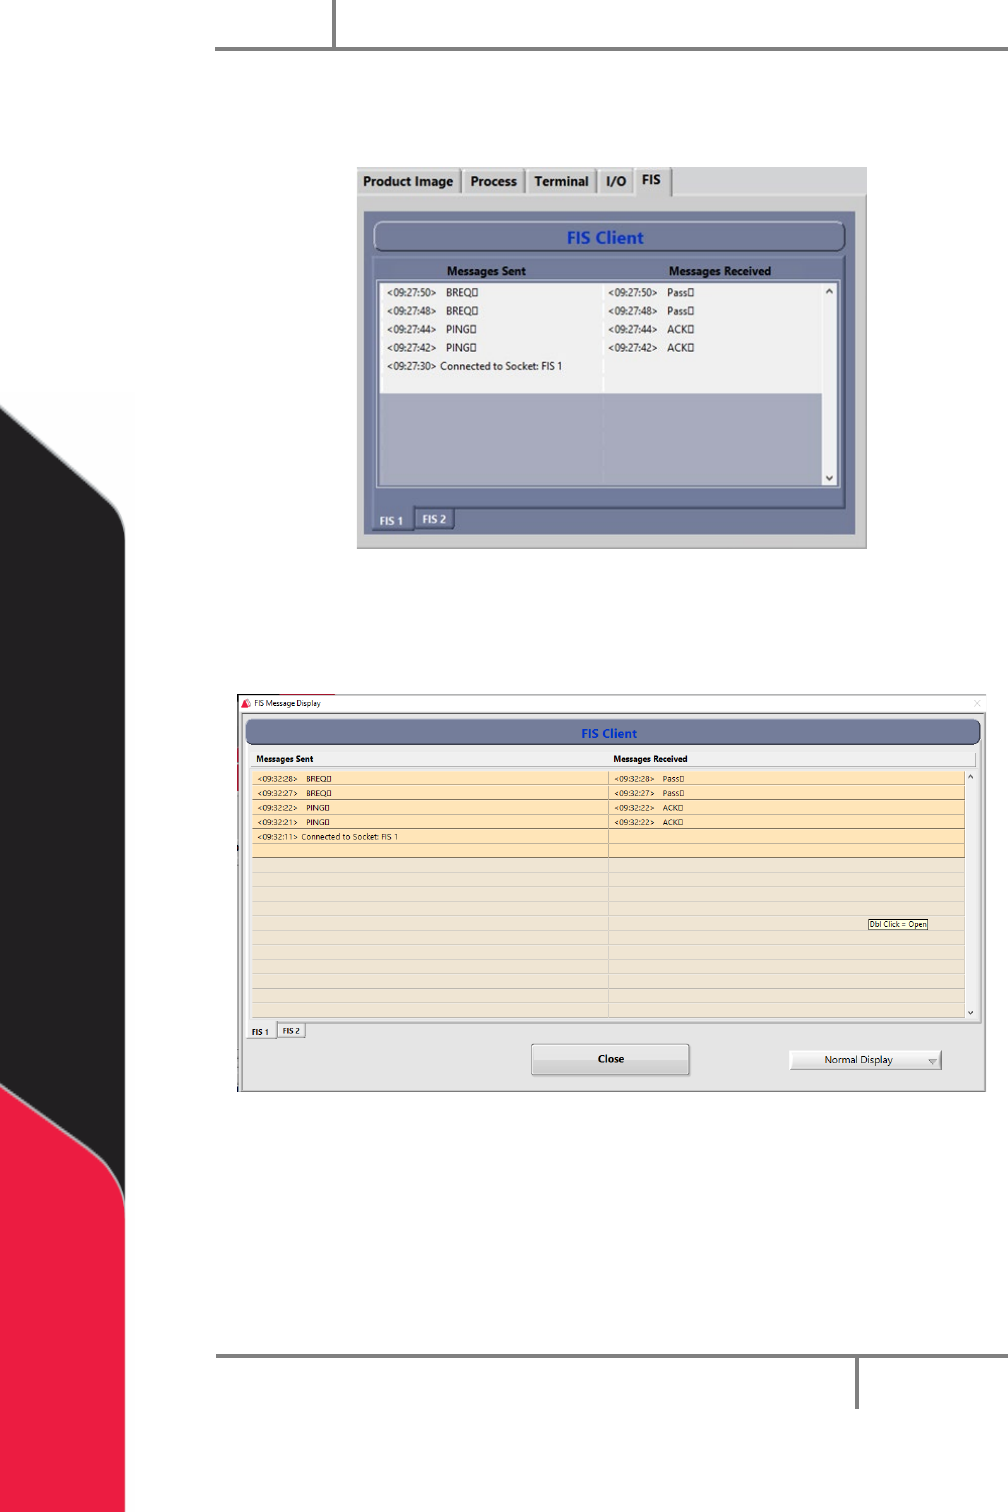
10. To access the large pop-up display, hold the “CTR” button on the keyboard and
double click on the message terminal.
Figure 19: FIS Message Display Window
11. To change the display format, select an option from the Display drop down
menu (Normal, ‘\’ Code, Hex Code).
12. Select “FIS 1” or “FIS 2” at the bottom right corner the window to select the FIS
instance (server) you would like to see.
13. Select the “Close” button to close the popup window.
Portal
PVA
Revision H (2018)
31 of 93
6.8 Vision
For more information on vision and fiducials, refer to your vision manual.
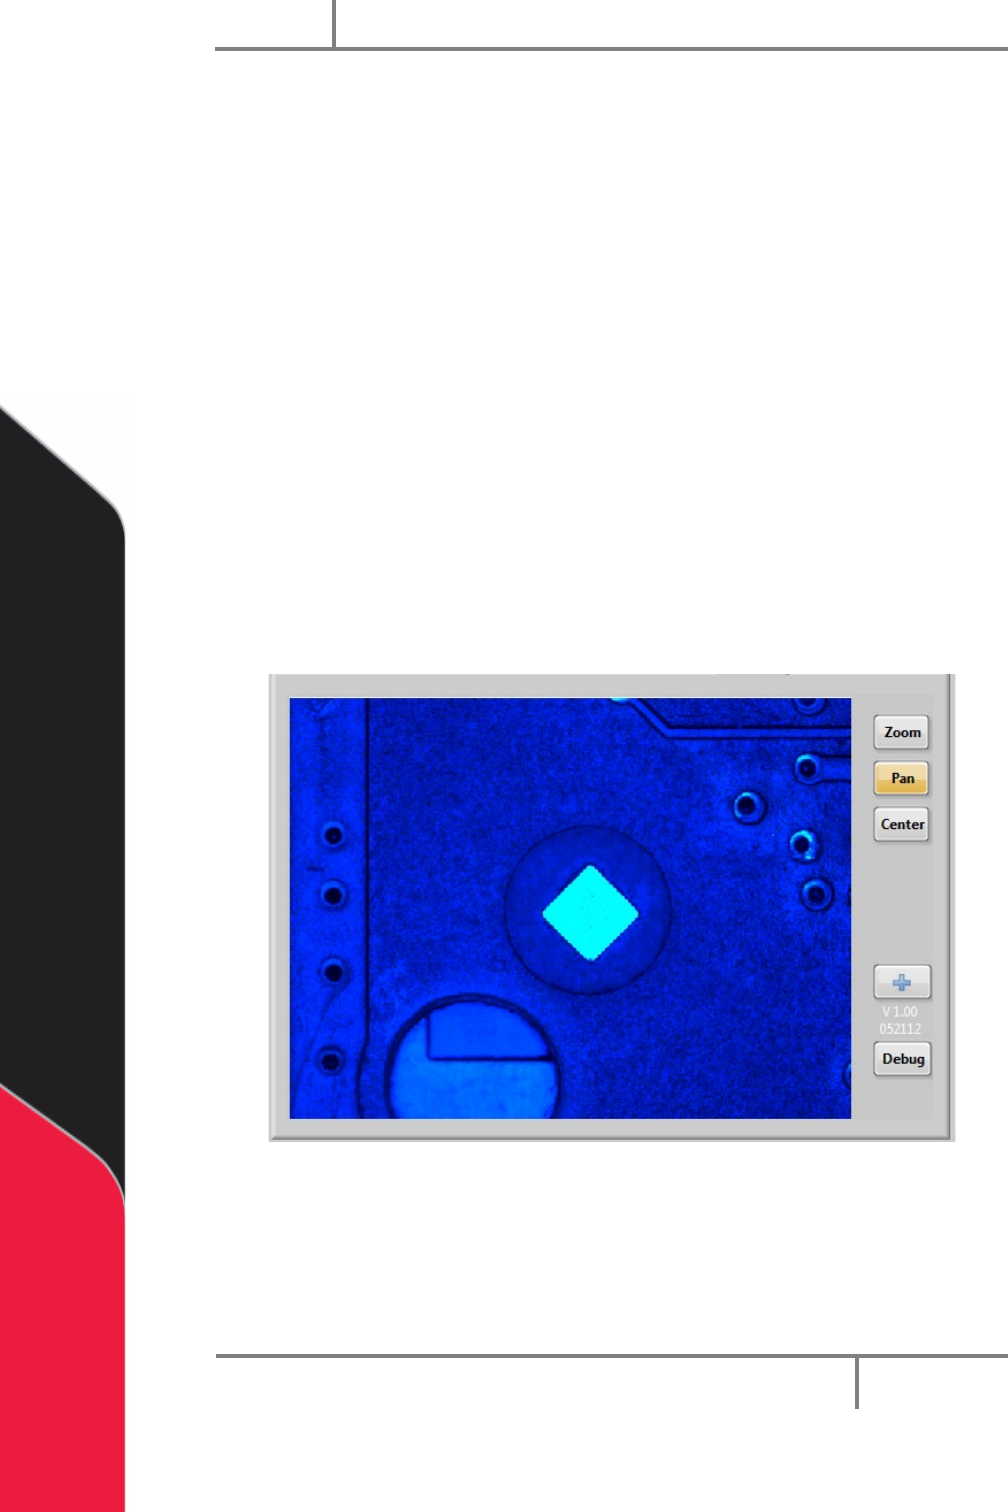
6.8.1 Camera Window
Shown below is the standard camera window. Each available function in the vision
window is explained below. To access the vision window select the Vision tab from the
system tab section of the screen.
• Select the “Zoom” button to zoom in, or increase the size of the image on the
screen. This is available for static or live images.
• Select the “Pan” button to move across the zoomed image.
• Select the “Center” button to make the image the original size and align it with
the center of the screen.
• Select the “+” (Crosshair) button to toggle the crosshair overlay on and off. This
is available for live and static images.
• Select the “Debug” button to toggle the debug message window on and off. To
hide the “Debug” button use the Vision.ini key.
Figure 20: Vision Window