SOM-1653-001.pdf - 第22页
Tg0756-PM-SO 0206-001 21 5.3 "Pattern Program" Edit Window *1 5.3.2 "O-data" T ab • Sheet Layout When the "O-data" tab is pressed in the "Placement Data" tab sheet, the following t…
Tg0756-PM-SO0206-001 20
5.3 "Pattern Program" Edit Window
5.3 "Pattern Program" Edit Window
5.3.1 "P.C.B. Data" Tab
• Sheet Layout
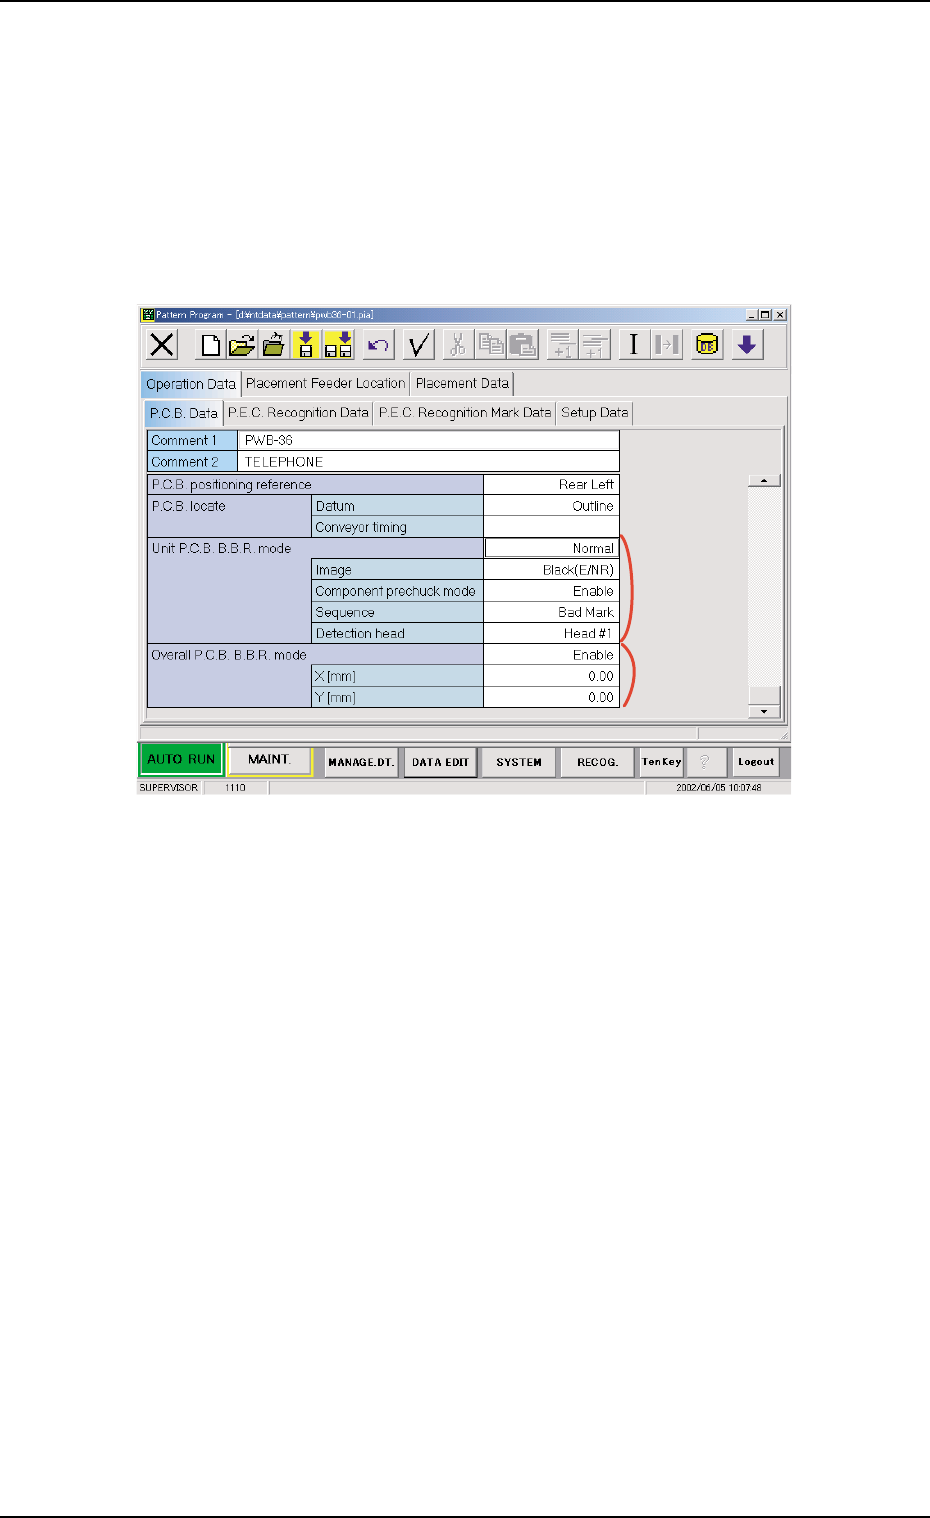
When the "P.C.B. Data" tab is pressed in the "Operation Data" tab
sheet, the following tab sheet appears.
*1
*2
Fig. 22 "P.C.B. Data" Tab Sheet
• Sheet Composition
Each parameter is displayed or can be entered.
*1 Unit P.C.B. B.B.R.
Mode
Image, Component prechuck mode, Sequence
When a parameter other than "Disable" is selected for "Mode",
it is required to enter parameters in the text boxes.
*2 Overall P.C.B. B.B.R.
X [mm] (Horizontal), Y [mm] (Vertical)
When "Enable" is selected for "Overall P.C.B. B.B.R.", it is re-
quired to enter parameters in the text boxes.
Tg0756-PM-SO0206-001 21
5.3 "Pattern Program" Edit Window
*1
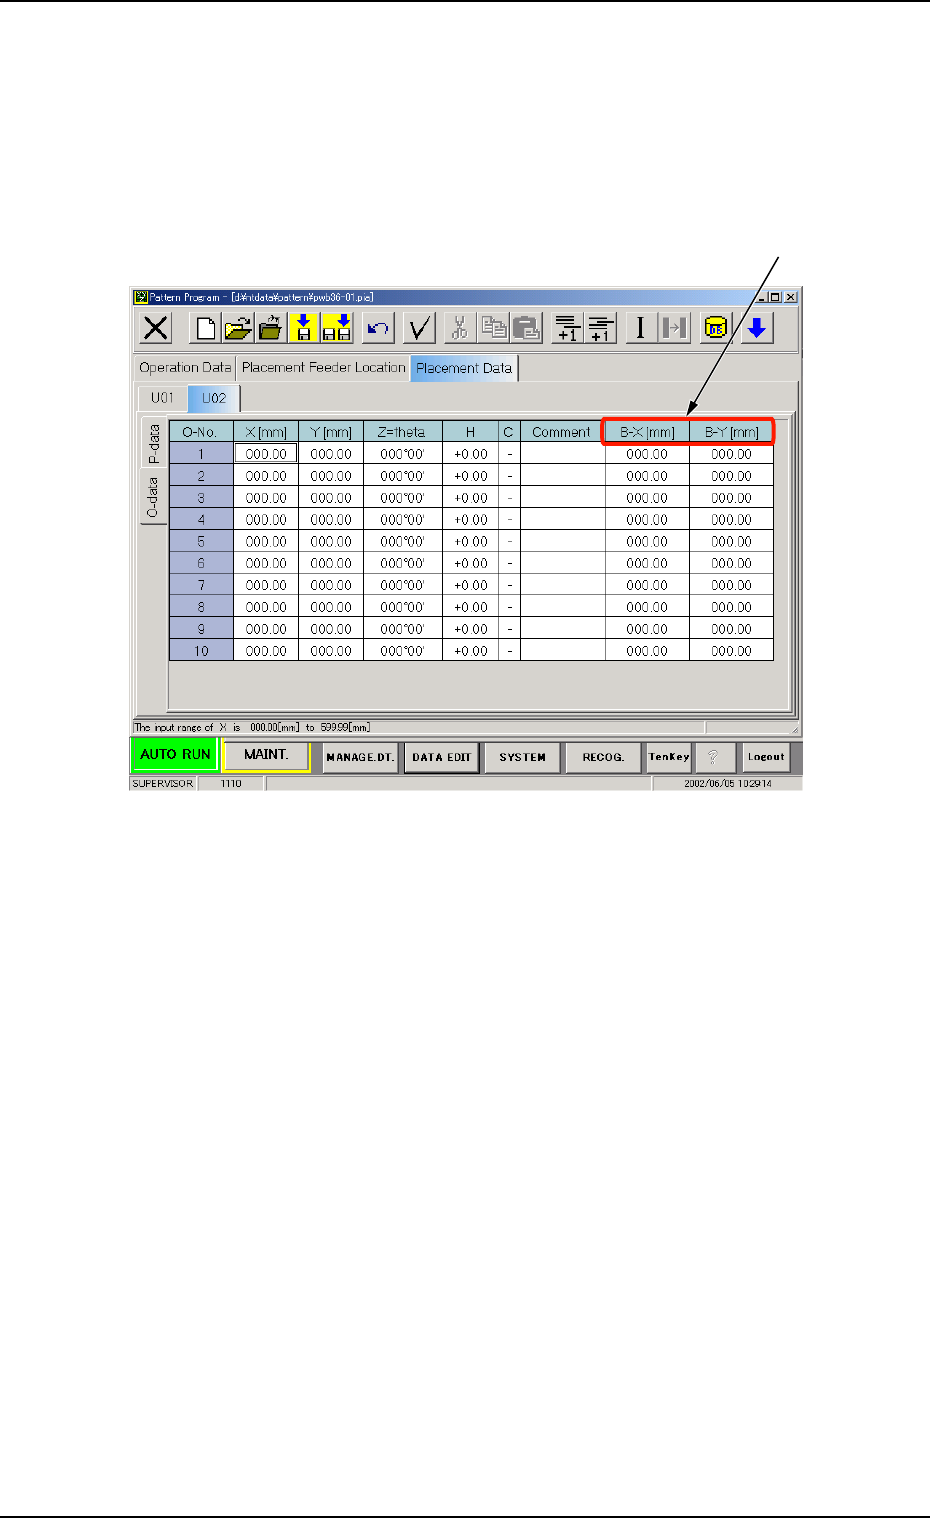
5.3.2 "O-data" Tab
• Sheet Layout
When the "O-data" tab is pressed in the "Placement Data" tab sheet,
the following tab sheet appears.
Fig. 23 "O-data" Tab Sheet
• Sheet Composition
Each parameter is displayed or can be entered.
*1 B-X [mm], and B-Y [mm]
Tg0756-PM-SO0206-001 22
• Operation Procedure
New Creation of "O-data" Tab
(1) When the second toolbar is not visible, press the [Open 2nd.
Toolbar] icon
[ ] to make the second toolbar visible.
(2) Select the "U#" tab where an "O-data" tab should be added with
the touch screen or pointing device.
(3) When the [Add O-Data] icon
[ ] is selected, a new "O-data"
tab is added.
Deletion of "O-data" Tab
(1) When the second toolbar is not visible, press the [Open 2nd.
Toolbar] icon
[ ] to make the second toolbar visible.
(2) Select the "U#" tab where an "O-data" tab should be deleted with
the touch screen or pointing device.
(3) When the [Delete O-Data] icon
[ ] is selected, the "O-data"
tab of the selected U data is deleted.
5.3 "Pattern Program" Edit Window