SOM-1619-001.pdf - 第15页
15 Tg0590-PM-SO 0301-002 5.1 "Placement Position T each" T ab Sheet • • • • • Sheet Layout When the [Place Pos T each] tab is pressed on the "RECOVERY" window , the following window appears. Fig. 5 &q…
14 Tg0590-PM-SO
5. Placement Position Teach
Pn and On are taught as follows.
0301-002
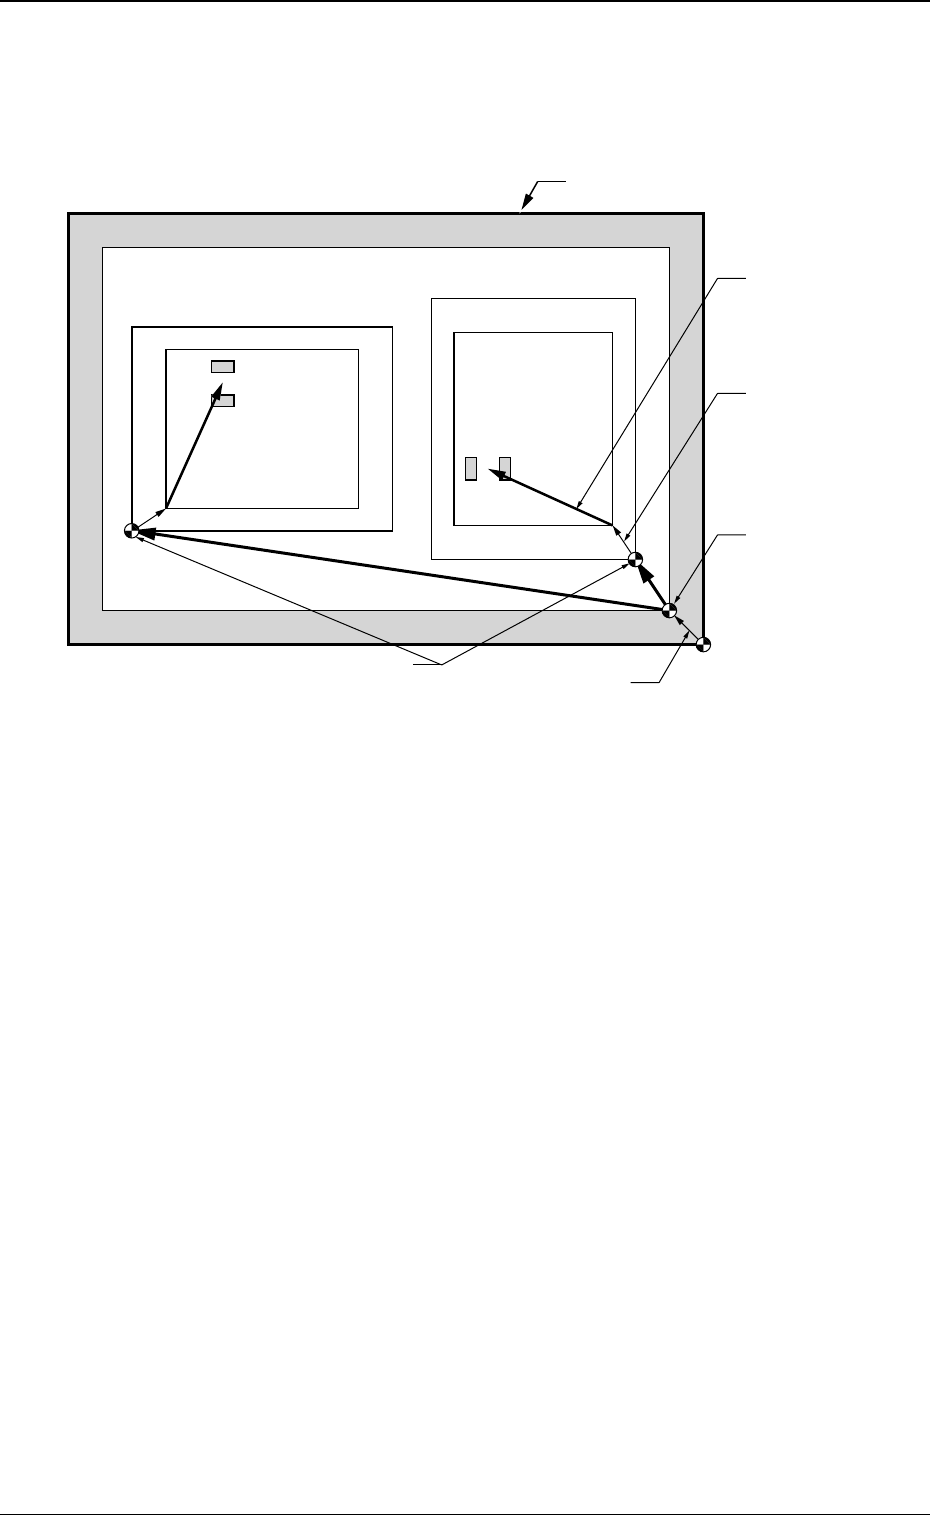
Fig. 4 Items to be Taught in Placement Position Teach
5. Placement Position Teach
Unit Pattern Angle: 270
°
Unit Pattern Angle: 0
°
Pn
Pn
PCB Outermost Shape
Placement
Position
O
2
O1
PCB Positioning
Reference
Pattern Origin
Unit Control
Offset
PCB Origin
PCB Origin Offset
15 Tg0590-PM-SO0301-002
5.1 "Placement Position Teach" Tab Sheet
••
••
• Sheet Layout
When the [Place Pos Teach] tab is pressed on the "RECOVERY"
window, the following window appears.
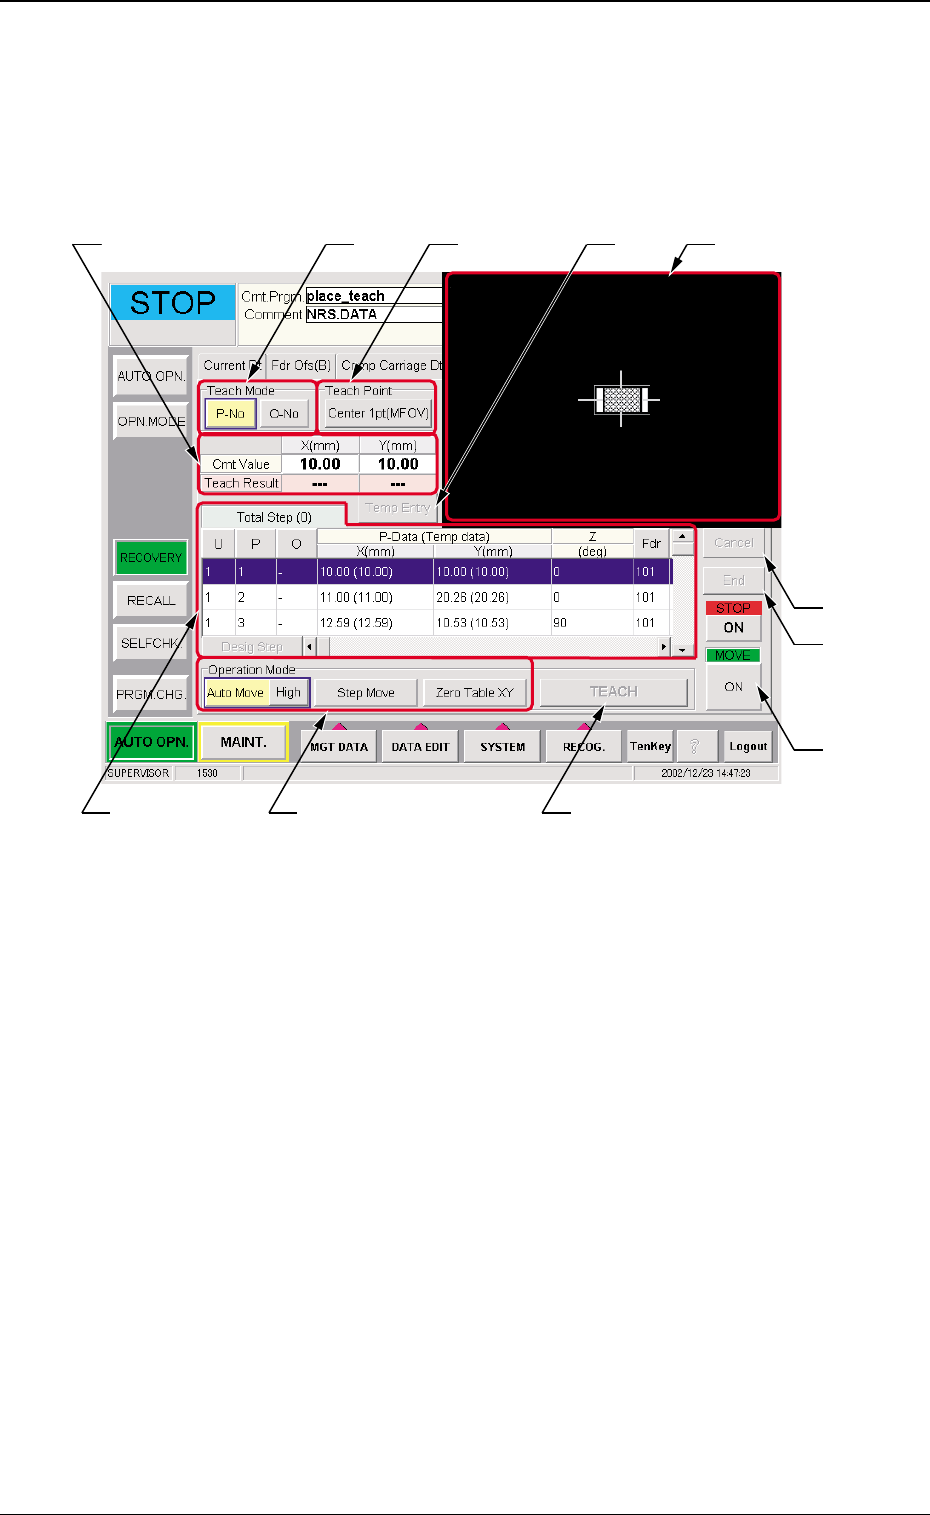
Fig. 5 "Place Pos Teach" Tab Sheet
5. Placement Position Teach
••
••
• Sheet Composition
*1 Teach Mode
[P-No] or [O-No] button is selected for the placement position
teach operation.
*2 Teach Point
The "Teach Point" window is opened to designate the teaching
method.
In the "Teach Point" window, designate "Center 1pt (MFOV)",
"Diagonal 2pt" or "Center 1pt (SFOV)".
*3 Placement Data
The pattern program position presently referred and the posi-
tion resultant from the teaching are indicated.
*3 *2*1
*9
*10
*11
*4 *5
*7
*6 *8

16 Tg0590-PM-SO0301-002
5. Placement Position Teach
*4 [Temp Entry] Button
The coordinates currently indicated in the placement position
teach operation are temporarily entered.
*5 Recognition Area
The image taken by the recognition camera is indicated.
*6 Pattern Program Indication
It consists of the following items.
Total Steps
The total number of steps in the pattern program is indi-
cated.
U, P, O
The steps in the currently referred pattern program are
indicated.
P-Data (Temp Data) X [mm] Y[mm], Z (deg), Fdr, Compo-
nent ID
The current placement position is indicated.
The temporarily entered data is indicated with a blue back-
ground.
[Desig Step] Button
Any step can be indicated.
*7 Operation Mode
When the operation mode is selected and the "Move" [ON]
button is pressed, the X/Y table is moved to the designated
position.
Auto Move
The automatic operation is performed.
Each pressing of the [Auto Move] button changes the speed
to high, middle and low in that order.
Step Move
The step movement is performed.
Zero Table XY
The X/Y table is returned to the origin.
*8 [TEACH] Button
The teaching operation is performed at the present position.