SOM-1619-001.pdf - 第21页
21 Tg0590-PM-SO Image 1 Image 4 Image 3 Image 2 Synthesized Image Divided Image (Example of Four Images Synthesized) 0301-002 5. Placement Position T each Fig. 7-1 Example of Image Synthesis in Divided Image Shooting Fig…
20 Tg0590-PM-SO
Fig. 7 Teach Operation in the case of 1-Pt
0301-002
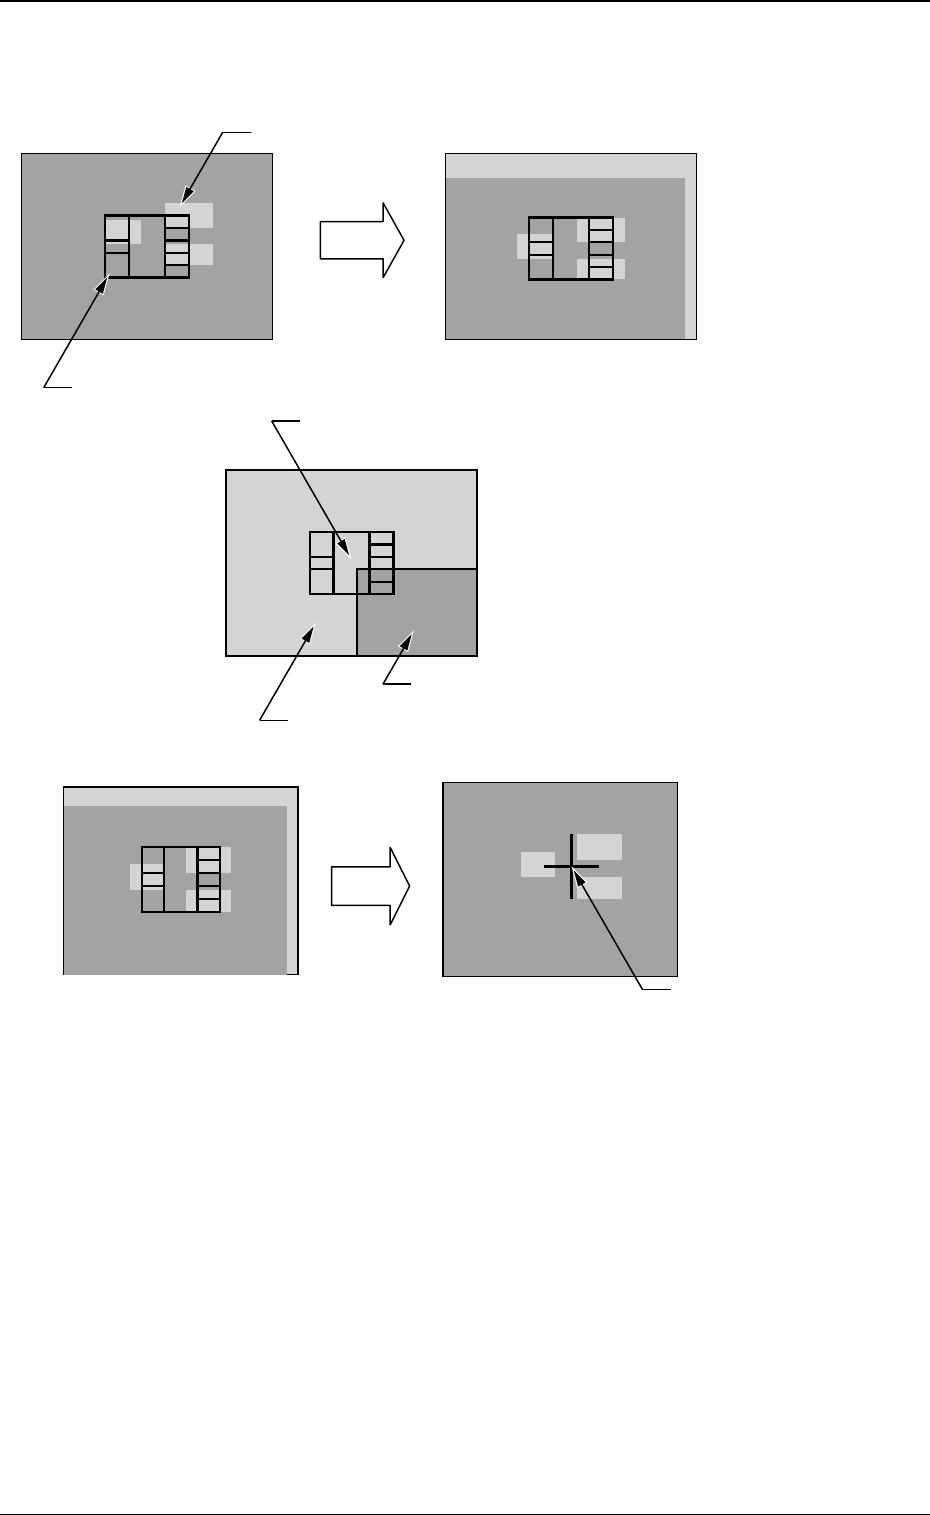
5. Placement Position Teach
Teaching Operation for 1 Point
The movement is limited to the position in which the four corners
of the
display are overlapped with the monitor center.
Image inside the View
PCB Pattern
Image outside the View
Component Outer Shape Image
Move the X/Y table by using the pointing device.
Move
C=MARK X=OOO Y=OOO
Deciding
the Position
Press the right and left buttons at the same time on the pointing device.
The decided position is
indicated as a blue cross.
1- Pt Teach
21 Tg0590-PM-SO
Image 1
Image 4Image 3
Image 2
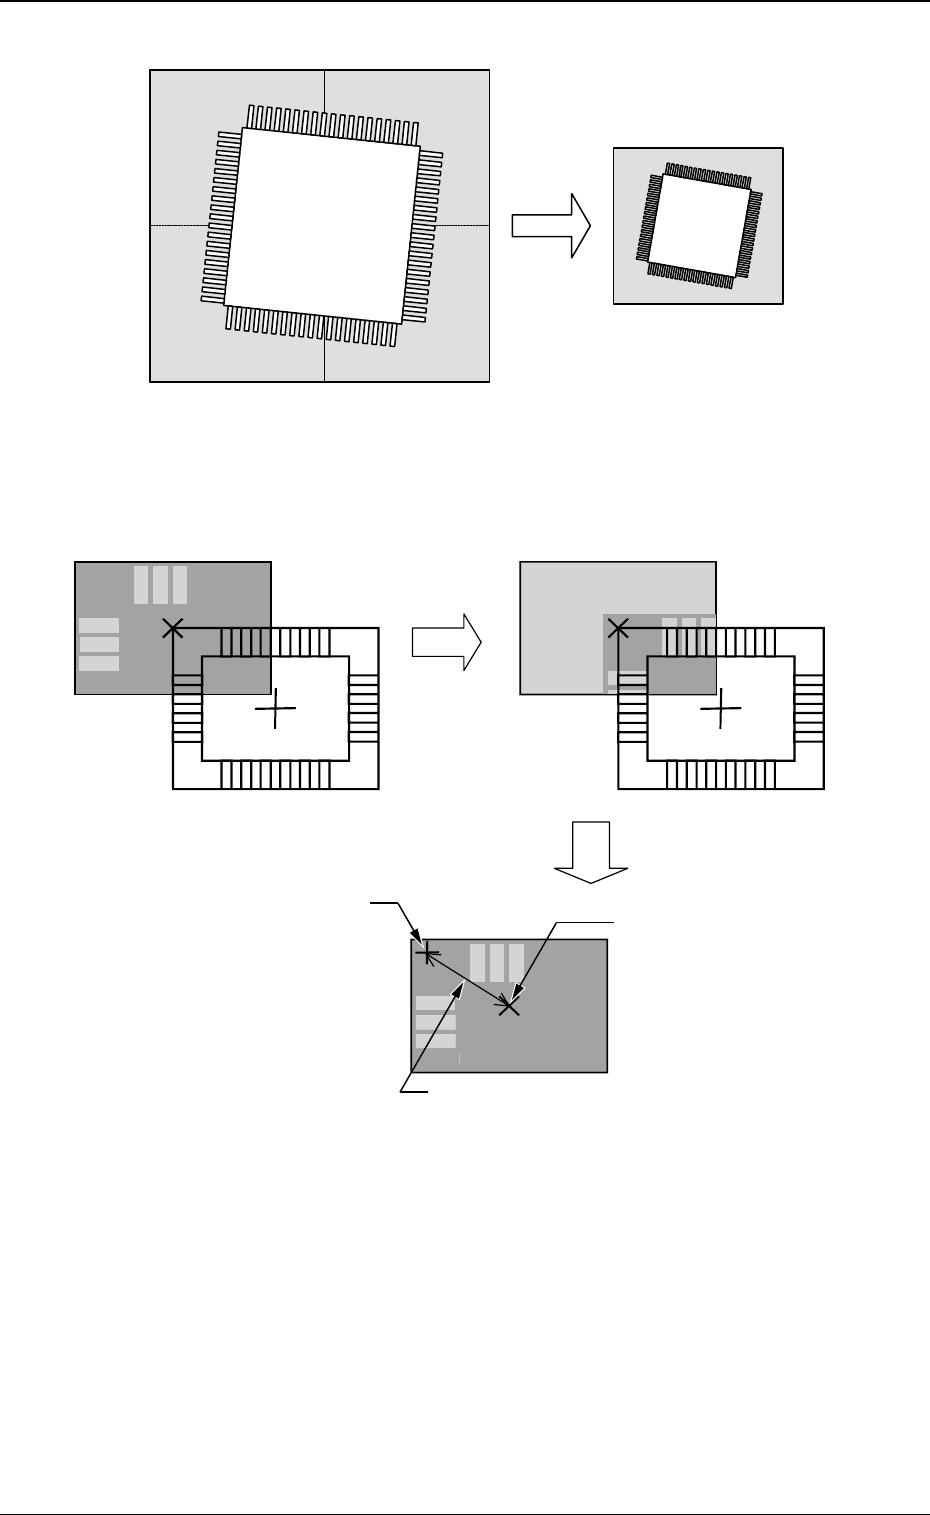
Synthesized Image
Divided Image (Example of Four Images Synthesized)
0301-002
5. Placement Position Teach
Fig. 7-1 Example of Image Synthesis in Divided Image Shooting
Fig. 8 Teach Operation in the case of Diagonal 2-Pt
Teach Operation for Diagonal 2 Points
C
=
M
A
R
K
X=
OOO
Y=
OOO
Teach
D
ecidin
g
the Position
D
ispla
y
Cente
r
It is not actually indicated
.
The distance from the displa
y
center is shown
.
The decided
p
osition is
in
d
i
ca
t
ed
as
a
b
l
ue
c
r
oss.

22 Tg0590-PM-SO0301-001
5. Placement Position Teach
(9) When the Teach Operation is completed, the new placement
position is indicated in the Teach Result (X, Y) *3.
(10) When the new placement position is entered temporarily, press
the [Temp Entry] button *4.
The new placement position is saved in the temporary file.
When the temporarily registered data is to be cancelled, move
the cursor to the step to be cancelled, and press the [Cancel]
button. When all data items are to be cancelled, refer to (11).
(a) The Temp Entry function of the new placement
position saves the temporary file for the data for
operation and pattern program file, but does not
overwrite the data on the original file.
(b) The temporarily entered step data can be can-
celled. When it is to be cancelled, select the step
to be cancelled and press the [Cancel] button *9.
(c) The temporarily entered step data is indicated
with a blue background.
(d) The temporarily entered data is immediately
reflected on the Auto Move and Step Move opera-
tions.