00196864-01_IM_OIS_SIS 9.3_DE EN.pdf - 第15页
OIS 9.3 / Installation Manual Ausgabe 07/2011 Edition Figure 3-12: Defining a password for OISAdministrator ► Enter the password for the OisAdministrator . The default password is "Siplace.1". ► Enter the passw…
OIS 9.3 / Installation Manual Ausgabe 07/2011 Edition
The operating levels of the OIS system are mapped to operating system user accounts. The
following two user groups are created in the User Manager on the OIS Server computer for this
purpose.
● OisEngineers for the operating level Line engineer
● OisAdministrators for the operating level Administrator
Only those users who are members of the relevant user group are permitted to switch to a given
operating level.
The following users are created and assigned to the user groups by default during installation:
● OisEngineer for the operating level Line engineer, is a member of the user group
OisEngineers
● OisAdministrator for the operating level Administrator, is a member of the user group
OisAdministrators
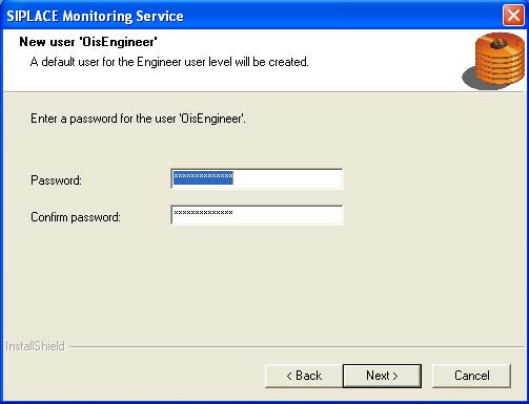
The next two dialog boxes allow you to assign a password to each user.
Figure 3-11: Defining a password for OisEngineer
► Enter the password for the OisEngineer.
The default password is "SmallSiplace.1".
► Enter the password again to confirm.
► Continue by clicking the Next> button.
14
OIS 9.3 / Installation Manual Ausgabe 07/2011 Edition
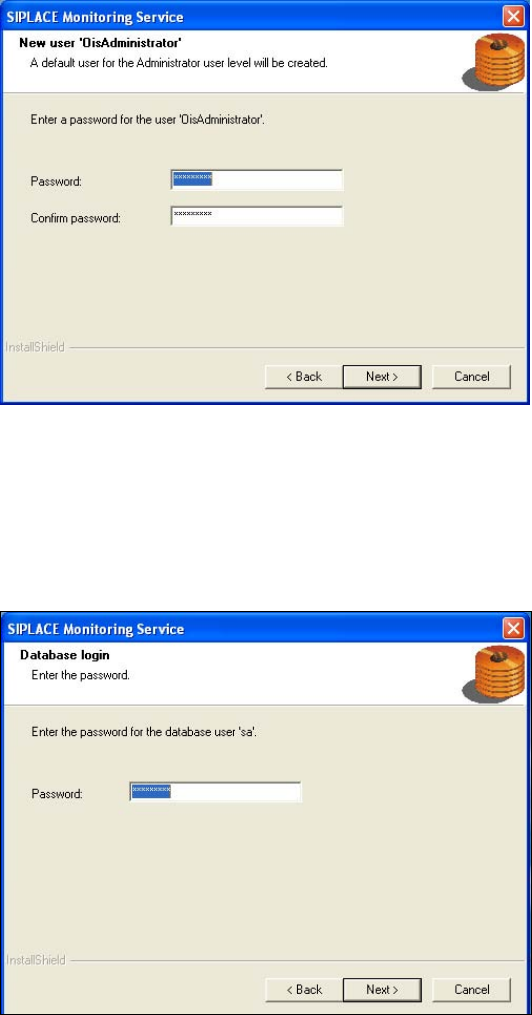
Figure 3-12: Defining a password for OISAdministrator
► Enter the password for the OisAdministrator.
The default password is "Siplace.1".
► Enter the password again to confirm.
► Continue by clicking the Next> button.
Figure 3-13: Entering password for database login
The installation routine must log in to the SQL Server as system administrator (sa) in order to set
up or update the database schema.
► Enter the system administrator password.
► Continue by clicking the Next> button.
15
OIS 9.3 / Installation Manual Ausgabe 07/2011 Edition
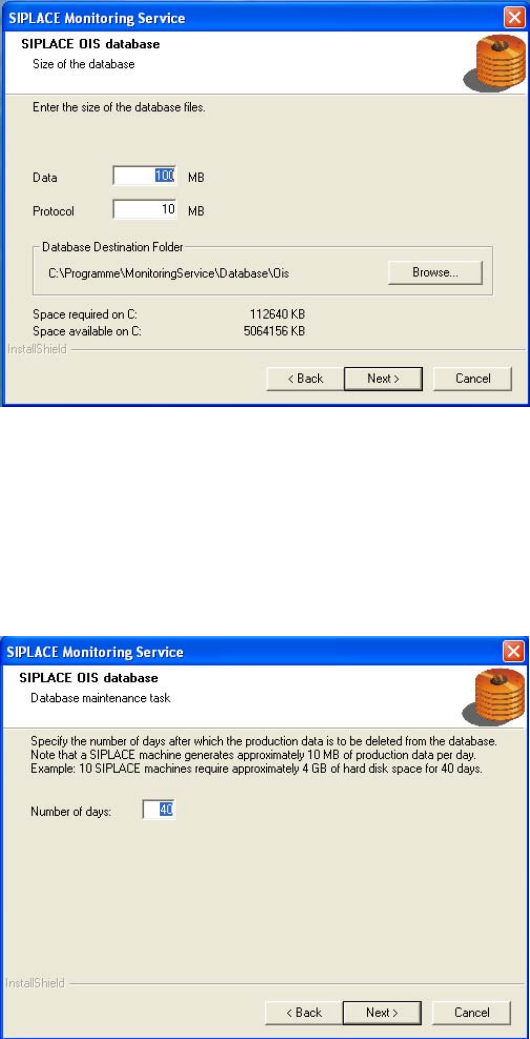
If you don't yet have a database, you'll see the following dialog:
Figure 3-14: Entering size of database
► Click Browse... if you want to choose another installation directory for the database.
► Enter the starting file size for the database files.
The default values are generally acceptable, and the files are allowed to grow as your database
expands.
► Continue by clicking the Next> button.
Figure 3-15: Entering number of days for storing production data
The production data is only saved in the database for a certain period.
► Specify the time for which the production data is to be retained in the database.
Values between 40 and 400 days are permitted.
16