00196864-01_IM_OIS_SIS 9.3_DE EN.pdf - 第16页
OIS 9.3 / Installation Manual Ausgabe 07/2011 Edition If you don't yet have a database, you'll see the following dialog: Figure 3-14: Entering size of database ► Click Browse... if you want to choose another in…
OIS 9.3 / Installation Manual Ausgabe 07/2011 Edition
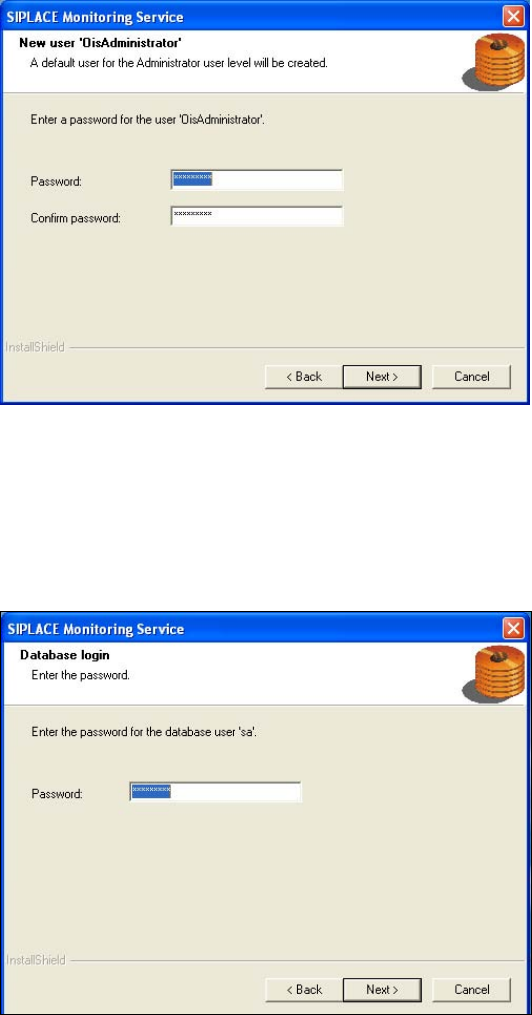
Figure 3-12: Defining a password for OISAdministrator
► Enter the password for the OisAdministrator.
The default password is "Siplace.1".
► Enter the password again to confirm.
► Continue by clicking the Next> button.
Figure 3-13: Entering password for database login
The installation routine must log in to the SQL Server as system administrator (sa) in order to set
up or update the database schema.
► Enter the system administrator password.
► Continue by clicking the Next> button.
15
OIS 9.3 / Installation Manual Ausgabe 07/2011 Edition
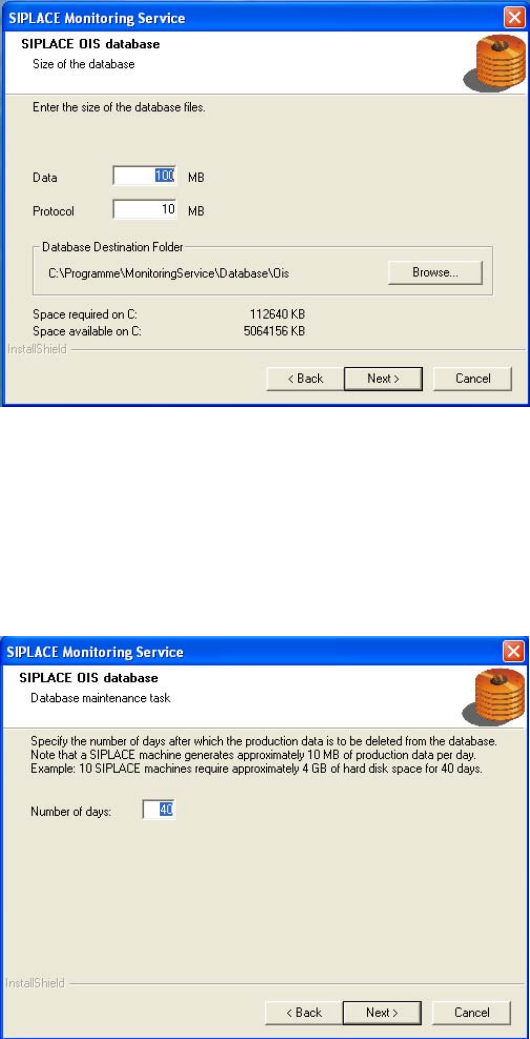
If you don't yet have a database, you'll see the following dialog:
Figure 3-14: Entering size of database
► Click Browse... if you want to choose another installation directory for the database.
► Enter the starting file size for the database files.
The default values are generally acceptable, and the files are allowed to grow as your database
expands.
► Continue by clicking the Next> button.
Figure 3-15: Entering number of days for storing production data
The production data is only saved in the database for a certain period.
► Specify the time for which the production data is to be retained in the database.
Values between 40 and 400 days are permitted.
16
OIS 9.3 / Installation Manual Ausgabe 07/2011 Edition
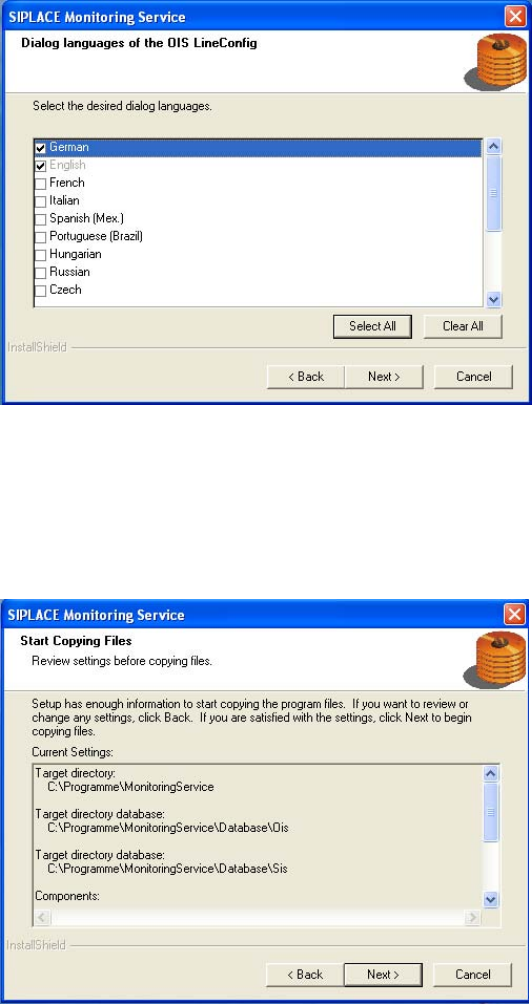
Figure 3-16: Selecting dialog languages for OIS LineConfig
► Select the desired languages.
The languages are only relevant for the OIS LineConfig dialog. German and English are
always installed.
► Continue by clicking the Next> button.
Figure 3-17: Reviewing settings
This shows a summary of the settings and entries you have made so far.
► Check the settings.
► If you wish to change your entries, click <Back to return to the appropriate dialog.
► Click Next> to start the actual installation process.
The software is then installed.
► Continue with section 3.2.3 on page 18.
17