00195424-01.pdf - 第34页
3 In stal lati on de s SIPL ACE E xplore r Inst all atio ns- u nd Ko nfigu rat ions anle itun g SI P L AC E E xplo rer 3. 1 E rst inst allat ion v on S IPL ACE Exp lorer 2.2 A usga be 05/2 007 DE 34 → Um die A u s w ahl …
Installations- und Konfigurationsanleitung SIPLACE Explorer 3 Installation des SIPLACE Explorer
Ausgabe 05/2007 DE 3.1 Erstinstallation von SIPLACE Explorer 2.2
33
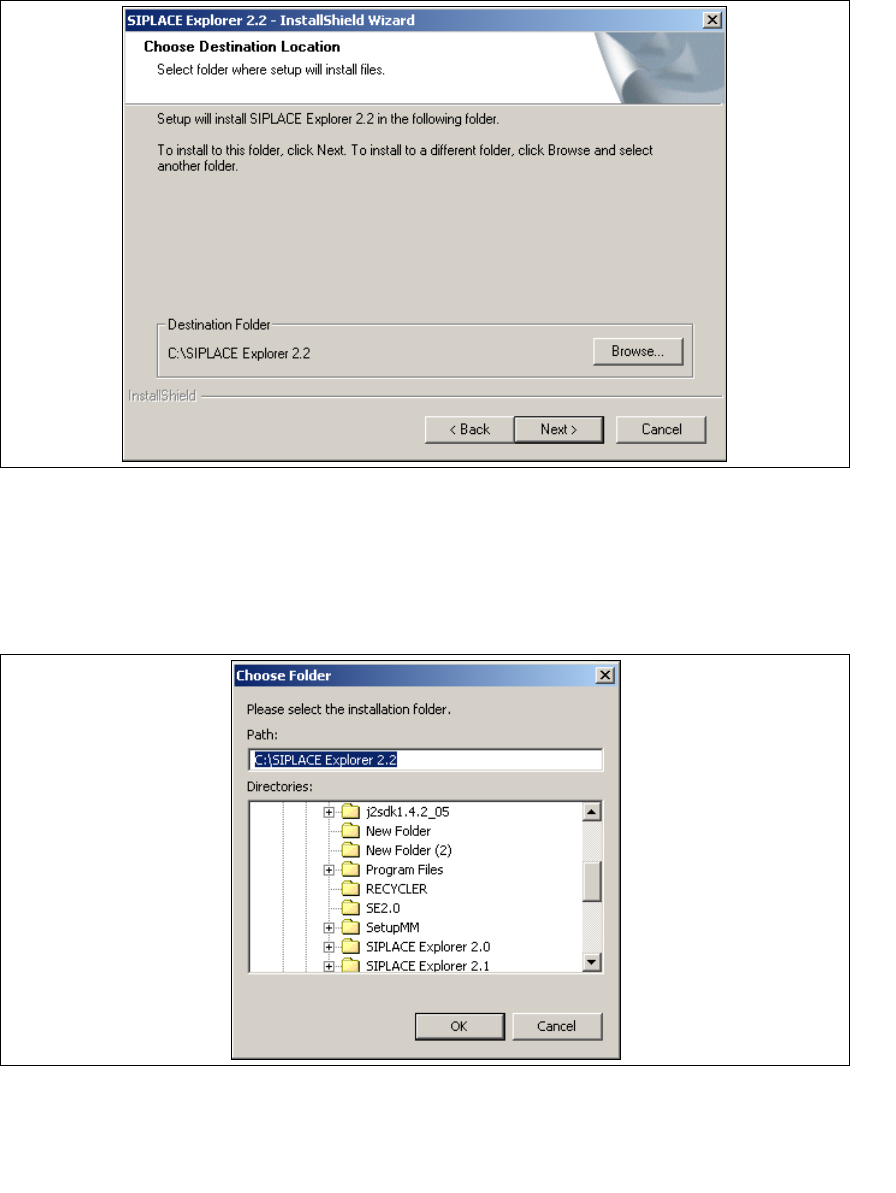
→ Geben Sie jetzt den Ordner an, in dem Sie die Anwendung installieren möchten. Der
standardmäßig eingestellte Ordner ist C:\SIPLACE Explorer2.2.
3
Abb. 3 - 7 SIPLACE Explorer setup - Zielordner wählen
→ Sie können die Standardeinstellung durch Betätigung der Schaltfläche Browse (Durchsuchen)
verändern.
→ Das Dialogfenster Choose Folder (Ordner auswählen) erscheint, um den gewünschten
Ordner zu wählen.
3
Abb. 3 - 8 SIPLACE Explorer Setup - Dialogfenster 'choose folder' (’Ordner auswählen’)
→ Geben Sie den gewünschten Ordner an und klicken Sie OK, um Ihre Auswahl zu bestätigen.
Im Dialogfenster Choose Destination Location (Zielinstallationsordner auswählen) wird der
ausgewählte Ordner angezeigt.
3 Installation des SIPLACE Explorer Installations- und Konfigurationsanleitung SIPLACE Explorer
3.1 Erstinstallation von SIPLACE Explorer 2.2 Ausgabe 05/2007 DE
34
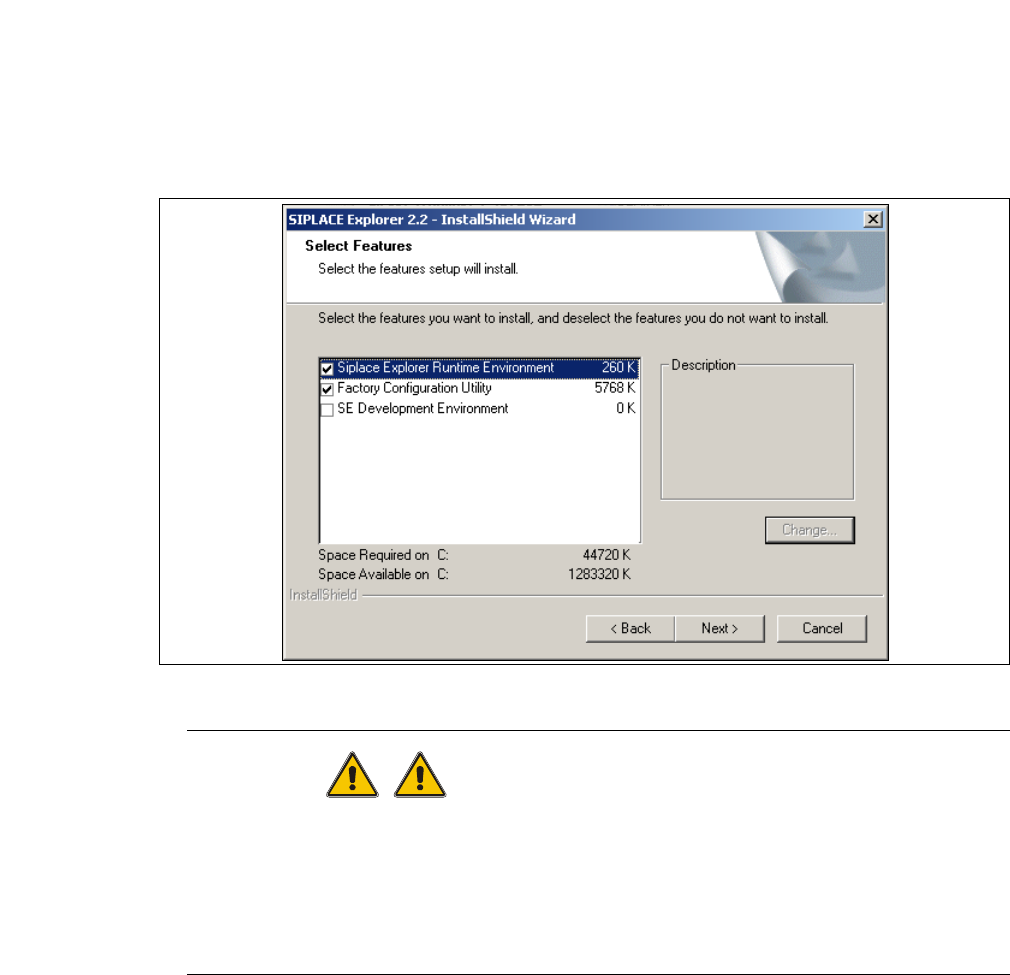
→ Um die Auswahl des Zielordners zu bestätigen, klicken Sie im Dialogfenster Choose
Destination Location (Zielinstallationsordner auswählen) die Schaltfläche Next (Weiter) an.
→ Das Dialogfenster Select Features (Installationsoptionen auswählen) öffnet sich. Wählen Sie
aus den folgenden drei Komponenten aus: SIPLACE Explorer Runtime Environment,
Factor Configuration Utility (Werks-Konfigurations-Utility) und SIPLACE Explorer
Development Environment.
3
Abb. 3 - 9 SIPLACE Explorer Setup - Dialogfenster 'Select Features' (Installationsoptionen auswählen)
WARNUNG
Installieren Sie "SIPLACE Explorer V.2.2 Runtime Environment" und "SIPLACE Explorer
V.2.2 Development Environment" nicht auf dem gleichen Computer. Beide Optionen können
nicht gleichzeitig parallel laufen. Um nacheinander mit den Optionen zu arbeiten, müssen die
Schritte zum Starten und Beenden der jeweiligen Option genau bekannt und eingehalten
werden. 3
→ Haben Sie die entsprechenden Installationsoptionen ausgewählt, klicken Sie die Schaltfläche
Next (Weiter) an.

Installations- und Konfigurationsanleitung SIPLACE Explorer 3 Installation des SIPLACE Explorer
Ausgabe 05/2007 DE 3.1 Erstinstallation von SIPLACE Explorer 2.2
35
→ Das Dialogfenster Ready to Install the Program wird geöffnet.
3
Abb. 3 - 10 SIPLACE Explorer Setup - Dialogfenster 'Ready to Install' (Bereit für die Installation)
→ Betätigen Sie die Sie die Schaltfläche Install, die eigentliche Installation von SIPLACE
Explorer V2.2 beginnt.
3
Abb. 3 - 11 SIPLACE Explorer Setup - Dialogfenster 'Setup Status' (Status der Installation)