TM1611_Stick Parts Support of Setup Verification.pdf - 第10页
SMT Software Engineering Group IM Operations Y AMAHA MOTOR CO., L TD. MD OC-SOFT50044 10/23 2. T he Plan Navigator s hows t he position in whic h the feeder is to be set. So, set the feeder into the specif ied…
SMT Software Engineering Group
IM Operations YAMAHA MOTOR CO., LTD.
MDOC-SOFT50044
9/23
2.3.2. Setting Other Multi Stick Parts
Step1.Set the parts in a feeder.
1. Click [Monitor] – [Production], check the contents displayed in the Operating Navigation,
and prepare the required parts.
2. Set the parts in a feeder.
Step2. Set the first parts in place.
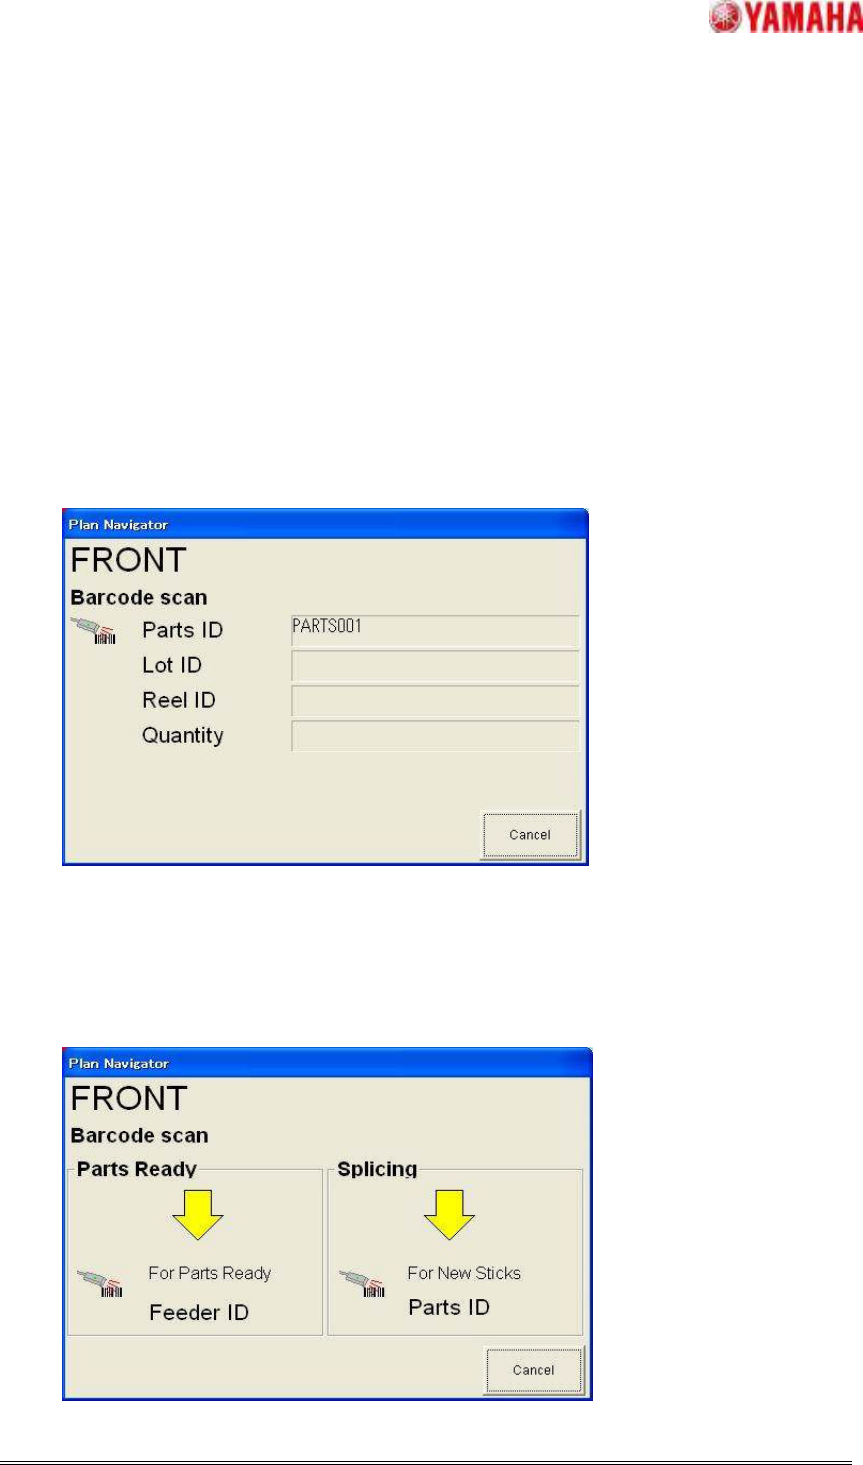
1 Use a barcode reader to read the barcode on the stick set in the feeder.
When the first barcode is read, the [Plan Navigator] dialog box will appear. So, read the
parts ID, lot ID and reel ID barcodes.
【Note】The parts ID, lot ID and reel ID can be read in any order.
Step3. Set the feeder in place.
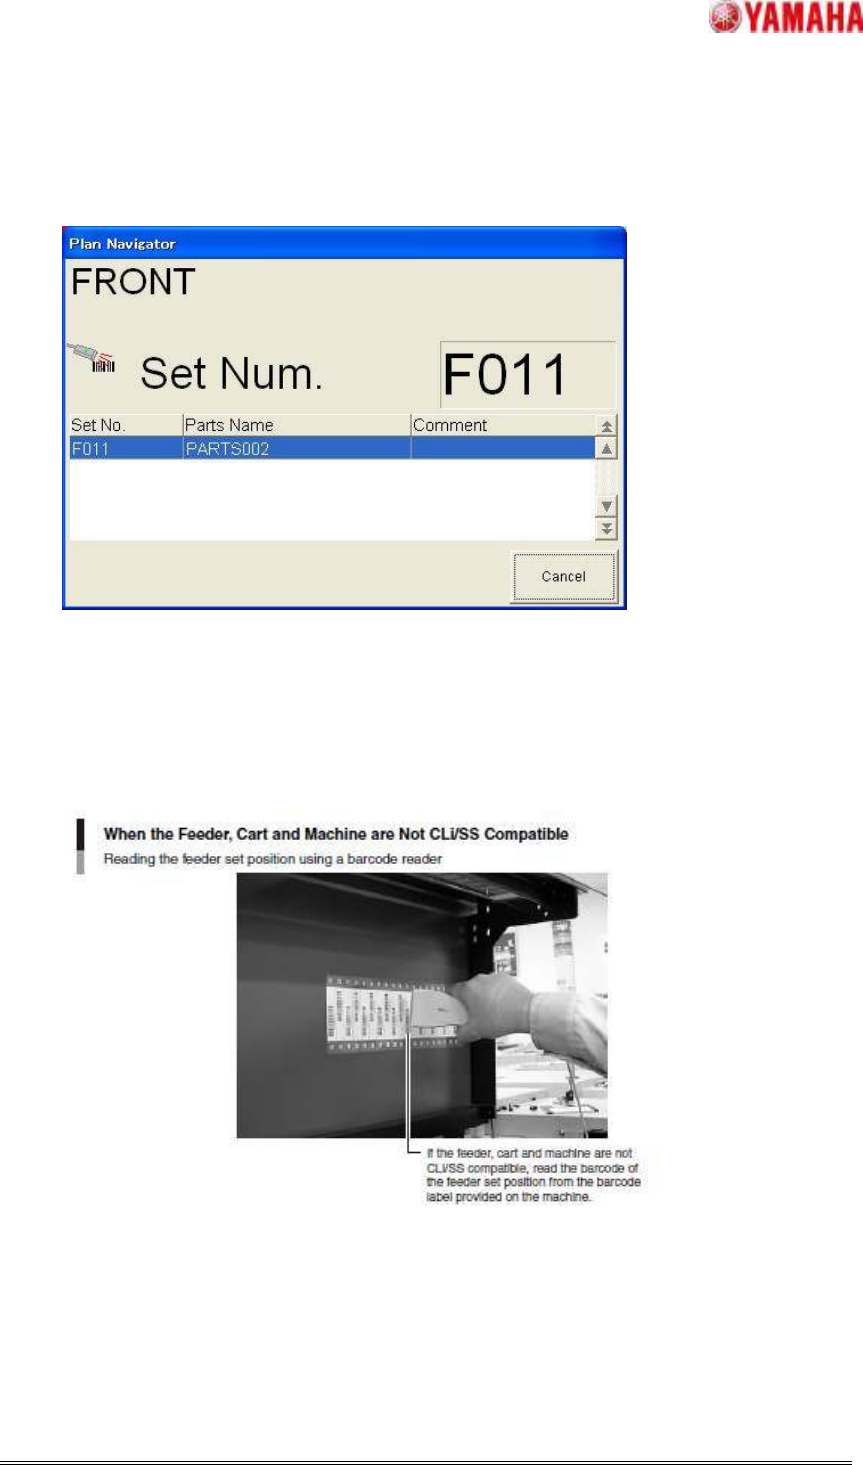
1. The contents of the Plan Navigator will change as shown below.
Use a barcode reader to read the feeder ID shown on the new feeder.
SMT Software Engineering Group
IM Operations YAMAHA MOTOR CO., LTD.
MDOC-SOFT50044
10/23
2. The Plan Navigator shows the position in which the feeder is to be set.
So, set the feeder into the specified position on the machine.
If the feeder, cart and machine are CLi compatible or if they are SS compatible, the feeder
set position will be recognized automatically.
If they are not CLi/SS compatible, read the barcode of the position where the new feeder
is set from the feeder set position barcode label provided on the machine.
SMT Software Engineering Group
IM Operations YAMAHA MOTOR CO., LTD.
MDOC-SOFT50044
11/23
2.4. Replacing/Refilling Parts on the Machine(
((
(VGOS V3.x)
))
)
2.4.1. Refilling Stick Parts
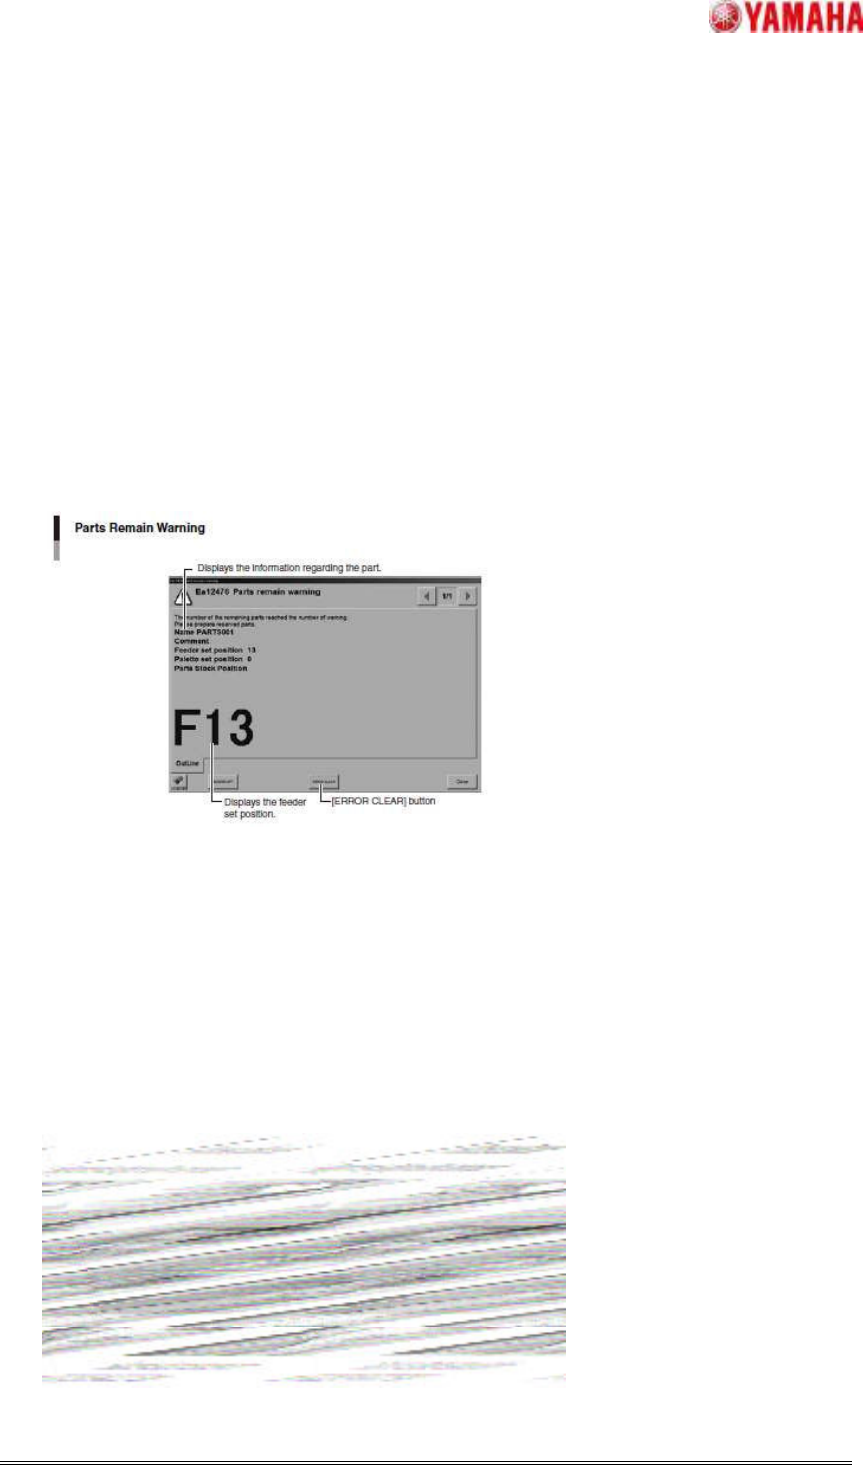
Step1. A warning appears when the number of remaining parts drops below the preset
number.
1. The following [Parts remain warning] dialog box appears and the yellow warning lamp
flashes.
Click the [ERROR CLEAR] button to close the dialog box.
2. The information shown in the [Production] tab page (Monitor window) appears.
In the [Detail] field, the part that caused the warning is displayed in yellow and the part
that has run out is displayed in red.
Prepare the parts to be added.
Step2. Register parts information.
1. Use a barcode reader to read the "SPLICING" barcode given on the "PROCESS
BARCODE" label affixed to the machine.