00193688-04.pdf - 第72页
4 Co nfi gura tion Ins tall ati on and Con figu rat ion Guid e SI PLA CE Exp lo rer 4.1 Stan da rd Moni tor ing Appl ic atio n ( SMA ) Ed iti on 12 /2 00 5 EN 72 → All li nes av ailable f or i mport from O IS will be sho…
Installation and Configuration Guide SIPLACE Explorer 4 Configuration
Edition 12/2005 EN 4.1 Standard Monitoring Application (SMA)
71
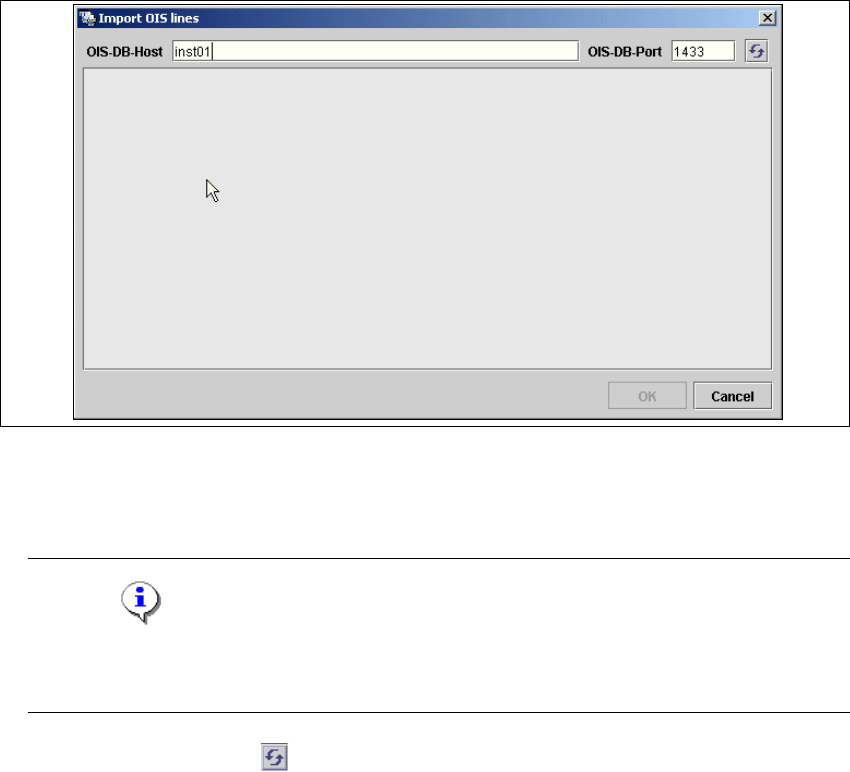
→ The Import OIS Lines dialog box will open.
4
Fig. 4 - 2 Step 1: import OIS lines
→ Enter the OIS DB host name in the OIS-DB-Host field and the OIS DB port in the OIS-DB-Port
field.
NOTE
If you have installed MSDE 2000, you must now enter the MSDE port number shown during
the installation procedure. 4
→ Click on the Refresh icon .
4 Configuration Installation and Configuration Guide SIPLACE Explorer
4.1 Standard Monitoring Application (SMA) Edition 12/2005 EN
72
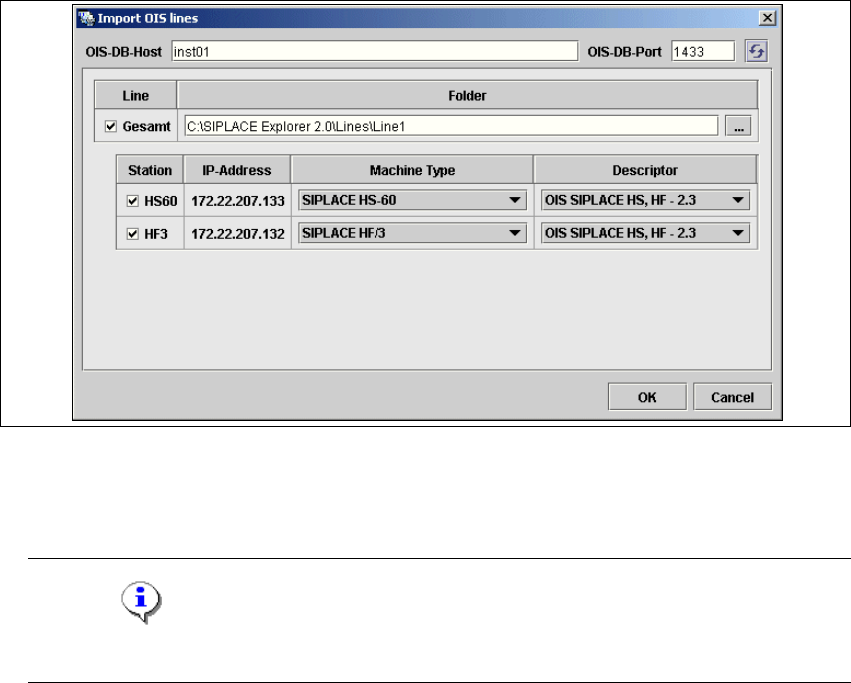
→ All lines available for import from OIS will be shown.
4
Fig. 4 - 3 Step 1: import OIS lines
→ Now select the relevant station machine type for each line, at Machine Type. The
corresponding OIS descriptor will then be automatically displayed in the
Descriptor field.
NOTE
It is assumed that the machine types are known for each line. 4
→ Once you have entered all settings, confirm your choice with OK.
Installation and Configuration Guide SIPLACE Explorer 4 Configuration
Edition 12/2005 EN 4.1 Standard Monitoring Application (SMA)
73
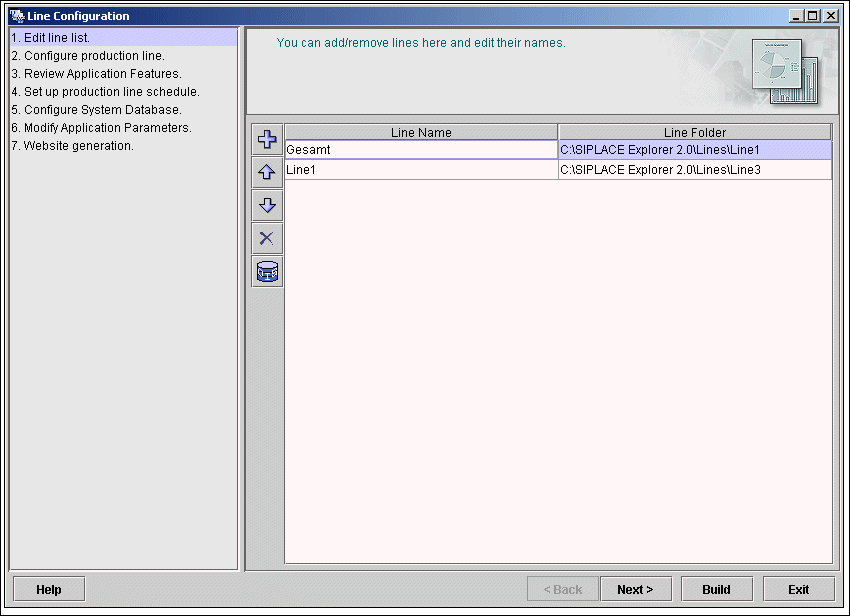
→ The added lines will be shown in the Line Configuration - Edit Line List dialog box.
4
Fig. 4 - 4 Step 1: line list
→ Specify the line name and the path at which the configured monitoring application is to be
stored for this line. A *.gms file with the configuration settings for this line application will then
be saved at the specified path.
→ Click on Next to continue with the next step.