AX501最新3.6x版英文操作手册.pdf.pdf - 第19页
4022 593 5189 4 Operatin g Man ual 09.01 AX-301/501, AX-3/5 19 2 2.5.2 Placing and r emoving an FCM-II feeder tr olley NOTE: A feeder trolley can only be placed and removed with the main switch of the machine tu rned on.…

4022 593 51894 Operating Manual
09.01 AX-301/501, AX-3/5 18
2
2.5 Feeder trolley handling
2.5.1 Placing and removing an A-series feeder trolley
NOTE: A feeder trolley can only be placed and removed with the
main switch of the machine turned on. Remove the trolley
lift cover before placing a feeder trolley, see 2.5.3.
Clean the feeder trolley position with a vacuum cleaner.
• Take the handle (1) and roll the feeder trolley to the machine.
• Position the feeder trolley in the required trolley slot (2). If
positioned correctly the yellow LED (3) is on.
• Push the button (4) until the feeder trolley is fully lifted. When
locked, the green LED (3) is on.
• If a tape cutter is mounted on the trolley, the tape cutter will
cut once after the trolley is fully lifted. When ready to function,
the green LED (5) is on
■ Remove the feeder trolley by pushing the button (6).
Figure 18 Placing the A-series feeder trolley
4
2
6
1
5
3
4022 593 51894 Operating Manual
09.01 AX-301/501, AX-3/5 19
2
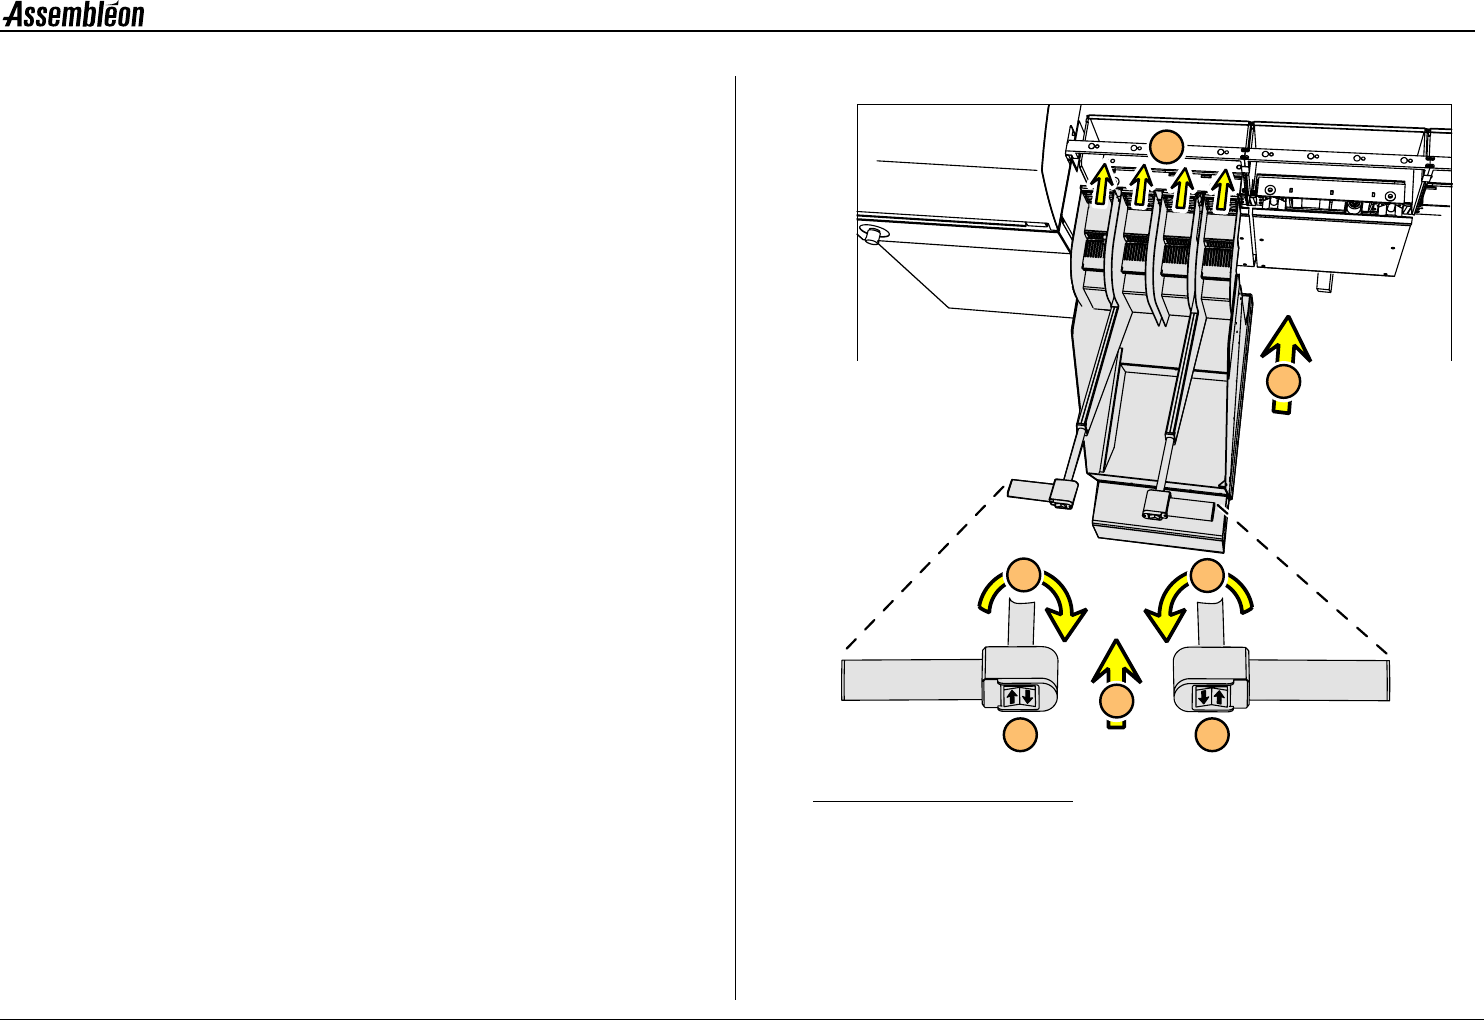
2.5.2 Placing and removing an FCM-II feeder trolley
NOTE: A feeder trolley can only be placed and removed with the
main switch of the machine turned on. Remove the trolley
lift cover before placing a feeder trolley, see 2.5.3.
Clean the feeder trolley position with a vacuum cleaner.
1 Roll the trolley to the machine.
2 Position the trolley in the required trolley slot.
3 Push both buttons until the trolley is fully lifted.
The control lights on the feeders will go on.
4 Fold up both handles.
5 Push the handles in.
■ Remove the feeder trolley in reverse order.
Figure 19 Placing a trolley
3
3
5
4
4
1
2
4022 593 51894 Operating Manual
09.01 AX-301/501, AX-3/5 20
2
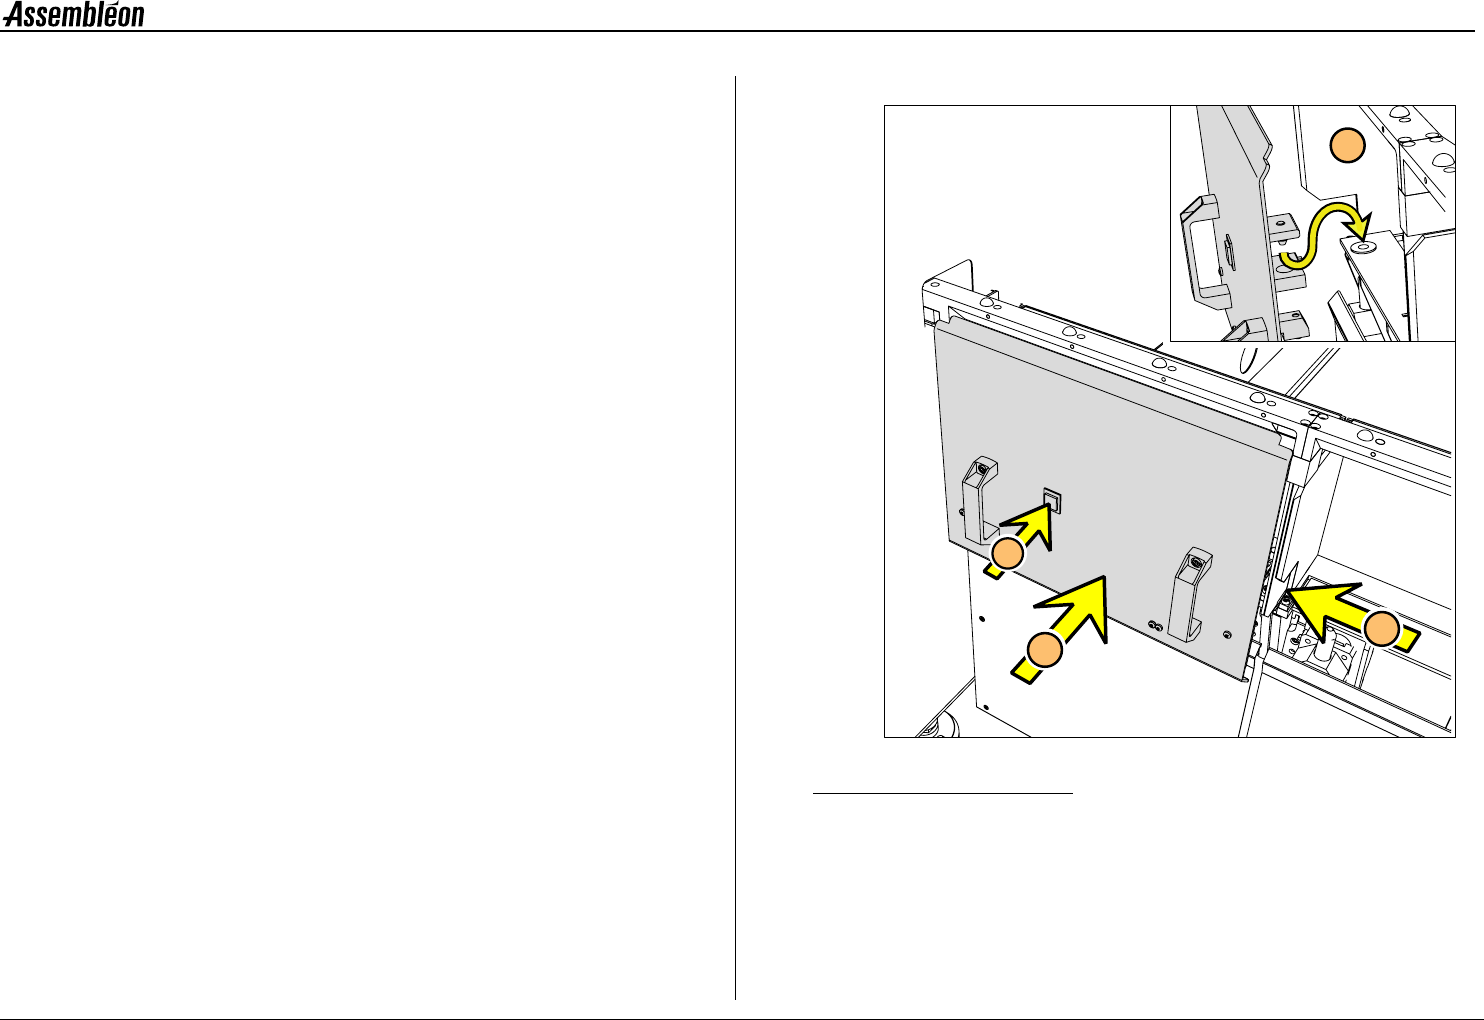
2.5.3 Placing and removing a trolley lift cover
NOTE: Trolley lift covers must be placed on trolley slots where no
feeder trolleys are present.
1 Install the trolley lift cover(s).
2 Push the button.
■ Remove the trolley lift cover in reverse order.
Figure 20 Placing a trolley lift cover
1
2
A
A