AX501最新3.6x版英文操作手册.pdf.pdf - 第35页
4022 593 51894 Operatin g Man ual 09.01 AX-301/501, AX-3/5 35 8 8.5 Install the support plates Figure 42 Install the board support plates NOTE: Use, when necessary, the stepstool to prevent an unsafe work load. 1 Moun t …
4022 593 51894 Operating Manual
09.01 AX-301/501, AX-3/5 34
8
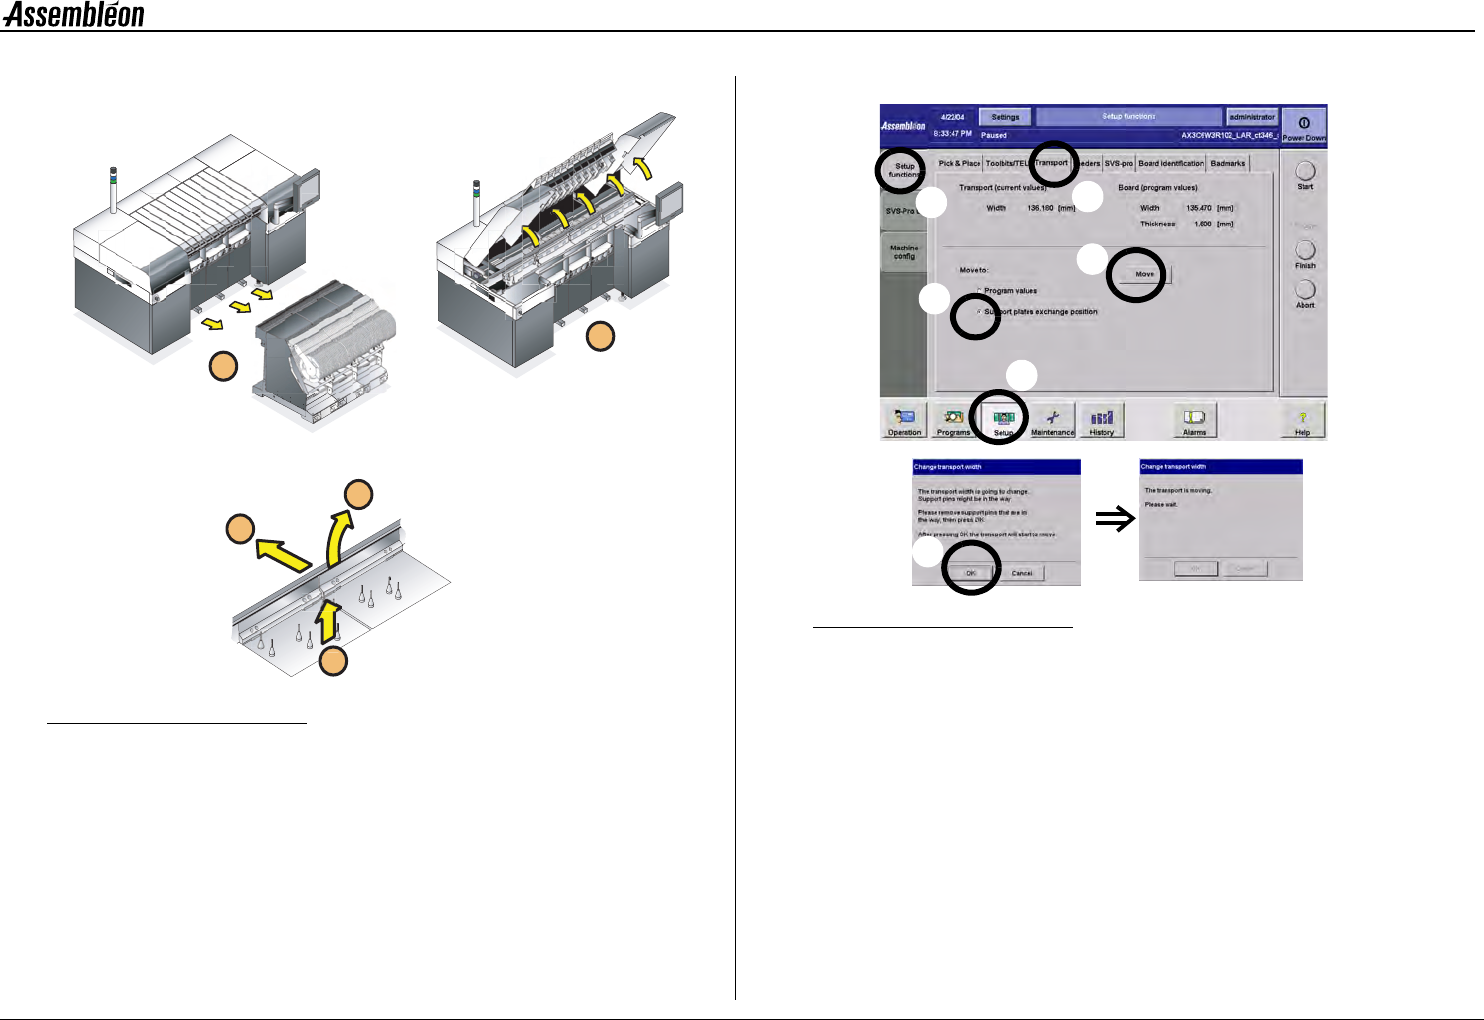
8.4 Remove the support plates
Figure 40 Remove the board support plates
NOTE: Use, when necessary, the stepstool to prevent an unsafe
work load.
1 Move rear transport rail to its most rear position.
Figure 41 Moving the rear transport rail to its most rear position
•
Select ’setup’ (a), ’setup functions’ (b), ’transport tab’ (c),
’support plates exchanges position’ (d), followed by ’move’(e).
• Check if the transport is free to move and confirm (f).
• Wait until the transport rail has finished its movement.
2 Remove all trolleys.
3 Open all robots, run-in and run-out covers.
4 Take away the rear support strips.
5 Take out the support plates.
6 Clean the transport area, trolley slots and dump bins with a
vacuum cleaner.
2
1
5
4
3
f
a
e
d
b
c
4022 593 51894 Operating Manual
09.01 AX-301/501, AX-3/5 35
8
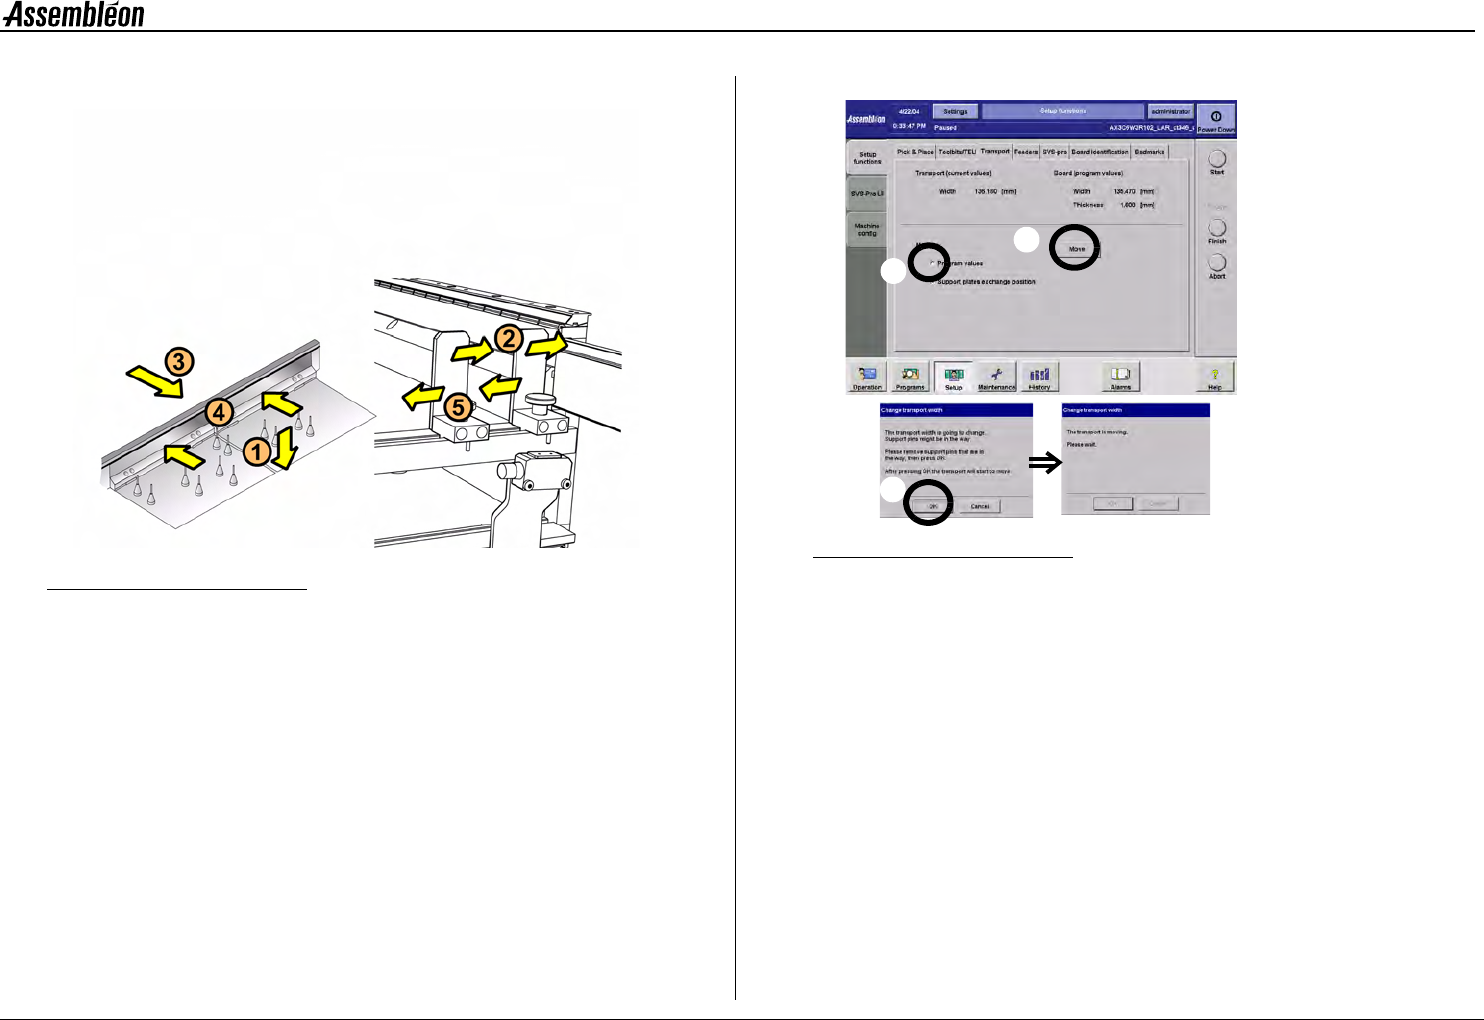
8.5 Install the support plates
Figure 42 Install the board support plates
NOTE: Use, when necessary, the stepstool to prevent an unsafe
work load.
1 Mount the prepared support plates on the transport beam in the
right order.
NOTE: Avoid shifting of the pins on the support plates
2 Loosen the stoppers and slide them against the front transport rail.
3 Move the rear transport rail to the ’board width’ position.
Figure 43 Board width settings
•
Select ’program values’ (a), and select ’move’ (b).
• Check if the transport is free to move and confirm (c).
• Wait until the rear transport rail has finished its movement.
4 Always re-place the board support strips and push them against
the rear transport rail.
5 Push a ’new’ board into the run-in to check the transport width
and position the stoppers equally along the board.
6 Check the position of the low speed sensor.
c
b
a

4022 593 51894 Operating Manual
09.01 AX-301/501, AX-3/5 36
8
8.6 Toolbit check
Check if the toolbits, needed for production, are available in the toolbit
exchange unit.
1 Place the missing toolbit(s).
NOTE: Use, when necessary, the stepstool to prevent an unsafe
work load.
Figure 44 Placing a toolbit in the toolbit exchange unit
2 Close the run-in and run-out covers and lower the robots.
3 Place the feeder trolleys.
Figure 45 Placing the feeder trolleys