YS24X_Mainte_E.pdf - 第60页
2-2 2 Daily maintenance items Storing the keyboard In the case of machines equipped with a sA TSII for YS24X, loosen the screws that hold the keyboard on the rear side and store it vertically to ensure the space for main…
2-1
2
Daily maintenance items
Before beginning work
In most cases, maintenance should be performed with the machine’s power turned Off.
However, some maintenance works are performed under emergency stop conditions with the machine’s power
turned on. In such cases, ensure adequate safety and press the emergency stop button before beginning the
maintenance.
The power is turned on during maintenance when moving axes or machine operation check are required
depending on the maintenance work while the machine’s power turned on.
In the case also, ensure adequate safety before beginning the maintenance.
Make sure that the following conditions are met when operating the machine.
n
Operating conditions
1. Supply air pressure is kept at correct pressure.
2. All safety covers are closed.
3. When the machine is equipped with exchange carriages, all exchange carriages are clamped.
4. Nozzles and other units are attached in place.
n
NOTE
The description "Cancel the emergency stop." is in the procedures of this manual. It means "releasing the emergency
stop and pressing the [Ready] button to turn the servo on".
2-2
2
Daily maintenance items
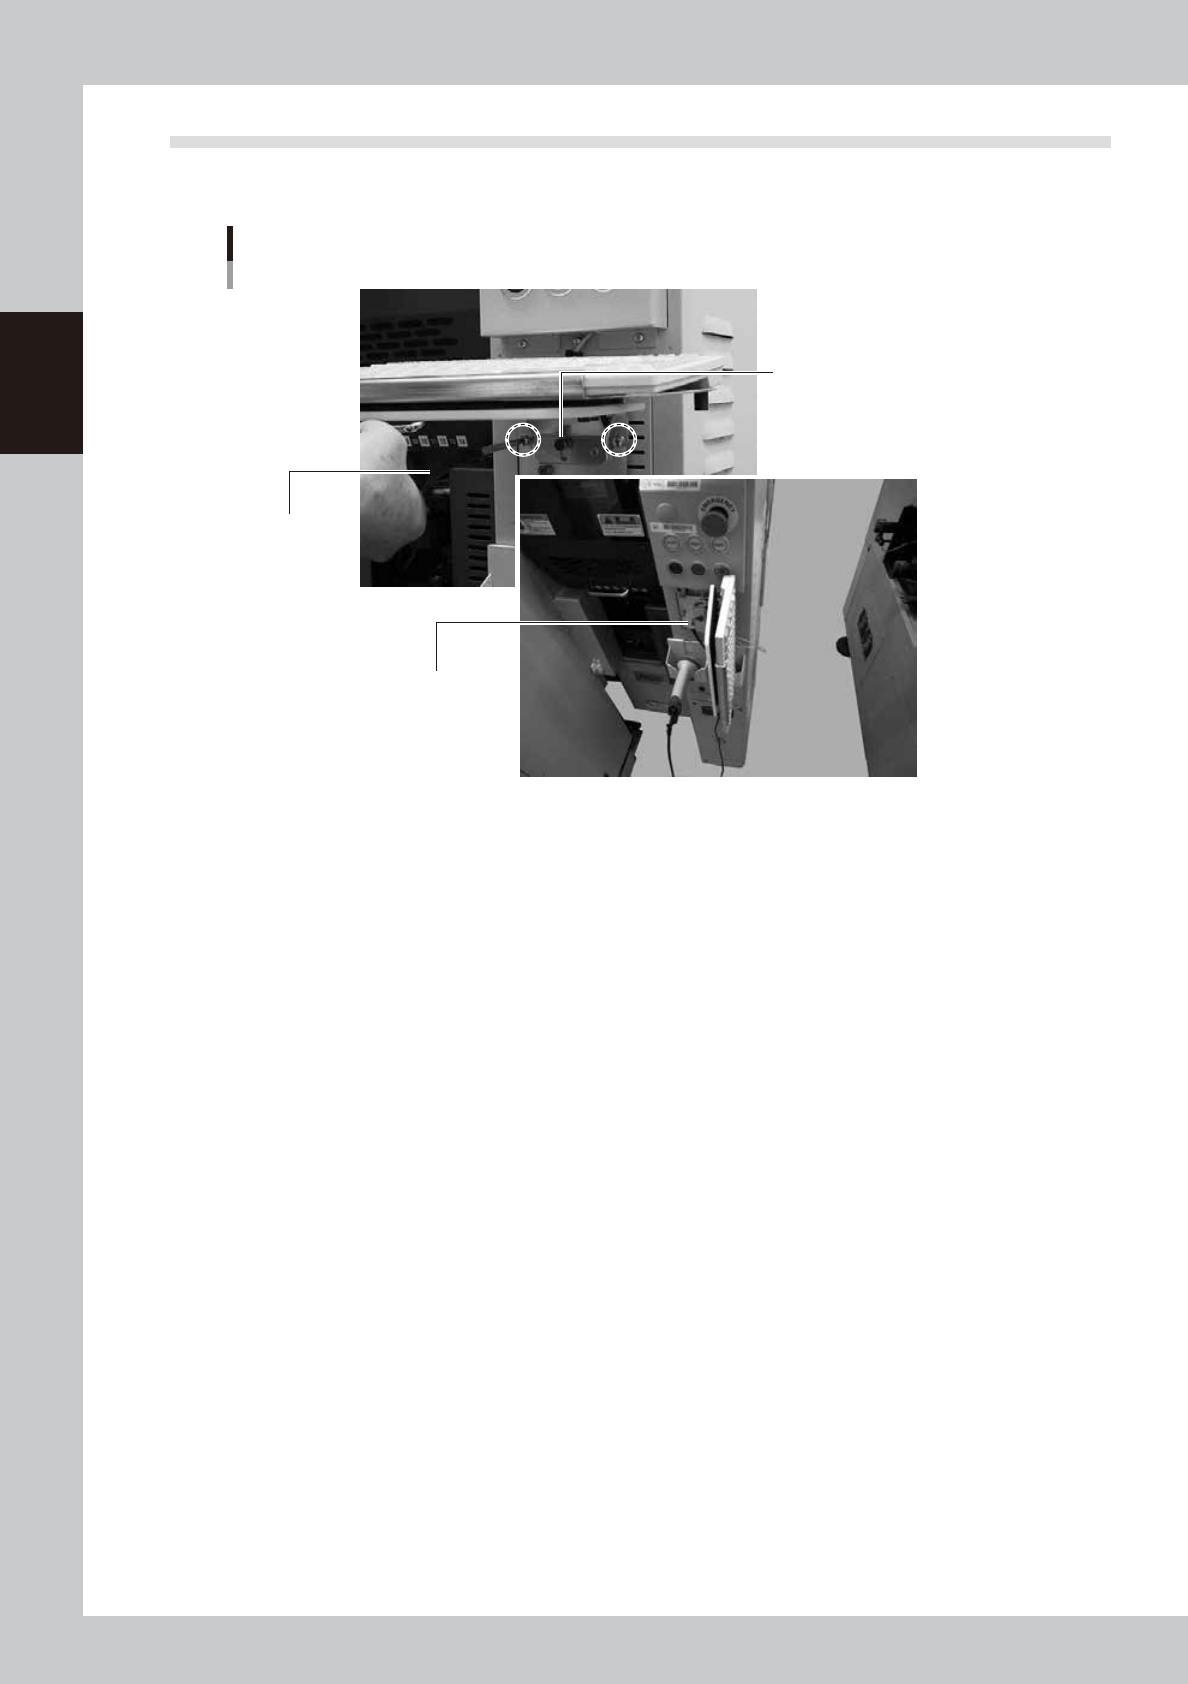
Storing the keyboard
In the case of machines equipped with a sATSII for YS24X, loosen the screws that hold the keyboard on the
rear side and store it vertically to ensure the space for maintenance.
Storing the keyboard
Phillips screwdriver
Push the keyboard to
place it on the hook.
Pull the keyboard and turn it to t
he
right around the pin.
53207-L4-00
2-3
2
Daily maintenance items
1. Checking the nozzle
Solder sticking to the nozzle tip or a clogged nozzle hole can cause component pickup errors and
recognition errors. Poor nozzle spring action can also cause pickup and mounting errors. To prevent such
problems periodically inspect and clean each nozzle.
1.1 Check with software
n
How to check for a dirty nozzle (with the [Tip Dirt Check] button)
The term "dirty nozzle" as used here indicates shiny material such as solder adhering to the nozzle tip. This
shiny portion might be mistaken for a component and cause recognition errors. [Tip Dirt Check] is a tool that
judges the nozzle contamination status by recognizing the nozzle tip in the non-component status with the
camera.
n
NOTE
[Tip Dirt Check] is a function that recognizes the reflection of the light around the nozzle center. So, applicable nozzles
are those with a small tip, such as 301A, 302A, and 311A.
n
NOTE
Since the nozzle specification may vary depending on
the machine, some machines may require additional
settings. For details about settings, contact YAMAHA
sales representative.
1
(Without nozzle station) Replace
the nozzle.
1. Press the [Required Nozzles] button on
the [Setup] screen to check the nozzle to
be used for the production.
e
2. Press the emergency stop button to open
the machine safety cover.
3. Attach the nozzle to be used for the
production to the head.
4. Close the machine safety cover and
cancel the emergency stop.
n
NOTE
If the machine is equipped with the nozzle station, skip
Step 1.
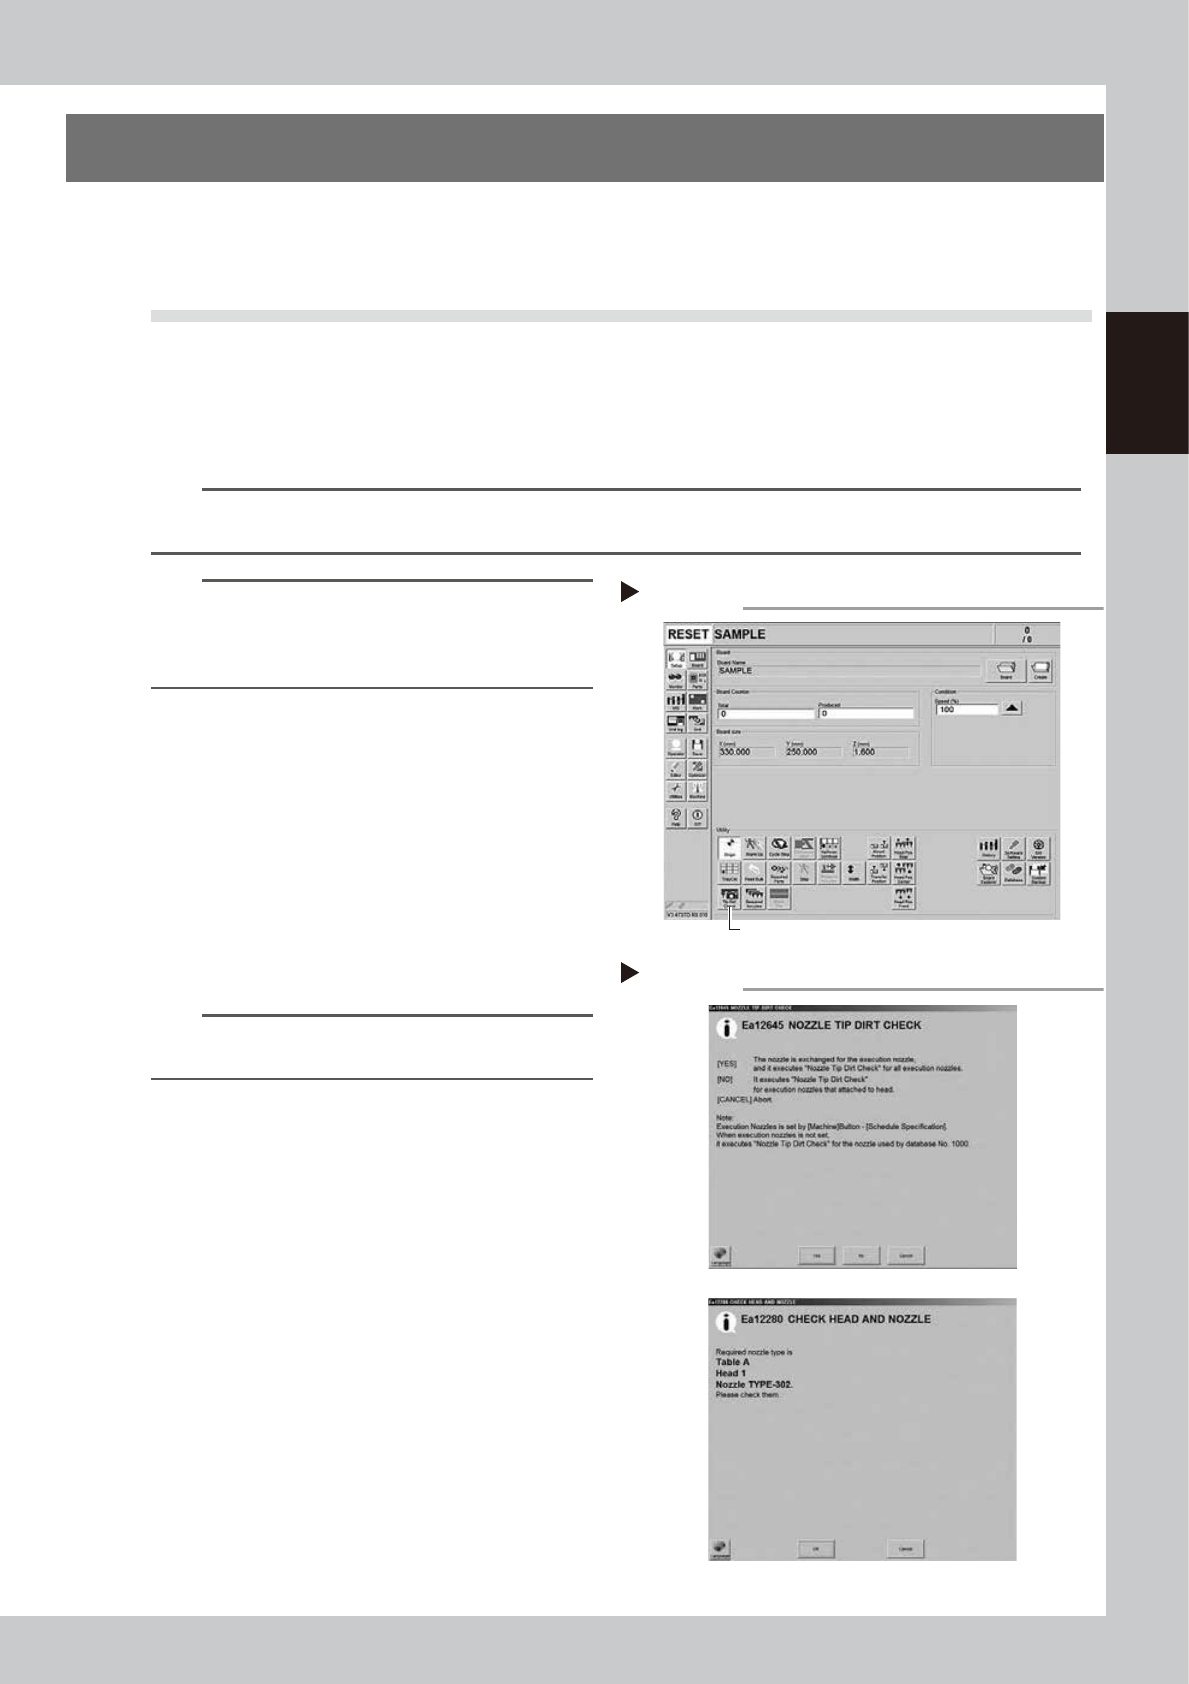
2
Press the [Tip Dirt Check] button.
Press the [Tip Dirt Check] button on the
[Setup] screen.
54200-L4-20
3
Select the item to be executed.
After checking the displayed message,
select the desired button.
n
When [Yes] was selected
Performs auto nozzle change and checks all relevant
nozzles.
n
When [No] was selected
Checks relevant nozzles of all nozzles currently
attached to the head.
54201-L4-10
4
Check the message.
Check the message. If the check is
determined as NG, clean the nozzle while
referring to "1.2 Nozzle cleaning" in Chapter
3.
Pressing the [Tip Dirt Check] button
Step 2
[Tip Dirt Check] button
Selecting the item to be executed
Step 3
When [No] was selected