YS24X_Mainte_E.pdf - 第93页
3-26 3 Periodic maintenance items 3.3 Inspecting and cleaning the conveyor belt Inspect the convey or belt for wear . As the belt wears a way , slippages ma y occur that prevent securely conveying the boards. It is there…

3-25
3
Periodic maintenance items
6
Set the applied grease.
1. Close the machine’s safety cover, and
cancel the emergency stop. If the
machine could be equipped with a
carriage, set the carriage.
2. Press the [Pushup] button on the stage or
lane that grease up was conducted to
lower the pushup unit.
3. Follow the Step 2 procedure to raise the
push-up unit.
4. Repeat Step 2 and 3 several times to set
the grease. After setting the grease,
leave the push-up unit in the up state.
e
7
Wipe away excess grease.
1. Press the emergency stop button, and
open the machine’s safety cover. If the
machine is equipped with a carriage,
remove the carriage.
2. Wipe the excess grease with lint-free
cloth that does not raise dust.
3-26
3
Periodic maintenance items
3.3 Inspecting and cleaning the conveyor belt
Inspect the conveyor belt for wear. As the belt wears away, slippages may occur that prevent securely
conveying the boards. It is therefore necessary to make periodic checks for wear of the conveyor belt.
Belt wear may also cause trouble such as erroneous detection of the conveyor sensor due to dust from belt
wear accumulating on the sensor surface, or dust from belt wear accumulating in the belt guide grooves may
cause the belt to stick, etc.
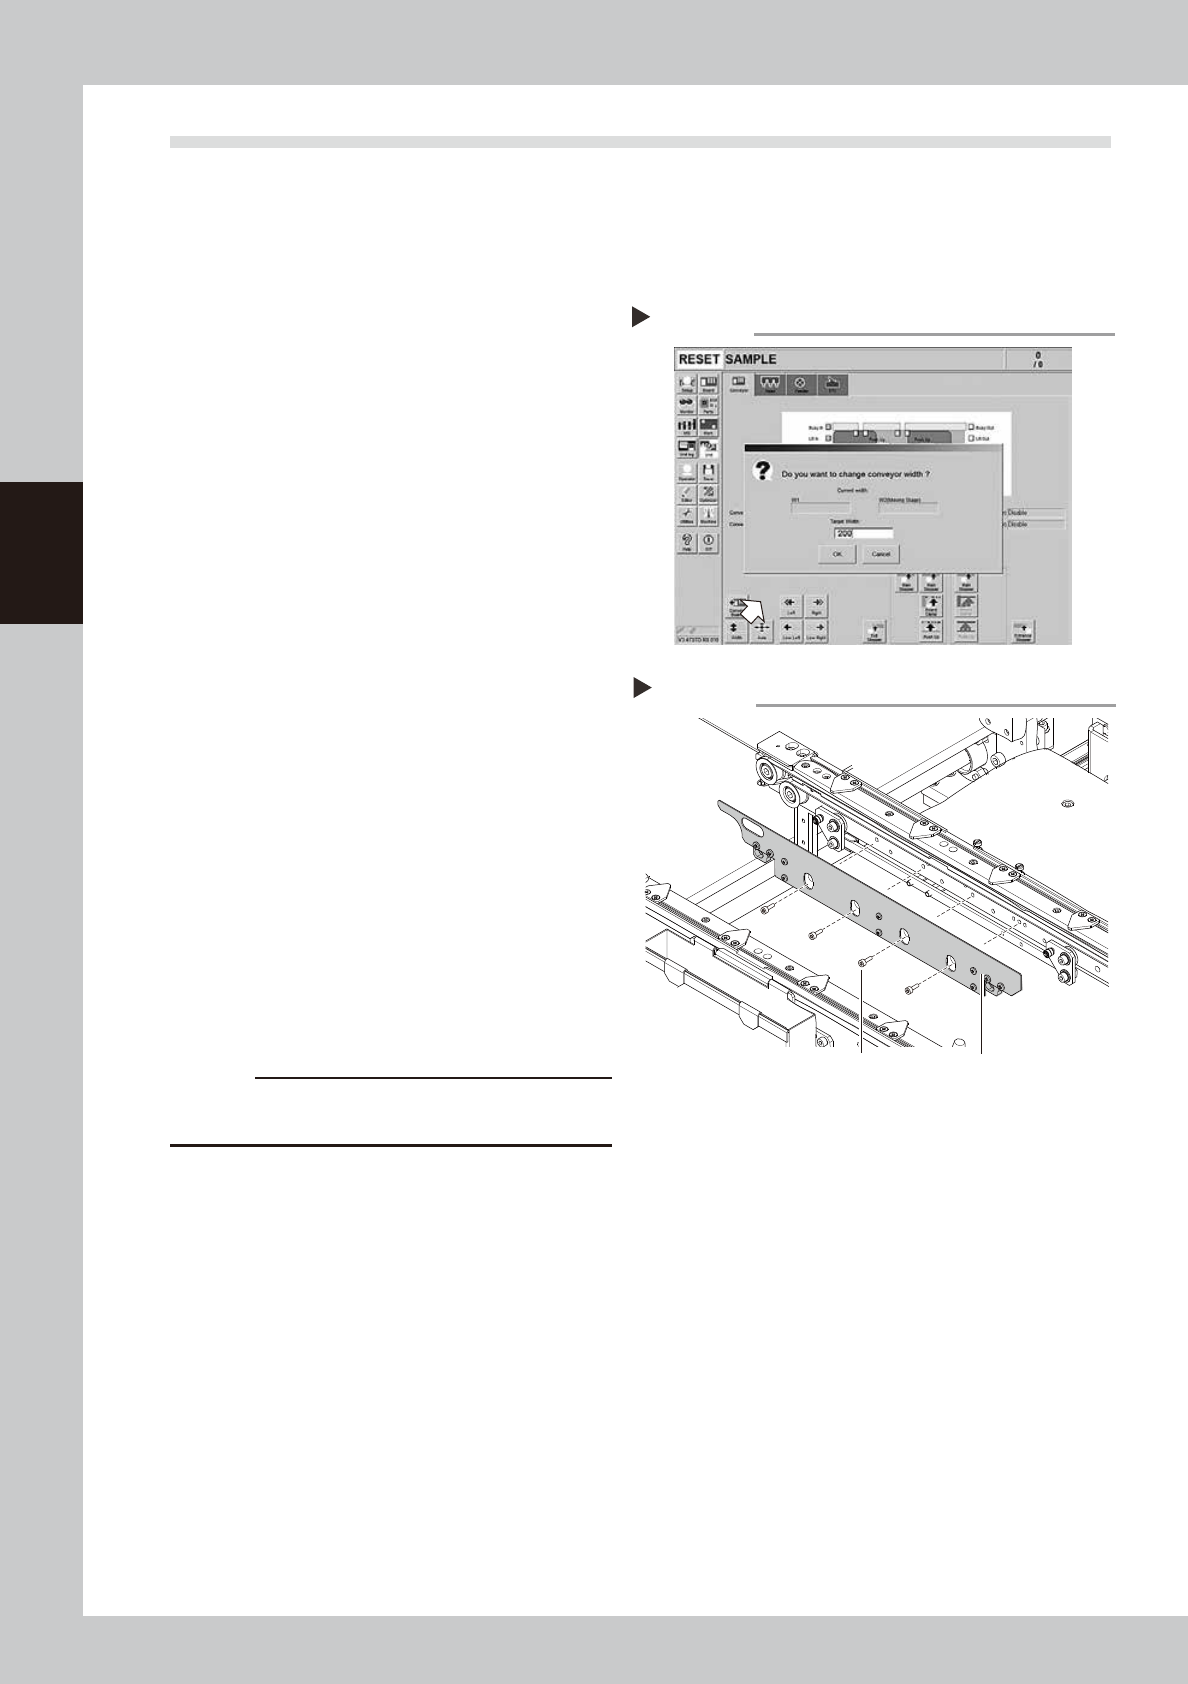
1
Change the conveyor width to a
convenient width for maintenance
work.
1. Press the [Width] button to display the
"Conveyor Width" screen.
2. Enter a width wide enough for a hex
wrench to be inserted (about 200 mm) in
the "Target Width" box and press the [OK]
button. The conveyor is changed to the
specified width.
54304-L4-10
2
Make the preparation for cleaning.
e
1. Remove all items that are affected by
magnetism, such as a watch and ID
card.
2. Press the emergency stop button and
then open the machine safety cover.
3. Lower the feeder exchange carriage by
using the clamp switch and remove the
feeder exchange carriage.
4. Place a square cloth on the push-up
plate.
3
Remove the board clamp plates.
Use a hexagon wrench (3) to remove the 4
board clamp bolts, then remove the board
clamp plate.
533D1-L4-00
c
CAUTION
Do not remove any bolts other than the 4 bolts shown in
the figure at right.
Removing the board clamp plate
Step 3
Board clamp plateBoard clamp plate securing bolts
Changing the conveyor width
Step 1
3-27
3
Periodic maintenance items
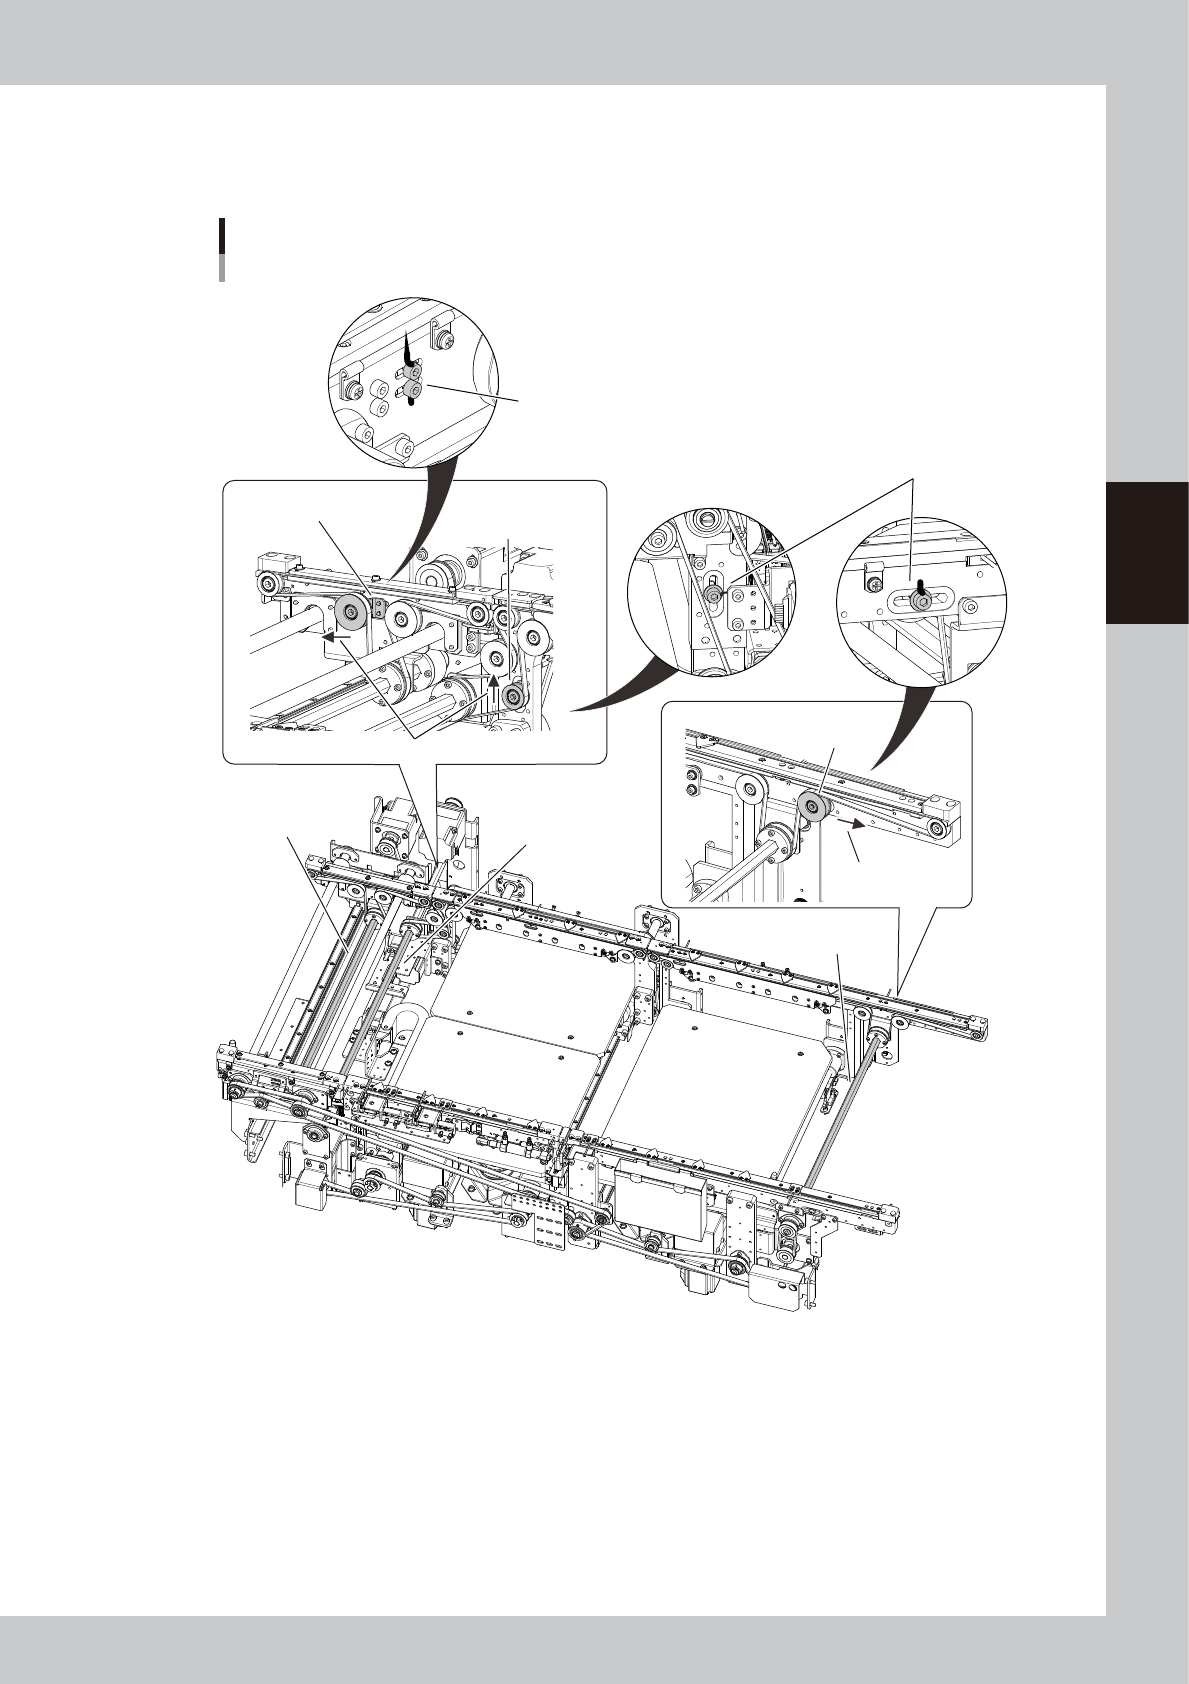
4
Mark the tensioner position with permanent marker.
Before loosening the tensioner (pulley/pulley bracket), mark the positions of the bolts fastening the
tensioner with an oil-based permanent marker.
Loosen the conveyor belt
Example of Dual-stage
■ W2-axis
(Stage 2)
■ W2-axis
(Exit conveyor)
■ W1-axis
(Stage 1)
Mark the positions of the bolts fastening the
pulley bracket with permanent marker.
Directions to move the pulleys.
W2 conveyor
Loosen this pulley.
W1 conveyor
Loosen this pulley.
Direction to move
the pulley.
Exit conveyor
Loosen the pulley bracket.
Mark the position of the bolt fastening
the pulley with permanent marker.
533D3-L4-10