DECAN_S2_Operation(ENG_Ver4.1).pdf - 第39页
DE CAN S2 O pe rat ion H an db ook 3 -20 Chap ter 3 This chapter describes the production procedure. Pr oduction Advanced Chip Shooter Pr epara tion F or Oper atio n Ⅱ > Chec k and tea ch posi tio ns Preparation F or …
DECAN S2 Operation Handbook
3-19
Chapter 3
This chapter describes the production procedure.
Production
Advanced Chip Shooter
Preparation For Operation Ⅱ > Check and teach positions
Preparation For Operation Ⅱ
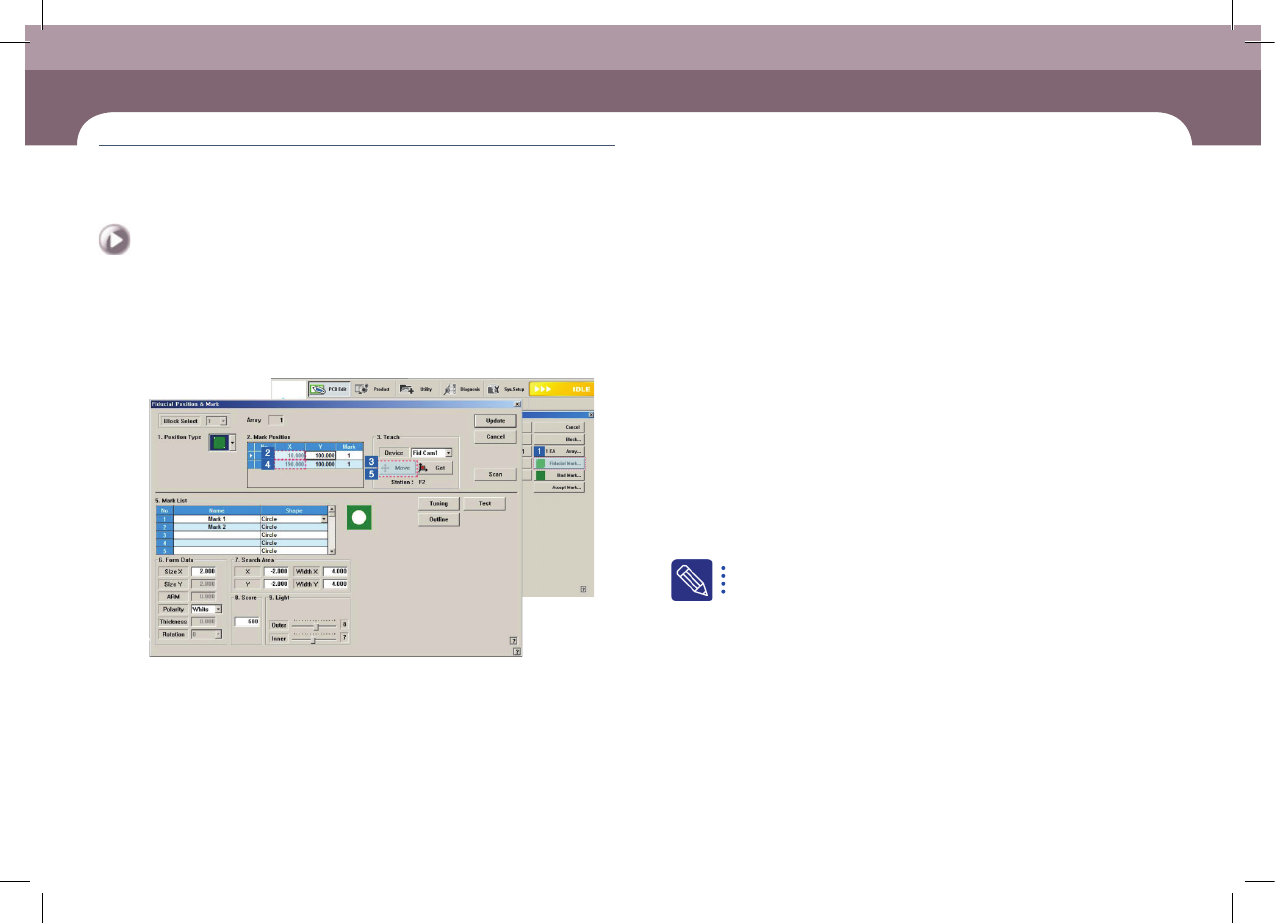
2. Check PCB fiducial mark position
Step 1.
Check the currently set PCB fiducial position
① Click the <Fiducial Mark> button
② Select the first fiducial mark in the <2. Mark Position> group
③ Click the <Move> button
④ Select the second fiducial mark in the <2. Mark Position> group
⑤ Click the <Move> button
⑥ Check the second PCB fiducial mark position
Step 2.
Teach the PCB fiducial mark position
If the current fiducial mark setup is incorrect, teach the fiducial mark again.
For further details, refer to “6.3.1. Fiducial Mark Setup Order” in the
Administrator's Guide.
DECAN S2 Operation Handbook
3-20
Chapter 3
This chapter describes the production procedure.
Production
Advanced Chip Shooter
Preparation For Operation Ⅱ > Check and teach positions
Preparation For Operation Ⅱ
Production
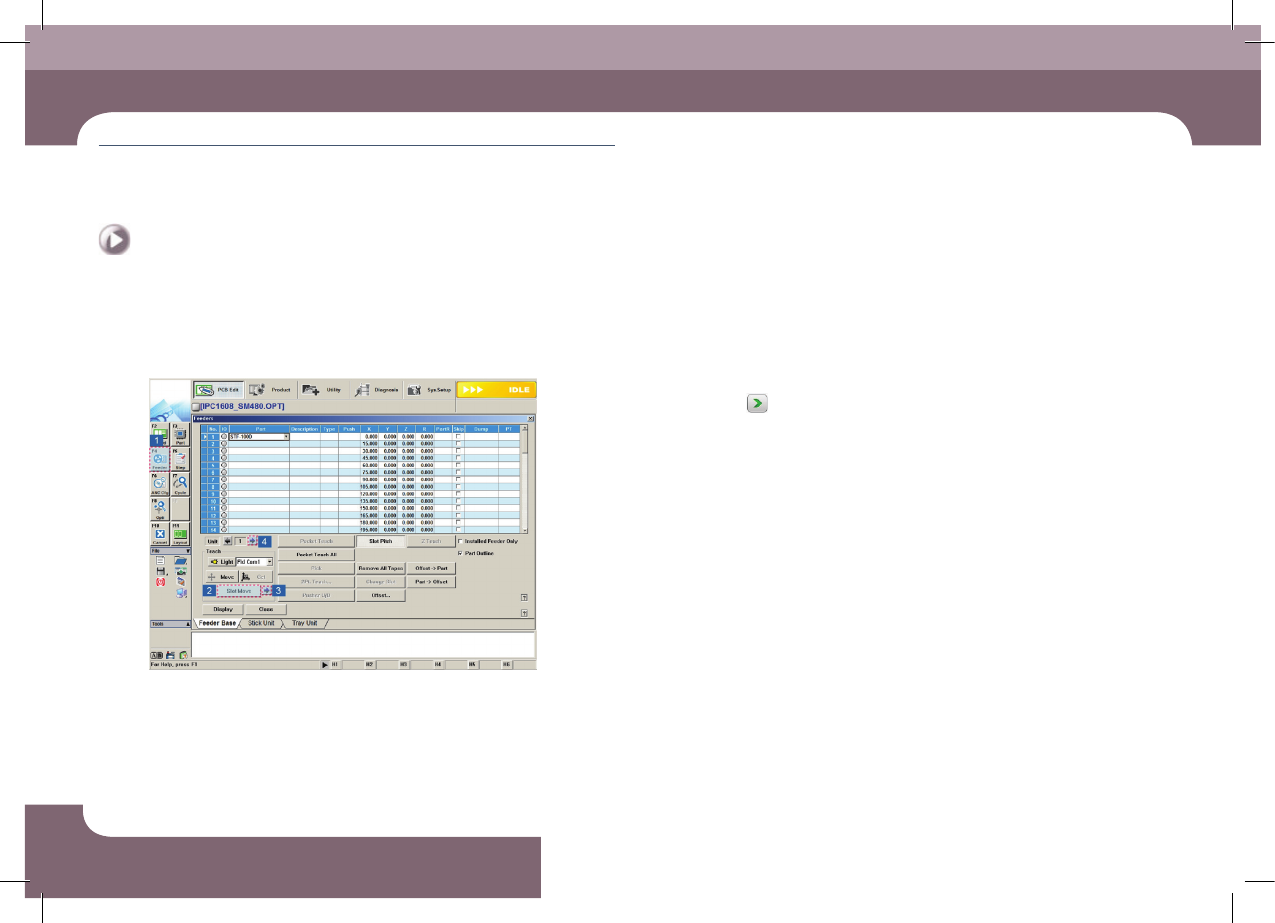
3. Check pickup point
Step 1.
Check the feeder pickup position
① Select the 'Feeder' submenu in the 'PCB Edit' menu.
② Select the 'Feeder' submenu
③ Click the
button to check the pickup point of the installed feeder.
④ Once the pickup point of the current feeder base has been checked, click the
arrow button in the <Unit> group to check the pickup points of the feeders
installed in other feeder bases in the same manner.
⑤ Check the pickup points of feeders other than the tape feeder
Step 2.
Teach the pickup point
If the current feeder's pickup point setup is incorrect, teach the pickup point again.
DECAN S2 Operation Handbook
3-21
Chapter 3
This chapter describes the production procedure.
Production
Advanced Chip Shooter
Preparation For Operation Ⅱ > Check and teach positions
Preparation For Operation Ⅱ
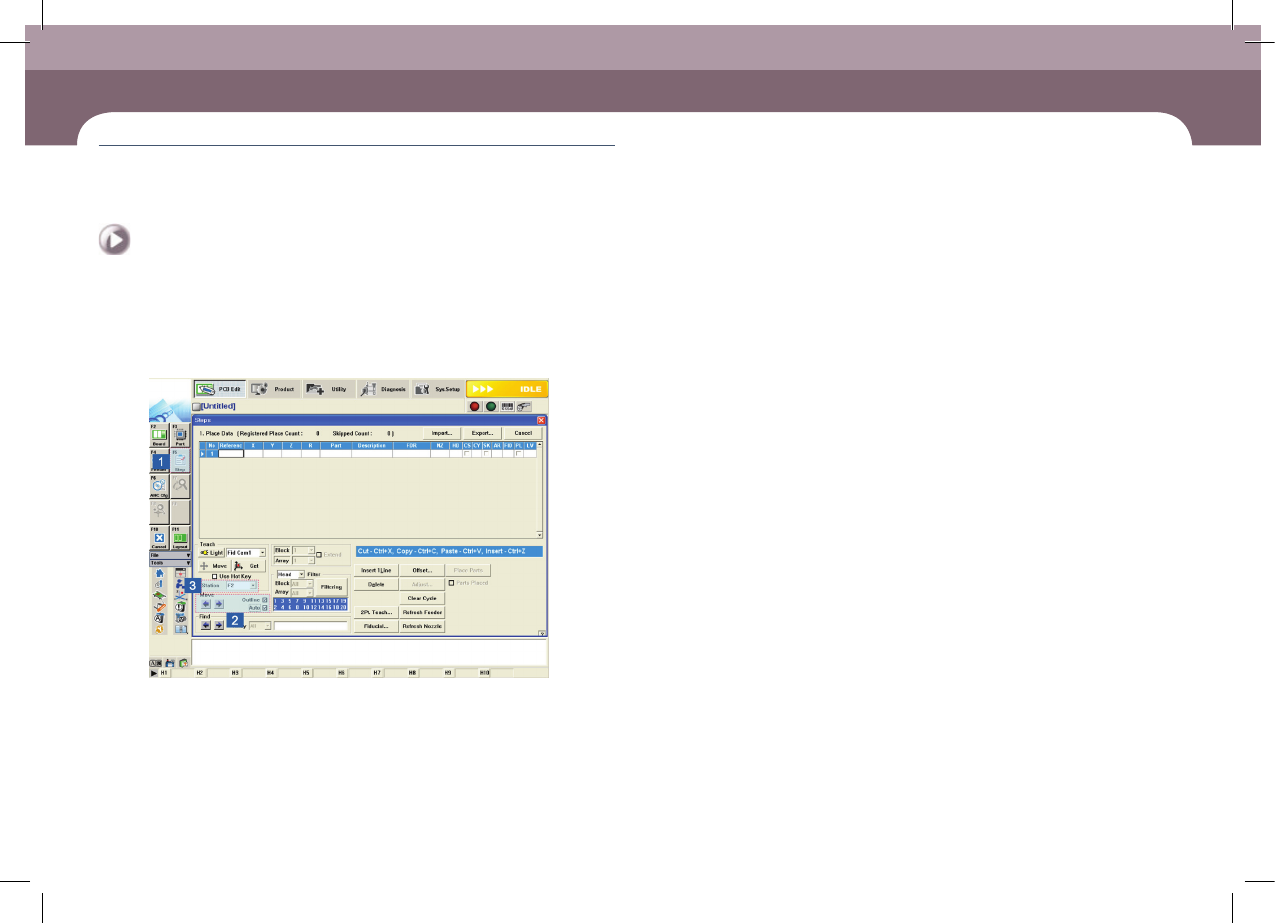
4. Check the placement point
Step 1.
Check the placement point of the PCB
① Select the 'Step' submenu in the 'PCB Edit' menu.
② Select the <Auto> check box and click the arrow button to check the placement
position.
③ Once placement points for the current work station have been checked, click
the combo box in the <Station> group to select another work station
④ Check the placement points for other work stations in the same manner
Step 2.
Teach the placement point
If the currently set placement point is incorrect, teach it again.