DECAN_S2_Operation(ENG_Ver4.1).pdf - 第88页
Ch e ck o th e r s and r e plac e e xhaus t e d part s Chap ter 6 Advanced Chip Shooter DE CAN S2 O pe rat ion H an db ook 6-1 7 This Chapter describes the items for which care must be exercised while using thetape feede…

Check others and replace exhausted parts
Chapter 6
Advanced Chip Shooter
DECAN S2 Operation Handbook
6-16
This Chapter describes the items for which care must be exercised while
using thetape feeder as well as the method to take measures when
parts are exhausted.
Replace exhausted parts > Change the part reel
Replace exhausted parts
Check others and replace exhausted parts
Step 9.
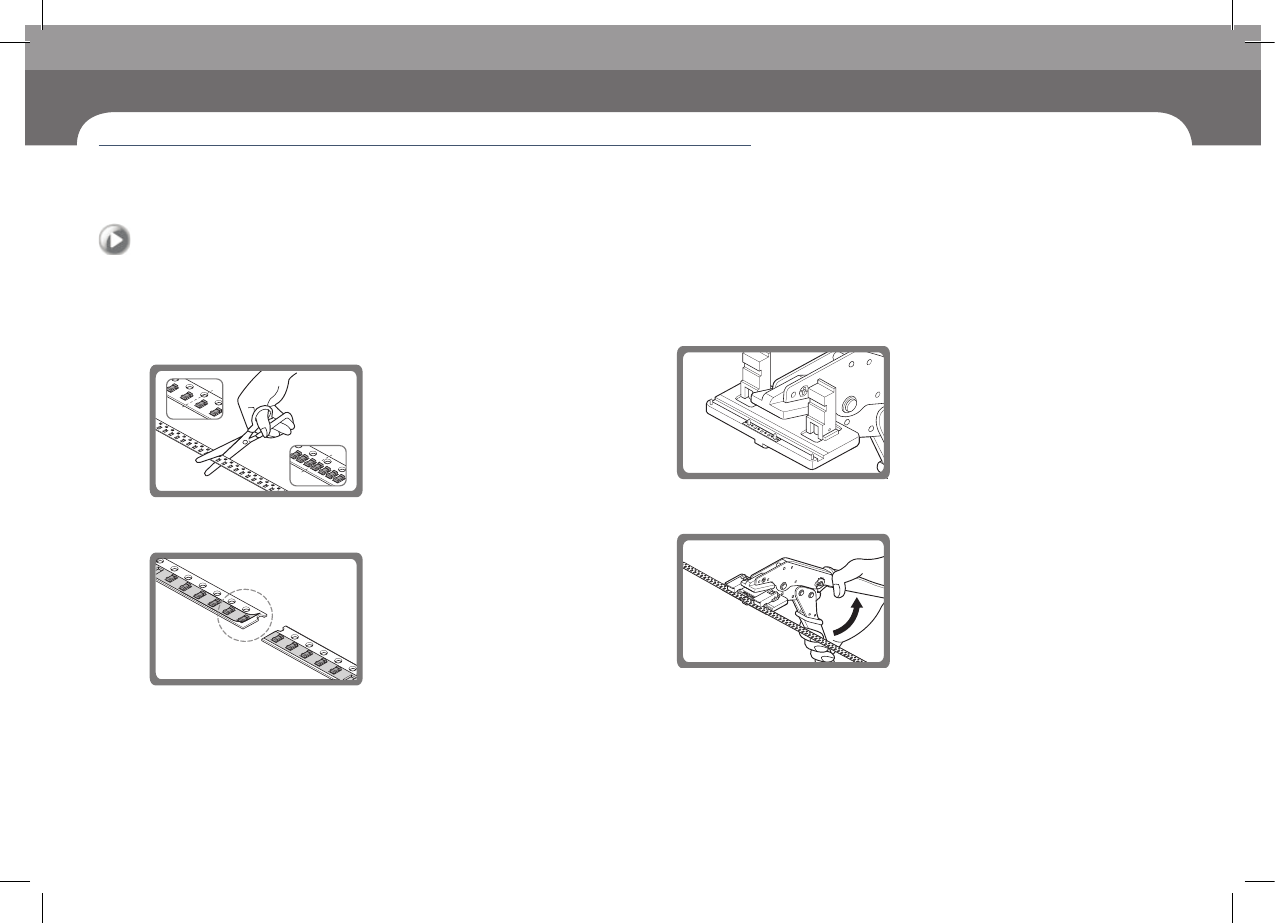
Put the used tape and vinyl in the empty box. Cut the used
tape and vinyl at appropriate intervals with scissors to avoid
the occurrence of defective feeding.
For further details regarding part reel replacement, refer to the tape
feeder's user manual.
Check others and replace exhausted parts
Chapter 6
Advanced Chip Shooter
DECAN S2 Operation Handbook
6-17
This Chapter describes the items for which care must be exercised while
using thetape feeder as well as the method to take measures when
parts are exhausted.
Replace exhausted parts > Tape Connection Method (Paper Type)
Replace exhausted parts
2. Tape Connection Method (Paper Type)
Step 1.
Cut the end part of the tape in use and the beginning part of
the new tape by using scissors.
4mm
2mm
Step 2.
Peel off the vinyl tape on the leading end of the new tape.
Step 3.
Place the I-shape tip in the tool so that the burr is on the top.
Step 4.
Connect the tapes by manipulating the handle of the tool.
Check others and replace exhausted parts
Chapter 6
Advanced Chip Shooter
DECAN S2 Operation Handbook
6-18
This Chapter describes the items for which care must be exercised while
using thetape feeder as well as the method to take measures when
parts are exhausted.
Replace exhausted parts > Tape Connection Method (Paper Type)
Replace exhausted parts
Check others and replace exhausted parts
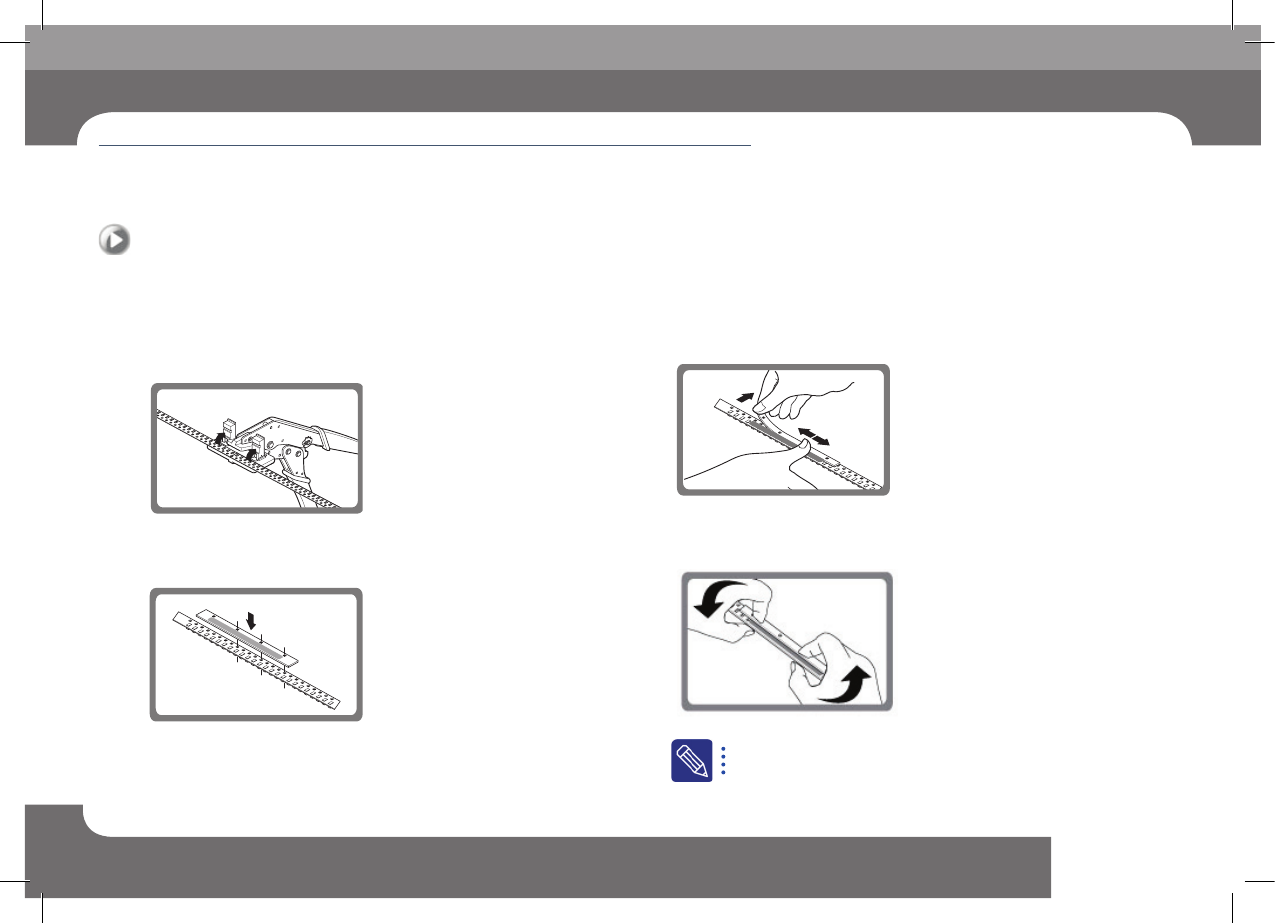
Step 5.
Move the pressing device upward. Push the handle of the tool
and release it, and then remove the connected tape from the
tool.
Step 6.
Align the vinyl connecting tape to the hole of the connected
tape and place it on the cut area.
Step 7.
Peel off the other side of the adhesive surface under the tape
and rub it so that it sticks well.
Step 8.
Hold the tape slicing section with both hands and twist it
slightly.
For more details, refer to the manual of the splicing tool set.